GardenerScott.com
  • Home
  • How-to Videos
  • GardenerScott Blog
  • Photos
  • Tips & Tricks
  • Contact Me

How to Pickle Beets

8/27/2011

2 Comments

 
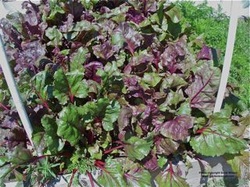
Pickling beets is easy. A little time consuming, but easy. I sowed beets for the first time this year and they grew extremely well, better than just about anything else in my garden. Trying new things in the garden and discovering a successful plant is great, but trying to figure out how to deal with a bumper crop can be a challenge.
Picture
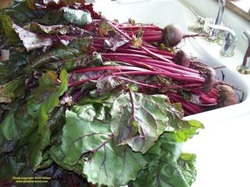
My beet crop
Picture

There aren't many options when confronted with a few dozen pounds of fresh beets. Like most root crops, beets store very well and can last for months in a cool, damp medium, but even then they have a finite shelf life. Pickling can extend that shelf life dramatically.

For eating, most sources recommend beets be harvested while still quite small. For pickling, you can get away with beets being a little larger. Three-inch beets fit canning jars very well. Fresh beets should be pickled; throw any limp or soft ones in the compost pile.
Picture


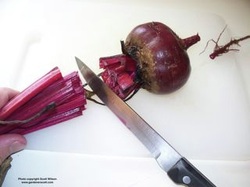
After selecting and harvesting your beets, wash and scrub them well. Cut off the greens leaving one to two inches of the stems in place. Leave the root intact or trim off just the end to minimize the red bleeding out.
Picture


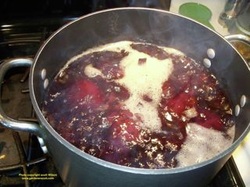
Put the beets in a large pot, cover with water, and boil for 30 to 45 minutes; less for small beets, more for larger. Beets are quite dense and boiling helps soften them for the pickling process.
Picture


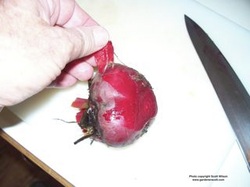
After boiling, place them in an ice bath or rinse with cold water. This makes it easy to remove the skins, which is an important step. Cut the stems and roots off and remove the skin. You can peel the skin with your fingers, rub the beet with a paper towel, or use a soft cloth. Your fingers will get red from residual juice but it washes off easily.
Picture


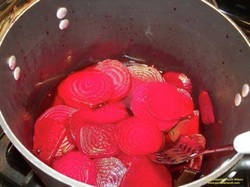
After the beets are cooked and skinned, cut them into slices about 1/4 inch thick and place them in a pot of hot pickling solution.
 

The pickling juice is a basic ratio of two parts vinegar, one part water, one part sugar, and spices of your choosing. For about six pounds of beets use four cups vinegar, two cups water, and two cups of sugar. You can add three or four tablespoons of pickling spice; or 4-8 cinnamon sticks and 10-12 whole cloves; or onion slices, cinnamon sticks, cloves, and 10-12 allspice nuts; or three to four tablespoons of caraway seeds and one or two tablespoons of whole black peppercorns. You can either place the spices directly in the liquid or wrap them in cheesecloth or a spice bag. When using a bag, the spices infuse their flavor into the solution and then you remove them. If you leave them in the liquid they'll continue releasing flavor during the pickling process which can make for more intense spiciness.

After combining the vinegar, water, sugar, and spices, bring the solution to a boil over medium heat and boil gently for 10 to 15 minutes. Discard the bag, if using one. Add the sliced beets and return the mixture to a boil.
Picture


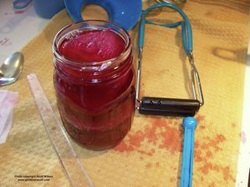
Using a slotted spoon, place the beets in prepared, hot, canning jars, leaving at least 1/2 inch of space at the top. Ladle in hot pickling juice, leaving 1/2 inch headspace. Use a plastic tool or spoon to remove air bubbles and add more liquid as necessary to maintain 1/2 inch headspace. Wipe the rim of the jar with a moist paper towel, place a lid on the jar, and secure it finger-tight with the band.
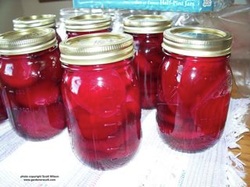
Place jars in your canner making sure they're completely covered by water. They'll be processed for a long time so I recommend at least two inches of water covering them. Bring the water to a full boil (covering the pot helps) and begin timing. Process for 30 minutes, or up to 45 minutes for people like me who live above 6,000 feet. After processing, turn off heat, let the jars rest for about five minutes, and remove them. Place them in a draft-free spot overnight and check the seal the next day.
Picture
Pickled beets will last for many months on the shelf and look beautiful in the jars. They're a great way to enjoy your harvest throughout the year and they make great gifts. Like most things from the garden, personally preserved products taste better than the mass-produced foods you buy in the store.
2 Comments
http://bestpaperservices.blogspot.com/ link
1/19/2016 07:13:52 pm

Thanks for this detail guide! I appreciate it.

Reply
best dissertation link
5/15/2016 06:22:23 am

Wow… such a great effort. There are a few blogger which are providing such articles. I appreciate you for this hard work. I have read many essay writing services but in comparison your blog is better. Thanks a lot for such detailed article!

Reply

Your comment will be posted after it is approved.


Leave a Reply.

    RSS Feed

    GardenerScott

    Join me as I discuss gardening subjects and take a look at gardens past, present, and future.

    Blog Categories

    All
    Animals
    Biochar
    Birds
    Chickens
    Compost
    Crafts
    Deer
    Environment
    Flowers
    Fruit
    Gardens
    Gifts
    Growing
    Harvest
    Herbs
    Inspiration
    Irrigation
    Lawn
    Mulch
    Pests
    Planning
    Planting
    Plant Selection
    Preserving
    Propagation
    Pruning
    Recycling
    Reviews
    Seeds
    Sites To See
    Soil
    Tomatoes
    Trees
    Vegetables
    Watering
    Weather
    Weeds

    Archives

    April 2018
    December 2015
    March 2014
    November 2013
    October 2013
    August 2013
    July 2013
    June 2013
    April 2013
    March 2013
    February 2013
    January 2013
    December 2012
    November 2012
    October 2012
    September 2012
    August 2012
    July 2012
    June 2012
    May 2012
    April 2012
    March 2012
    February 2012
    January 2012
    December 2011
    November 2011
    October 2011
    September 2011
    August 2011
    July 2011
    June 2011
    May 2011
    April 2011
    March 2011


Web Hosting by iPage