GardenerScott.com
  • Home
  • How-to Videos
  • GardenerScott Blog
  • Photos
  • Tips & Tricks
  • Contact Me

Home Garden Crop Rotation

3/2/2013

15 Comments

 
Growing the same crop in the same location year after year can deplete essential soil nutrients in that area, subject plants to harmful diseases, and adversely affect the crop's growth, health, and production. To avoid this, for thousands of years farmers have practiced two, soil-enhancing, growing methods. The first is allowing a field to lie fallow. Periodically after harvest, plants are turned into the soil and allowed to decompose for a year; essentially it is in-place composting.
 
The second method is crop rotation. Different crops are planted in different years in a single field. For home gardeners, allowing a garden to remain unplanted goes against the very essence of why we garden so practicing crop rotation to prevent a cycle of diminishing harvest is the best idea.

Crop rotation is used to keep soil from losing nutrients that a specific plant needs. A plant like corn needs a lot of nitrogen from the soil. When it is planted in the same spot repeatedly, it will ultimately deplete all available soil nitrogen, committing a slow suicide. On a commercial level, farmers add tons of nitrogen fertilizer to soil to artificially feed the plants. On a local level, home gardeners add nitrogen fertilizer to their soils when they notice reduced plant growth too.

Effective home garden crop rotation can drastically reduce the need for supplemental fertilization and helps maintain a healthy, balanced, nutrient-rich soil. For organic gardeners it is almost a must.
Picture
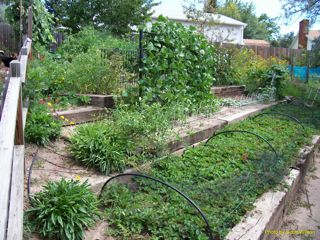
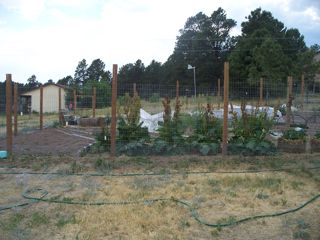
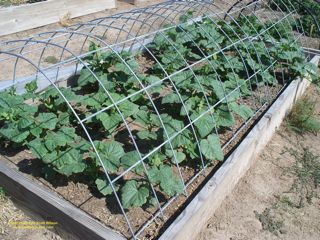
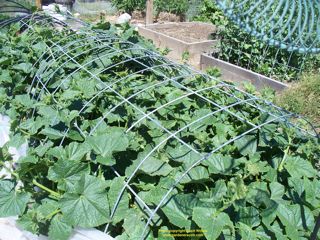
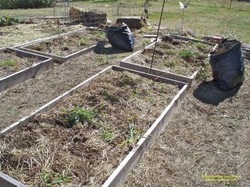
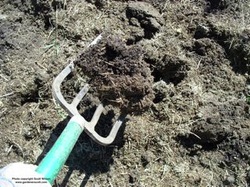
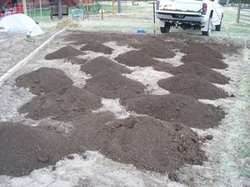
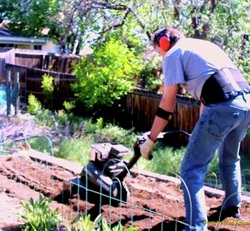
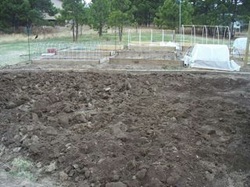
Every year my garden looks different with crop rotation
The concept of crop rotation is simple. Crop A is planted in year one, Crop B is planted in the same location in year two instead of Crop A, Crop C is planted in year three instead of Crop A or B, and so on until the cycle is repeated.

The simplest cycle is a two-crop rotation where a plant like corn is planted one year and a crop like peas is planted in the same bed the next year. Then the cycle repeats each year with corn followed by peas followed by corn followed by peas; each cycle is completed in two years. A three-crop rotation takes three years to complete. A seven-crop rotation takes seven years.

The selection of the plants for each year is the most important aspect of crop rotation. To be effective, each successive planting should grow differently than the previous planting. In the two-crop example above, corn grows in a spot, depleting soil nitrogen. The next year a legume like peas is planted to replenish soil nitrogen. Many legumes have root nodules that harbor beneficial bacteria that takes nitrogen from the air and fixes it into the soil.
Picture
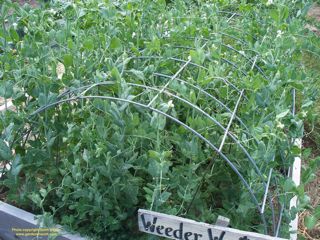
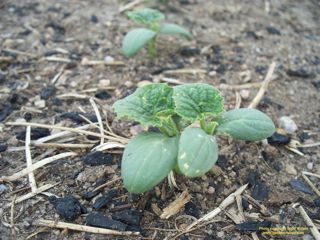
Peas are a perfect legume to plant
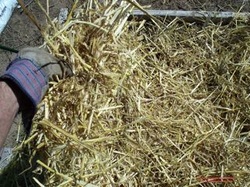
In a home garden, legumes are a great choice in an easy crop rotation cycle. Peas, beans, lentils, and soybeans provide a nice harvest while adding nitrogen to soil. Other plants like clover, alfalfa, and vetch don't offer a harvest, but have the same beneficial properties. I use vetch in my garden as part of my crop rotations; the vetch is attractive with pretty little purple flowers. After a season of growth that fixes nitrogen into the soil, the plants are tilled in to add additional organic material.

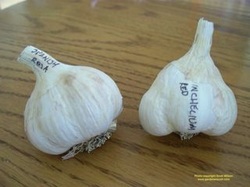
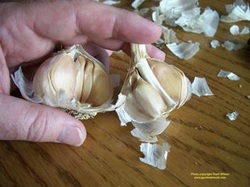
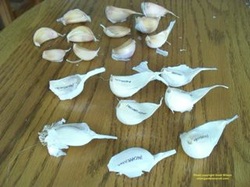
I like to practice a three-year crop rotation in my garden. In recent years I've done a tomato-pea-cucumber cycle, a garlic-pea-spinach cycle, and a beet-bean-cucumber cycle. In each of those cycles I also grew vetch. Vetch can handle cold weather so I sow it in fall after I've harvested and cleaned up a bed. The vetch grows into winter and again in early spring; I turn it into the soil about six weeks before planting the new season's crops. For plants with early summer harvest, I'll sow vetch and allow it to grow during the remaining summer and early fall.
Picture
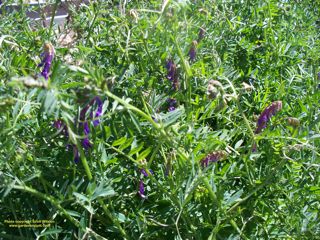
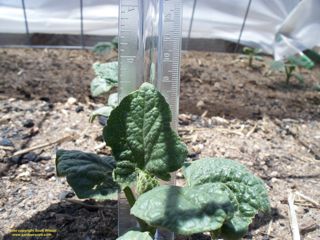
Vetch looks good and adds nitrogen
A basic three-crop cycle of sowing plants that produce nitrogen, followed by plants that are heavy nitrogen feeders, followed by plants that are light feeders is easy to start.

A four-crop cycle is also easy if you divide plants into groups. Fruiting plants like tomatoes, cucumbers, and pumpkins is one group. Leafy plants like spinach, kale, and broccoli is a second. Root vegetables like carrots, beets, and potatoes is a third. Legumes like fava beans, peas, and lentils is a fourth.

Another important reason to rotate your crops is to reduce disease and pest problems. Tomato plants are very susceptible to soil-borne pests and pathogens. In the first year of planting a new bed, tomatoes often do very well, but after being in the same spot for a period of years they suddenly seem to have problems with early blight, fusarium wilt, or leaf spot. The fungus or bacteria that causes many potential tomato problems lives in soil.
Picture
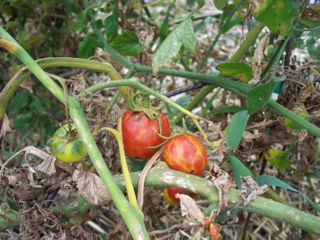
Tomatoes with problems will infect soil
Once a plant is infected it spreads that pathogen into more soil. Any new plants in the bed will become infected and help spread it further. Crop rotation breaks this cycle. An infected plant may adversely affect soil, but if there is no new plant to spread the fungus, bacteria, or virus, it will eventually diminish and no longer cause problems.

This works because the pathogens are plant specific; tomato disease will not affect corn, peas, spinach, or pumpkins. Crop rotation helps keep plant problems from becoming established in your garden. Before tomato pathogens develop, another plant like beans grow in the bed, then a plant like spinach is planted before bean problems develop.

Knowing what plants you want to grow and the most likely diseases in your region will help you determine the best cycle. Many fungi that affect tomatoes remain viable in soil past three years so a four-crop rotation is recommended. By the time tomatoes are planted again, the threat is gone.
 
It's important to be aware of plant families when planning and planting. Tomato, eggplants, and potatoes can be susceptible to the same pathogens. Tomatoes and peppers have similar problems. For that reason similar plant families should not be included in a crop cycle; avoid planting tomatoes and peppers or tomatoes and potatoes in the same bed within a single crop cycle.

I practice a three-crop cycle because it's easy to plan and easy to do. It reduces the potential for problems, but isn't foolproof. If I do encounter problems in a bed, like tomatoes, I'll make note and transform that bed's cycle into a four-crop or five-crop model.

Occasionally I get lazy or behind in planting and repeat crops in a bed. Problems don't automatically develop, but I do try to get back on track for the next year.
Picture
Only perennials like rhubarb stay in the same spot
For virtually flawless results, a seven-crop cycle can be followed. There are very few pathogens or pests that will survive seven years in soil. Extra effort should be taken to insure adequate legumes are added in the sequence. If you have the space and the inclination to develop this more-complicated cycle plan, seven is the magic number.

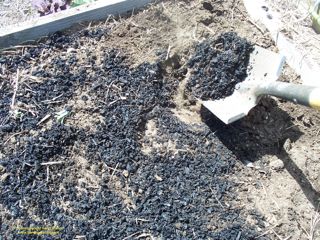
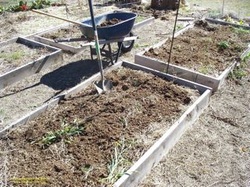
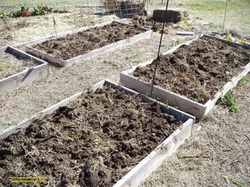
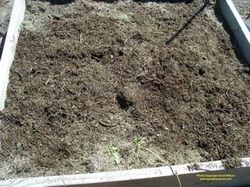
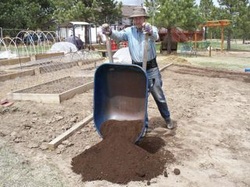
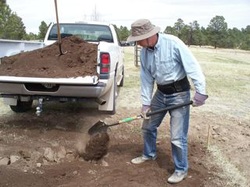
Home garden crop rotation also provides a great opportunity to amend your garden soil. Because you're cleaning up each bed before planting a new crop, the addition of compost is easy to do as part of soil preparation before sowing or planting. Tilling in the spent plants from the previous season, like I do with vetch, also adds important organic material to soil.

The combination of crop rotation and soil amending acts to maintain a healthy soil environment. Beneficial soil bacteria and organisms thrive while harmful ones diminish and the microorganisms help make soil nutrients available to plants, enhancing overall garden production.

It does take a minimal amount of extra time to plan and initiate a new crop cycle. Depending on the size of your garden you may have to forgo certain crops in some years if there isn't enough space for a complete cycle for all garden plants. I accept these limitations as a tradeoff for a better garden overall. Occasionally doing without chard or parsnips or butternut squash is okay.

Home garden crop rotation is easy to do and has many benefits. While you're planning your next garden, think about doing it a little different than last time.
15 Comments

Biochar Works in the Garden

10/19/2012

17 Comments

 
Biochar enhances plant growth and is ideal for short-season gardens.  In my experimental garden bed, biochar added an extra two weeks to my harvest schedule. For many of us who grow in challenging regions, that can be more than 10 percent of our growing season.
 
Biochar is reported to improve the development and growth of plants. Most of the benefits have been reported through anecdotal evidence so I decided to conduct as scientific an experiment as I could to prove or disprove the claims. I've written about biochar before and about the beginning of this experiment (see my article "Using Biochar in the Garden", June 4, 2012).

I was convinced by others on the internet that biochar could improve my garden, but I wanted to prove it to myself, and others looking for statistical analysis. With a calendar, metric ruler, and scale, I set out to document the effectiveness of biochar. I must acknowledge that a new friend, the daughter of very good friends, is a strong advocate of biochar and is a director at Soil Reef Biochar, a company selling and marketing the product. That had no effect on my analysis.

Using 100 percent biochar from Soil Reef Biochar, I amended the soil in one half of a four feet by eight feet raised bed. As a control effort, the other half of the bed remained unamended, aside from an addition of compost that the entire bed received one year earlier. As mentioned in my earlier article, I inoculated the biochar with beneficial bacteria. After amending the soil I let the bed rest for three days, keeping the bed's soil moist in the process.
Picture
Amending with biochar
In each four feet by four feet half I placed 24 'Straight Eight' cucumber seeds at the recommended depth, spaced approximately six to eight inches apart in a grid. 'Straight Eight' is a common slicing cucumber that I've had success with in the past. Normal germination ranges from 3 to 10 days with about eight days being the norm. Maturity is reached in about 50-75 days with about 60 days being the norm.

The growing season in my garden at 7500' elevation (2285m) is short, typically ranging from 110 to 130 days. Late frosts are common in spring and delay sowing and planting of warm season plants. My seeds were sowed on May 30, 2012, and I began the diary of plant development at that point.

The first obvious difference in the biochar side of the bed began with the germination time and rate. On June 3, five seedlings broke the soil surface. That is four days after placing in the soil, half of the typical germination time. The first non-biochar seedling appeared on June 4, but the biochar germination rates exceeded the other half. Here are the results for the germination of each side:

                                Biochar seedlings                               Control group seedlings
June 3  (Day 4)                     5                                                               0
June 4  (Day 5)                    13                                                              1
June 5  (Day 6)                    19                                                             13
June 6  (Day 7)                    23                                                             16
June 7  (Day 8)                    23                                                             18
June 8  (Day 9)                    23                                                             19

All of the biochar seeds sprouted earlier than the expected germination time. After nine days, 23 of the 24 seeds sprouted on the biochar side, a 96% germination rate. Only 19 of the 24 in the control group sprouted, a 79% rate. The soil was kept consistently moist on both halves and no pest damage was evident. There is no clear reason for the lower germination rate of the control group.
Picture
Cucumber seedlings in biochar soil
It's obvious that the biochar plants got an earlier start than the control group and that advantage carried through for the rest of the experiment.

On June 25 (Day 26), I measured the height of all the plants. The average height of the biochar cucumber plants was 7.53 cm. The average height of the control group was 5.34 cm. In an effort to avoid skewed numbers, I deleted the measurement of the smallest and tallest plants in each group before averaging. The biochar plants were 41% taller than the control plants.
Picture
Measuring a seedling
At this point I thinned the plants to 14 in each half of the bed. Each section's plants were staggered in four rows spaced about one foot apart. This spacing is closer than commonly recommended, but not out of the ordinary. It does add a minor stress factor.

All of the plants were watered at the same rate and received addition of a balanced liquid fertilizer on days 26 and 37.
 
On July 6 (Day 37), I measured the plants again. The biochar plants averaged 16.2 cm and the control plants measured 12.22 cm. The biochar plants were 33% taller than the control plants at this point.
Picture
The test bed
The first flower appeared on a biochar plant on July 15. The first flower in the control group appeared on July 21; eight flowers were on biochar plants at that time. That six-day difference continued the trend of accelerated growth in the biochar plants.
Picture
Cucumber plants nearing harvest
All of the fruit was harvested when it was at least 18 cm (7 inches) long. The average in both groups was 19 cm (7.5 in) at the time I picked them. I harvested the first fruit on a biochar plant on August 10 (Day 72). The first fruit on a control plant was harvested on August 22, 12 days later.

The accelerated growth in the biochar bed allowed me to begin enjoying juicy cucumbers almost two weeks earlier than a standard garden bed in my garden. I harvested four biochar cucumbers before I picked the first one in the control group.

It should be noted that the maturity/harvest point of the biochar cucumbers was at 72 days, at the high end of normal maturity and past the expected 60 days. The control group reached maturity/harvest at 84 days, well past expected maturity. This isn't unusual in a high-altitude garden. Our summer nights are cooler than gardens at lower elevations and this temperature variation delays maturity of many warm season plants.

I expected that the biochar cucumbers would be bigger and more robust that the control group, but that wasn't the case. The average biochar cucumber was 19.14 cm long and weighed 272.2 grams. The average control cucumber was 19.02 cm long and weighed 279.1 grams. The control group cucumbers were about 2.5% heavier, but that isn't statistically significant with my measurement methods. Basically, the cucumbers in both groups were about the same size at harvest.
Picture
A biochar cucumber
Ultimately I harvested 13 cucumbers from the biochar plants and 12 from the control ones. The stress of growing the plants close together reduced the potential number of fruit, but that was partially intentional so I wasn't overrun with cucumbers to measure. I was also on vacation for 10 days during the middle of the experiment and our house sitters enjoyed a few cucumbers that weren't measured.
 
I had the first frost damage to my garden in the middle of September at about 110 days into the growing season. Though I covered the cucumber bed with plastic and was able to keep the plants alive for a few more weeks, the cooler weather effectively ended new growth and flower and fruit development. There were still a number of cucumbers, of varied sizes, on the vine when I let them succumb to the climate.

I think the results of this experiment are clear. Biochar speeds and enhances germination in cucumbers. The earlier germination and effect of biochar in the soil leads to greater plant growth rates. This enhanced growth results in earlier flowering, fruiting, and harvest in biochar-amended garden beds.

Biochar offers a clear advantage to gardeners like me who have concerns about short growing seasons. For gardeners in warmer climates and more gardener-friendly regions, two weeks of extra harvest time may not seem like much, but for me it's substantial. My tomato beds are almost always two weeks short of reaching full maturity.
 
We can infer that the results of this experiment with cucumbers can be carried over to other plants in the garden. I've started another experiment using biochar in one bed of cool season plants and no biochar in another bed of the same plants. The biochar plants are already larger than the others.

Next year I'll add biochar to my tomato beds and I anticipate bigger growth and earlier harvests. I plan experiments to determine if the ultimate harvest amounts of biochar beds is larger than non-amended ones.

Biochar adds an exciting component to gardening. As advertised, it does influence the growth of plants in a very positive way. Currently about 10 percent of my garden is amended with biochar. I look forward to the day when all of it is enhanced.

17 Comments

Using Biochar in the Garden

6/4/2012

5 Comments

 
Biochar is a great amendment for any garden soil. I wrote about the wonder product a month ago (May 9, 2012, "What is Biochar?"), and have incorporated it in a few of my garden beds for testing. Biochar research is in its infancy so information on how to use it in gardens is still being developed by researchers and gardeners like me. While I encourage you to add biochar to your garden soil based on present data, be aware that my methods are one option developed only by me; there are other options and other undiscovered processes for using it.
Picture
100 percent biochar
Biochar acts as a repository and delivery system of beneficial soil bacteria. These microorganisms are an important component in soil that make nutrients available to plants by converting elements to the ionic form that roots absorb. Without an encouraging environment, bacteria and other microorganisms exist in soil but not at a level that can support sustained plant growth.

Compost is another repository and delivery system of beneficial soil bacteria and is the most common soil amendment used by home gardeners. Both biochar and compost enrich soil and provide similar structural, textural, and fertility improvement, but compost needs to be added regularly due to its steady decomposition while biochar remains relatively intact for decades.

To begin, biochar must be acquired and that is currently a major limiting factor. There aren't many biochar manufacturers or distributors. I bought my biochar from Soil Reef Biochar through their website. Until wholesale manufacturing and processing becomes competitive you can expect the cost for biochar to remain relatively expensive, but you need to consider the long-term benefits. One application of biochar can save you the cost of multiple applications of compost over many years.

That being said, I'm pursuing a joint approach to soil improvement. My working hypothesis is that if compost is good for soil and if biochar is good for soil, then compost and biochar together should be really good for soil. My garden test beds are amended with both.

To be most effective, biochar should be prepared before adding it to your soil. Biochar provides a positive environment for beneficial bacteria but if just mixed with soil its effectiveness is minimized. It's a "build it and they will come" approach that can be compared to building free housing in Europe for customers in the Americas; there is a big ocean that needs to be crossed before it can be occupied. Bacteria have difficulty transiting wide spaces.

Inoculating biochar overcomes this obstacle. Inoculation incorporates the bacteria directly into the biochar before you amend your soil. One method to inoculate it, and the one recommended by Soil Reef Biochar, is to mix biochar with an equal amount of compost and let them meld for two weeks. The bacteria in the moist compost gradually multiply and migrate to their new home.

I developed a speedier, and in my opinion more effective, method for inoculating biochar. Using a method analogous to the way we inoculate against disease, I essentially inject raw biochar with bacteria-rich fluid.

To begin I take equal quantities of compost tea and worm tea. Compost tea is made by soaking or steeping compost in water for two or three days; the resulting liquid is swimming with the bacteria that populated the compost. Worm tea is made in a similar process but using worm castings (manure) instead of compost; it has similar multitudes of beneficial bacteria.

About one gallon of compost tea and one gallon of worm tea are mixed and combined with one cup of dark molasses in a four-gallon bucket. This sugary concoction becomes an incubator for bacteria growth as the tiny creatures feed and multiply.
 
Oxygen is a critical component for the growth of beneficial bacteria; the "bad" anaerobic bacteria don't need oxygen. To ensure adequate oxygen in the developing inoculant you can insert a fish aquarium pump with plastic tubing into the liquid to provide air bubbles. As an alternative I covered the bucket and physically twisted, bounced, and shook it multiple times during the day.
Picture
After three days the inoculant is a little foamy on top and ready to use. If left alone for a longer period the sugar in the molasses will eventually be totally consumed by the bacteria and the liquid will ferment, turning into alcohol. The lack of food and the presence of alcohol can kill the bacteria, which defeats the whole purpose of creating a bacterial incubator. Use the inoculant before it goes bad.

Picture

Two gallons of this concoction is enough for five gallons of biochar. Starting with small batches, I poured the liquid inoculant into the dry biochar using a rough one to two ratio.

Picture

I stirred it with a garden trowel and let it soak for about five minutes. Then I mixed and stirred it again because some of the liquid drained to the bottom. After the second mixing and another five minutes, the biochar was evenly moist.

Liquid inoculant achieves two important steps in biochar preparation.

First, it incorporates the bacteria directly into the microscopic crevices and holes that constitute biochar. While contact with moist compost can take two weeks for this crossover to be accomplished, inoculating with a liquid achieves the same results in minutes.

Second, it moistens the biochar so it can immediately provide the moist environment that bacteria need. Pure 100 percent biochar from the distributor is very dry with a large portion of it very powdery. It needs to be wet before adding to soil to be most effective, both to benefit bacteria and to keep the dry powder from blowing away.

The inoculated biochar can be added to soil immediately or covered and stored for later use. However, it should be used within a day or two of inoculating for best results because the bacteria will go dormant or die if the biochar dries out or if their food source is diminished.

There is no universal standard developed yet for biochar distribution in garden soil. The Soil Reef Biochar 5-gallon bucket says it will cover 36 square feet when distributed one-half inch thick. The Soil Reef Biochar website says the same bucket will cover 18 square feet at one-half inch thick. A biochar handbook developed by EcoTechnologies Group recommends a maximum of one pound per square foot; biochar is very lightweight so at this rate the five-gallon bucket would only cover about five or six square feet.
Picture

I spread my inoculated five-gallons of biochar over about 48 square feet. The addition of the liquid increased the mass slightly. I added the biochar to one half of two separate 32 square-feet beds and into one 16 square-feet bed. The spread depth of the biochar varied between one quarter and one half inch thick.

Picture

Using a garden spade I turned the biochar into the soil to incorporate it about five to six inches deep. Biochar works its magic with the bacteria that provide nutrients to roots. To be most successful it should be resting at root level. A garden tiller can also be effective in distributing it evenly in soil.

An alternative to adding 100 percent inoculated biochar to soil as I did is to combine it with compost at the time of application. If inoculated as Soil Reef Biochar recommends, it is already mixed with an equal amount of compost. If inoculated as I recommend, it can be mixed with compost for easy soil amending.

The amount or organic material present in your garden soil will determine whether you need to add compost at the same time as biochar. I add compost at the beginning or end of the growing season based on the quantity available. One of the nice things about biochar is that once it's amended to soil it never needs to be replenished.

Another option is to add biochar to your compost pile. Biochar can shorten the time it takes for compost to develop and is already incorporated in the mix when you amend your soil. You'll get the benefits of biochar but it may be difficult to determine how much of the mass is biochar and how much is compost. For accurate distribution and for testing, I suggest adding biochar as a measured amount directly to the beds you want amended.
Picture
Once added and turned in or tilled, water the garden bed right away. You want the inoculated biochar to stay moist for best effectiveness. Moist soil also gives the bacteria a new potential environment. Think of the biochar as an urban center and the surrounding soil as the suburbs. Eventually the bacteria will inhabit all of it. Because biochar retains moisture better than basic soil, it will continue to propagate the beneficial bacteria even when the soil dries out between waterings.

To date there is no definitive research that recommends the ideal amount of biochar for home gardens. One test by EcoTechnologies Group showed no difference between plants grown in a 10 percent biochar application rate and that of a 20 percent rate. My distribution is much less than that, but I still anticipate positive results.

Already my test bed is showing benefits of using biochar. Cucumber seeds on the biochar side germinated a full two days earlier than those on the unamended side. I'll continue documenting its effectiveness and report on it in the future.

Consider biochar in your garden and let me know how you do it.
5 Comments

What is Biochar?

5/9/2012

1 Comment

 
Biochar may become the future of gardening, though not many gardeners are aware of it. So if you know the answer to the title question consider yourself one of the knowledgeable few.
Picture
A handful of biochar
Biochar increases soil fertility and increases plant production in the garden as a soil amendment. On a global scale it works to sequester carbon from the air into soil, helping to reduce atmospheric carbon dioxide, and effectively removing the greenhouse gas for centuries. Whether as a garden soil amendment or a global greenhouse gas reducer, biochar is clearly beneficial for all of us.

Biochar is commonly compared to or confused with basic charcoal but it is much more. You have seen the basic process of creating charcoal. A campfire or woodstove filled with sticks and logs of varied sizes burns, produces heat, and often leaves behind black, carbon-rich chunks that didn't burn to ash. The blackened chunks are raw charcoal. When charcoal is added to soil it essentially becomes biochar.

This basic principle of improving soil fertility through the use of charcoal is attributed to the natives of the Amazon basin who burned their jungles in smoldering mounds to create charcoal. Large amounts of charcoal, bone, and manure were mixed into their infertile clay soils to create extremely fertile soil that is still visible today in Brazil where sections of "Terra Preta", or "black earth", reveal this innovative, ancient practice. 

Biochar, or charcoal in soil, improves the soil in many important ways. It raises the pH, improves water retention, increases microorganism activity, improves nutrient levels, and can even reduce metal contaminants in soil.

By many measures, biochar achieves the same benefits as compost (and you know I love compost), but does so with a mechanism that doesn't decompose as compost does. Biochar stays active in the soil for hundreds of years. Many low estimates say at least 300 years; the terra preta soils are over 1,000 years old and still quite viable.

When wood burns in a low-oxygen environment, water, chemicals, and gases escape leaving behind the simple carbon structure of the tree. The same holds true for any biological material that is burned in the same way. Within this carbon structure are innumerable microscopic pockets that once held cellulose and the water and gases. Think of it as resembling the structure of a sponge but on a much smaller scale. Charcoal looks solid from the outside but it contains countless air pockets and a true surface area much larger than the relative size of the chunk.

As biochar when the charcoal is added to soil, these empty pockets unleash their magic. Soil moisture finds its way into the empty, microscopic biochar chambers through capillary action and is retained very efficiently. These moist pockets then become home to billions of bacteria. These soil bacteria are critical to converting chemicals in soil into nutrients for plant uptake and form the bottom of the microorganism food chain. Compost as a soil amendment does the same things but compost continues to break down through the natural bacterial onslaught. Conversely, biochar's structure remains intact and continues to act as a home for water, air, and bacteria.

Biochar improves the texture of soil through it's own variably-sized pieces incorporating with various sizes of soil grains. It improves the fertility of the soil through the improved microorganism activity. It improves the structure of soil through the increase in pore space, aggregation, and soil stability. Biochar greatly improves overall soil tilth (for more about tilth see my article "The Dirt on Soil", Feb 24, 2011).

Lucky for gardeners, there are companies that are beginning to market biochar to consumers. Their biochar is made in a much more refined process that removes some of the impurities that remain after the simple smoldering pile method of making charcoal. This process, "pyrolysis", is quite efficient and reduces many of the air pollutants that burning wood releases into the atmosphere. Biochar companies use more than wood as their fuel. All kinds of organic waste, or biomass, are burned; these include corn stalks, manure, nutshells, leaves, and grass. Any biological matter that can be dried and burned can be turned into biochar.
Picture
A bucket of Soil Reef Biochar
One biochar company that I've become familiar with is "Soil Reef" Biochar. One of their founding members is a friend of mine so I do have a connection with them, but I haven't received anything by mentioning Soil Reef Biochar and paid full price for the biochar I purchased. In this evolving and emerging field, they are at the forefront and are working with Whole Foods Markets to bring their product to consumers.
 
My friend Lopa has been an advocate of biochar for years and has spoken around the world testifying to its amazing benefits. Only recently was I fortunate enough to learn about it and her company Soil Reef Biochar.

In the months ahead I'll be working with and writing more about biochar. I've set up test beds and plan to create my own kiln for making biochar through pyrolysis as I recycle my yard waste into beneficial soil amendments. I'm sold on the benefits of biochar and will document its effectiveness in my garden.

If you're intrigued by the idea find out more and purchase some biochar for your own garden. It's a new and innovative idea and you can be at the forefront.
1 Comment

Fall Clean up for the Vegetable Garden

10/21/2011

9 Comments

 
Much of my garden is looking pretty ragged and it's time to deal with it. While I advocate leaving flowers and decorative grasses in place through the winter as food and protection for birds and for their interesting wintry appearance, vegetable beds are often best when cleaned up before the ground freezes. Fall clean up is an important chore in most gardens.
Picture
An unsightly garden
There are many reasons to clean up the vegetable garden in the fall: most of the chores associated with growing and harvesting are complete but the days are still warm enough to work outside; dead and dying vegetable plants rarely have the same positive visual appeal of flowers and grasses; vegetable plant material left in the garden to overwinter can often harbor harmful insects; weeds can be pulled before they spread in spring; organic material added to the soil can decompose through the winter and early spring; the garden beds will be ready for spring planting with minimal preparation.

Fall is a great time to work in the garden. Daytime temperatures can be warm enough to work comfortably without the heat stress of summer and the soil is warm enough to handle digging and amending. You've had the entire growing season to identify things you want to do and change in your garden and those thoughts are still fresh in your mind while all of your tools and supplies are still in place. Take advantage of that and get outside before the cold of winter keeps you cooped up in the house.

After the first frost kills your warm season plants and subsequent freezes finish off the others, the withered vegetation can become a blight in your landscape. Gone are the vibrant colors and verdant backgrounds. Solely from an aesthetic perspective, removing the plant carcasses makes an immediate positive impact.

Most of the dead plants should find their way to your compost pile; chopping or cutting them into smaller pieces will hasten decomposition. Tomatoes and potatoes are best carted off in the trash, especially if you had any problem with fungal or bacterial infections. If you compost tomato plants with a disease you will introduce that same problem to future plantings when you spread the compost.
Picture
Bagged tomato plants
Dead plants left in place through the winter provide a haven for many insects, most of them harmful. They burrow into the plants, or just under the soil, and continue their life cycle that results in many more insects emerging in spring. Cleaning up your beds breaks the cycle and reduces your insect pest problems the next year.

Cool season plants will continue to grow in cold weather and don't need to be removed right away. Leaving brassica plants like cabbage, kale, broccoli, Brussels sprouts, cauliflower, and radishes is a natural way to kill some insect pests. The vegetation attracts some harmful insects. After harsh winter temperatures finally kill them and the plants begin to decompose in early spring, they'll actually release cyanide compounds that will kill those pests. You can pull them up and add them to the compost pile in spring.

If you don't have a compost pile, the debris of fall creates a great start. Stack the dead plants in your designated area and you now have a compost pile. Add the leaves that are piling up on your lawn and kitchen scraps you used to throw away. You probably won't have the perfect blend of material to allow decomposition during the cold temperatures of winter, but you'll have a mass that will begin to turn into compost with the warmth and rain of spring.

With your beds cleaned up, it's easy to see the perennial weeds that have been lurking under cover. Left unchecked those weeds will grow, set seed, and multiply before you return for spring planting. The soil is still workable so deal with those invaders now. Dig them up and throw them on your compost pile. The green of the weeds is a nice balance to the brown of the dead plants.

I add to my compost pile throughout the year and at the end of the growing season I usually have a batch of compost ready to use. With the beds cleaned up I add a layer of that compost to the surface. Along with the straw and grass I used as mulch, it is a great organic amendment to the soil. Aged manure works well too. This year I also added the bedding and droppings from my neighbor's rabbits that have been aging in a pile all summer. Store-bought compost and soil amendments are a good alternative.
Picture
Compost on straw mulch
With all of those organics in place I simply turn them into the soil with a spade. Through earthworm and microorganism activity the material will break down and decompose. The freeze-thaw cycle of winter will help incorporate it in the soil. It will be about six months until I plant again and in that time the soil will be improved greatly.

In a few hours my vegetable garden is ready for spring planting. Sure the task is completed months ahead of time, but when the air and soil temperatures are finally warm enough in early spring I want to get to planting. Cleaning up the withered plants in spring is an unnecessary delay.
Picture
Ready for spring
My vegetable garden is just about on autopilot right now. The garlic is planted and beginning to sprout under the straw mulch; it will be fine through the winter (see my blog, "How to Plant Garlic"). The beds I cleaned up have the organic material incorporated in the soil and are ready to support new growth next season. My green manure, the cover crops (see my blog "Try Green Manure"), are growing well and will be turned in to the soil in spring. I'm leaving the sunflowers in place to feed the birds.

There are many activities to keep me busy now and in the months ahead, but an entire garden, the vegetable garden, is put to bed for winter. It required effort, though it wasn't hard. In a small way I can relax a little as I focus on other things. And it's a nice feeling to look back on the season from first seed to last plant on the compost pile and think about all the enjoyment it provided.

9 Comments

How to Plant Garlic

9/12/2011

20 Comments

 
Garlic is a plant that many gardeners are curious about growing, but too few do. Fans of garlic tout its medical benefits, its culinary virtuosity, and its pest control effectiveness. With so much going for it, I find it mildly shocking that I'm one of the few gardeners I know who actually grows it. It's surprising because garlic is about as easy to grow as anything in your garden and provides such wonderful rewards.
Picture

There is nothing mysterious about planting garlic, but deciding on where you'll plant is important. Garlic is in the ground for six to nine months so you'll need a spot that is dedicated to it, where it won't interfere with or be impacted by other plants. I've planted my garlic in its own four-feet by four feet (1.2 meters) raised bed. The location should be in full sun.

Picture

Garlic will grow in a variety of soils, but it will do best in well-draining, well-amended soil. If you spend extra time preparing the bed you'll be rewarded with large, healthy bulbs. Add two to four inches of compost or aged manure on the soil surface. Work it into the soil with a tiller, spade, or garden fork. You want it to be incorporated throughout the soil to a depth of at least six inches (15 centimeters) and deeper if you can.

You can also add blood meal and bone meal to the soil to provide extra nitrogen and phosphorus. If you have pets that have access to the garden you may skip those amendments. Dogs and cats love to dig through soil with fresh, wet blood meal as they search for the source of a "fresh kill". Alfalfa meal is a good alternative. A balanced fertilizer works well too.

Garlic tends to do best in most regions when planted in the fall. The cloves are able to develop basic roots before the ground freezes and are in place to grow quickly when spring warmth returns. Garlic needs exposure to cold temperatures to sprout in spring and being in the ground during the winter provides that. One old tradition is to plant garlic on the shortest day of the year, 21 December or 21 June depending on your hemisphere. That may work for some temperate regions where the soil can still be worked, but for those of us who have frozen ground in winter it's a little too late.

For many gardeners, fall is the ideal time to plant. As long as they're in the ground at least three weeks before the ground begins to freeze, the cloves will have time to begin their development. It's okay if little green shoots poke through the soil during warm periods that will occur during winter. Garlic is very durable and can handle the cold.

In warm regions, planting garlic in early spring works well. The cloves will still need cold saturation so you'll need to store them in a cool, dry spot for three to four weeks. The temperature needs to remain below 50F degrees (10C) the entire time. Refrigerators (which should be set below 40F and 4C degrees) are a good solution.

After you've selected which garlic you'll grow (see my blog, "Choosing Garlic for the Garden") and when you'll plant, find a good source for the bulbs. Your local nursery should have a selection of the best varieties for your location, but shop early because garlic tends to sell fast to the gardeners who have already discovered its benefits.
 
You want to choose symmetrical and firm bulbs. Avoid bulbs that have mold or fungus on them. There should be no soft spots when you squeeze them. Though many of the bulbs will be fully encased in the papery skin, look for the outline of the cloves; they should be full, consistent, and plump. Pass on the bulbs that already have green shoots sprouting from the top.
Picture
If you buy more than one variety, be sure to label the bulbs or bag them separately. Many of the cloves will look alike and you'll want to know which ones you've planted. Marking the row in the garden and planting the appropriate cloves will give you feedback as to which ones grow best and taste best after harvest.

The bulbs will store for weeks after purchase so there's no rush to get them in the ground. It's a good idea to buy early and spend your time preparing the bed. When it is time to plant, separate the bulbs into the individual cloves. Don't pull apart the cloves until shortly before planting time. If they dry out it impacts their root development.

Picture

 When you're ready, crack open the bulbs by gently prying off the outer cloves with your fingers, working your way to the center. With hardneck garlic, you have the center stalk exposed with the cloves growing around it; softneck garlic won't have the little stalk. Each clove will be attached to the basal plate at the bottom of the bulb, where the roots are. Separate all of the cloves. Some may want to stay attached to the basal plate. Try to remove it, but don't damage the clove in the process. It's okay if some of the old root base is attached when you plant the individual cloves.

Picture

While all of the cloves should grow into a garlic plant, you'll have best results by planting the larger ones. You can eat the smaller cloves or use them in pickles as I do. A typical bulb from the most popular varieties should provide you eight or ten good cloves for planting. If you crack the bulbs in a location other than right at the planting bed, label the cloves with a permanent marker or bag them separately. Again, you'll want to know which garlic is planted where.

Picture

Plant the cloves four to six inches apart (15 centimeters). Consider the ultimate size of the mature bulb when determining your spacing. Some garlic grows quite large so you'll want to plant farther apart. Some bulbs will be smaller when full-grown and can be spaced closer together. In a bed like mine, there is enough room for more than 60 cloves to be planted, allowing space around the borders for the bulbs to grow.
 
I like to lay out all of the cloves I plan to plant on the surface of the bed. I can adjust the spacing as needed and it provides an "assembly line" process. I simply dig a hole with the trowel, place the clove, cover it with soil, and move on to the next. In the past when I planted without laying them all out, invariably I ended up planting two cloves in the same hole or got my rows out of alignment.

Picture

The cloves should be planted three to four inches deep (8 to10 centimeters).  Three inches is fine for most cloves, but plant large cloves deeper and also plant deeper in very loose soil that will settle and compact later. Place the clove in the hole pointy side up. The flat end that was attached to the basal plate is where the roots grow from and should be on the bottom. There should be about two inches (five centimeters) of soil from the top of the clove to the surface.

Picture

Cover the bed with about four to six inches of mulch (10 to 15 centimeters). I consider this a critical step. Mulch helps moderate the soil moisture, but more importantly moderates the soil temperature. In very cold regions the freezing and thawing of the soil during winter and early spring can heave the cloves out of the soil. This frost heave can tear roots and expose the cloves to damage. Mulch also helps reduce winter kill and reduces heat stress on hot summer days. Use thicker mulch in colder areas.

In wet regions, the thick mulch isn't necessary and should probably be avoided. Mulch can keep waterlogged soil from drying out and that spells doom for the cloves that can rot when exposed to excess water. A thin layer to suppress weeds is appropriate.

Straw is a good mulch. It insulates well and allows the shoots no barrier to new growth. Dried leaves or a mix of dried leaves and dried grass is good and often in abundant supply in fall. I don't recommend hay grass; as I've written before, it tends to be full of seeds that sprout and turn into a blanket of weeds. Use an organic mulch that you can turn into the soil to amend it after you harvest the garlic. Pine needles are a good initial mulch but won't decompose as quickly when turned into the soil.
 
Winter snow and spring rains will compress the mulch into a soft, thinner layer that effectively manages the soil through spring and summer. It will suppress weeds and help keep soil moisture and temperature under control. If a heavy layer was used in frigid winter zones, be prepared to remove some of it in spring. A final, spring layer two to three inches thick (5-8 centimeters) is all that is needed.

Water the garlic after planting and periodically through the winter. When the soil isn't frozen it should remain moist but not waterlogged or soggy. As I've said before, check the soil moisture before watering. With the mulch you will probably need to water much less than you expect. Avoid letting the soil dry out; not enough moisture will result in a smaller bulb that hasn't reached its full potential. Garlic won't need a lot of water in the fall and watering too much can hasten excess green growth.

Basic care for garlic is similar to other garden plants. Garlic likes minerals with its nutrients so fertilize about once a month in spring and early summer with a weak fish emulsion unless you have pet and animal pests. Compost tea, worm tea, and manure tea can be good alternatives.

I'll follow up in the months to come with more about garlic care, diseases, and, of course, harvesting. For now, get out there and get planting.

20 Comments

Try Green Manure

8/16/2011

1 Comment

 
It's not what you think. It's not the fresh contribution from the southern end of a northbound horse. Green manure is the term for a cover crop that is specifically grown to benefit soil. A cover crop consists of a large number of individual plants, usually annuals or biennials, that cover the soil as they grow side by side. The cover crop becomes green manure when it is tilled into the soil. Like animal manure, it adds organic material to soil.

I'm a huge advocate of amending soil. Many of my previous articles reference that dedication. Green manure cover crops provide a great way to amend soil in an easy and productive process during the time you're not actively gardening.

Here's the concept: when your garden beds are finished for the season you plant a cover crop; the plants grow during the fall, winter, or early spring; you till the plants into the soil before planting the primary crop again; the incorporation of these plants into the soil improves its fertility and structure; the next season's plants benefit from the improved conditions provided by this green manure.
 
There are five beneficial components to a cover crop. The first is erosion protection; the cover crop protects from wind and water erosion. Second is weed suppression; the cover crop keeps weeds from growing on bare soil. Third is nitrogen fixation; some plants, like legumes, store nitrogen in their roots, which becomes available in the soil when the roots die or the plant is tilled into the soil. Fourth is soil structure creation; roots, especially in grasses, exude a substance that helps "glue" together loose soil particles. Lastly, pest insect reduction; the cover crop encourages beneficial insects while reducing harmful insect control measures.

While some perennial grasses can be used as cover crops and achieve many of these benefits in varied areas of the landscape, they aren't best suited as green manure for a flower or vegetable garden. For these type of gardens, the cover crops should be annuals or biennials. You don't want perennial plants regrowing after they've been tilled under.

As you might guess, some plants are better than others to use as green manure. Many of the best and most popular green manure crops are legumes. Because of their nitrogen-fixing ability, legumes can achieve all five aspects of a good cover crop. When they're tilled into the soil, the organic matter breaks down quickly and the nitrogen fixed in the roots boosts soil fertility. Their aggressive roots can also help break up some hard soils.

Legumes have limitations as a cover crop, however. They typically are slow growing and probably won't survive winter temperatures. When they're tilled in in the spring, it may be dead plants rather than active green ones that are added to the soil, though that's not a bad thing. They'll just be younger and smaller than if allowed to fully mature before being killed by a freeze. They're often best suited for early spring planting.

Non-legume cover crops are typically grasses or grains. They don't add nitrogen like legumes, but grow faster and do a better job at weed suppression. When they're tilled into the soil they break down slower, adding more organic matter over a longer period of time. Some can survive winter temperatures, but frozen ground is usually enough to kill many of the annual grasses.

Green manure crops have familiar names and are readily available from nurseries and online seed sources. I'm ordering some of my seeds this year from Territorial Seed Company which has a section of green manure plants in their catalog.

Winter rye, clover, pea, vetch, and fava beans are the cover crops usually mentioned first when you ask a gardening expert about green manure. Alfalfa, oats, winter wheat, canola, and buckwheat often follow in the next breath. Which plants to choose depends on where you live and which ones are best for your climate. Typically, late summer and early fall are the times to begin sowing seeds for fall and winter cover crops.

In late summer I plan to sow hairy vetch and winter rye over much of my open vegetable garden, where corn, beans and squash are currently growing. I can sow the seeds while the other plants are growing and use the straw mulch already in place to help increase soil moisture and assist in seed germination. The first frost will whack the beans and squash, but the cover crop shouldn't be affected. They'll have time to grow and establish before freezing conditions hit. They should overwinter fine. I won't be planting again until next June so I'll have plenty of time to allow some spring growth before tilling them in.

In some of my raised beds I'll sow Fava beans and peas in early spring. Those are the beds where I'll plant my warm season crops. The legumes will add nitrogen to the soil and I'll use a hoe to work them into the soil before I place my tomatoes, peppers, and beans.

You can mix the plants within a cover crop; it doesn't need to consist of a single variety. Grasses grow quickly while legumes provide nitrogen, so plant both in the same bed. Each will provide unique attributes.

When it comes time to till or work the cover crop into the soil, it should be done about three weeks before planting. This allows time for the organic matter to begin decomposing and adding soil nutrients. In warm, wet areas with lots of spring rain, you can do it as late as two weeks before planting. In colder, drier areas, till in about four weeks before planting because it will take longer for the organic material to break down. For spring planting the tilling may need to be done while the soil is still cold. Just be careful not to till if the soil is frozen or too wet.

You want to mow, till, or dig in the cover crop before the plants set seed. The concept is to add nutrients and organic matter to your garden soil not create a nuisance weed. If you allow the cover crop to go to seed, you'll continue to have those plants in your garden, but as competition for the primary garden plants. It works well to mow or cut the cover crop a few days before you plan to till or dig them in. Some of the stems and leaves will begin drying out and that's fine.

Using green manure works just as well in a small garden plot as it does for a large commercial operation. You can plant a cover crop in any garden area. If it's a mulched bed, remove the mulch before sowing seed unless it's a mulch with small pieces that you'll till in along with the cover crop.

I plan my plant rotation among my garden beds with green manure in mind. This year I'm growing peas in one bed. Next spring I'll work the dead pea plants into the soil in that bed and plant something new like green beans. The peas will add nitrogen and organic material to the soil and will benefit the beans. Next year I'll plant my peas in a new bed to benefit another future planting.

Though you grow green manure as a sacrifice to other future plants, you still need to treat them with the same care as the rest of your garden. They need sun, water, and weeding. You want them to grow and mature to achieve the best potential benefit. Snow and spring rain may provide enough moisture to sustain cover crops, but check the soil periodically so they don't dry out and die prematurely.

If your soil can benefit from organic matter and nutrients, and most soils do, consider growing green manure. And having fun telling people about using green manure. It's a great way to stop or start a conversation.
1 Comment

Do a Soil Test for Your Garden

4/26/2011

2 Comments

 
Testing soil in your garden is a good idea. Knowing the quality of your soil is the best forecast of plant success. If you know you have good soil, you should expect good plant results. If you know you have poor soil, you shouldn't be surprised by poor growth. To determine the quality of your soil you can grow a garden for years and see how it turns out, or you can have the soil tested.

There are two basic ways to test soil: buy a home test kit and do it yourself or send a soil sample to a laboratory and have it done professionally. The best answer is to have the pros do it. 

A laboratory analysis only runs about $20 for a basic test, but can run much higher if you want to test for specific elements. Generally, a home gardener only needs to know four things about soil: the pH, and the levels of nitrogen, phosphorus, and potassium (or potash). I would recommend a fifth, the level of organic matter. Basic professional testing by a university or private lab should include all of that info plus salinity levels. You can find a list of testing labs at this link to Colorado State University fact sheet 0.520, Selecting an Analytical Laboratory. Results should be send back to you in a few weeks.

A home soil test kit usually costs about half the price and can be done quickly. It will give you the same basic information, but not nearly as accurately as a laboratory test. Most home kits work best for acid soils and are less accurate for alkaline soils, but they'll still give you a basic idea of soil quality. A slightly inaccurate test is better than no test at all.

If you are just starting your garden and have a plot of bare soil, I highly recommend getting a professional soil test. That way you'll know exactly what you need to add to the soil in the way of amendments and fertilizers to prepare it for the type of plants you plan to grow. If your garden is in place and you're just concerned about basic nutrient levels, a home soil test kit will give you an basic, though not precise, idea of what is in your yard.
Picture
A home soil test kit
To begin either test you need to gather samples of soil from your garden. With a clean trowel or spoon, dig a hole in four to six locations about four to six inches deep. You're getting a soil sample at root level. In a typical garden plot collect five samples, one from each corner and one from the middle. For your average soil status, combine the soil samples into one bag. If you really want to know how the soil differs from one end of your garden to the other, you can do multiple tests.
Picture
Collecting a soil sample
Bag the combined sample and send it to the laboratory per their specific directions for submitting soil. Or carry it to your kitchen or shed for a do-it-yourself test.

The basic process for doing a home soil test kit is to combine your soil with distilled water and various chemical tablets in small plastic vials. You'll use different tablets in different vials for different test steps. The water will change color and you compare the color with a chart to determine the respective test result.

Don't expect accurate results. The outcome of my pH test showed it to be somewhere between 6.0 and 7.0, not too extreme. Depending on how you interpret the color, it could be close to either end. That's good enough for most plants, but if you're trying to grow something with specific pH needs you'd be better served by an accurate reading.
Picture
Soil pH interpretation
The other tests showed similar vague results and weren't surprising. I already knew my soil was deficient in nitrogen, phosphorus, and potassium. That's why I'm amending it and adding fertilizer. But based on the home soil test kit I don't know how much fertilizer is enough, or too much. Many professional soil tests will provide guidance on how to add nutrients.
Picture
Deciding results
A home kit is best suited for determining if the location you've chosen for your garden is appropriate. If you find that one location is extremely poor while another is average, you can save time and effort by gardening in the location that is less work.

Regardless of whether you do it yourself or have it done by the lab experts, get a soil test done. A professional test is advised. It will keep you from guessing about plant problems. It will help you provide appropriate levels of fertilization. It will set a foundation for proper soil amending.

By knowing your soil you are better able to know your garden. Eighty percent of plant problems are soil related. Understand your soil and you have a great advantage in understanding why things go wrong with your plants.
2 Comments

Soil Amendments in the Garden

4/20/2011

1 Comment

 
Almost every garden can benefit from soil amendments. I'd say every garden, but I once lived in California's famous San Joaquin Valley and the soil would grow just about anything with very little help from me; spit out a watermelon seed and in a few months you'd have a watermelon plant. But Colorado and most regions of the world aren't so blessed. Your garden and mine will benefit from soil amendments.

Amending your soil is simply adding a material to improve the soil's physical properties. The soil amendment can be organic or inorganic. Organic amendments are alive, were once living, or come from a living creature. We typically think of peat, compost, and manure when talking about organic amendments. Inorganic amendments are mined or manufactured. Perlite, vermiculite, sand, and gravel are typical inorganic amendments.
Picture
Adding compost to a new bed
The purpose of adding amendments is to make your soil better by improving the tilth. Soil tilth is important for good plant growth (see my blog "The Dirt on Soil" for a more thorough explanation). It is the combination of a soil's texture, structure, and fertility. When it's deficient or downright terrible, you have to intervene to improve it.

Soil structure is how the individual soil particles fit together. In sandy soil the particles are large and loose with lots of air pockets, or pore space, in between them. That's why water drains so quickly through sand; it travels easily through the pore space. In clay soil the particles are very close together and the pore space is very small. That's why water is absorbed in clay and it stays wet for so long; the water fills the pore space and has nowhere to go.

Soil amendments will change the structure. While inorganic amendments are a definite option, they tend to be more expensive for a home gardener and don't improve the third component of tilth, soil fertility. Soil fertility is what enables roots to absorb the nutrients in the soil. Because organic amendments improve both structure and fertility, they will be my primary focus.

Organic soil amendments increase the organic matter within the soil. That sounds obvious, but it takes decades or centuries for nature to increase soil organic matter naturally. Organic matter is important because it's the fuel for the billions of microorganisms that live in your garden bed. Microorganisms make plant growth possible. They convert the nutrients in the soil into the ions that plant roots can absorb. Increased soil organic matter means increased root growth.

Organic amendments can be small or large. Small amendments include peat, compost, crushed leaves, aged manure, sawdust, and dried grass clippings. Large amendments include bark, wood chunks, and straw. Generally, small amendments are best for sandy soil and large amendments are best for clay soil. In sandy soil the smaller pieces act as little sponges to fill the pore space and soak up water and nutrients. In clay soil the larger pieces act to push aside the small soil particles and make space for water and air.

You can buy organic amendments or make your own. Nurseries, garden centers, and big box stores will all sell bags of compost, manure, and soil blends. You can buy compost and decomposed manures in bulk from many landscape or sand and stone companies. Depending on how much you need, it may be worth filling your truck or paying for the delivery of a large quantity of amendments. Starting your own compost pile, bagging fallen leaves, and saving some grass clippings are free ways to accumulate good soil amendments. If you have or know someone with horses, use the manure.
Picture
Two yards of compost for the garden
For amendments to do their work they need to be thoroughly mixed into the soil. Spreading a bag of compost on top of the soil won't work. You need to get a spade and dig it in. Buy or rent a tiller to make the work a little easier. Regardless of the method, the organic matter needs to be completely blended with soil. In the beginning of amending your garden's soil it will be more difficult to change the soil structure, particularly in clay soil. It may be hard to dig and hard to break up, but over time the soil becomes looser and more able to accept the gift you give it.
Picture
Digging in compost
Avoid just digging a hole and dumping the amendment in. Yes, eventually earthworms and other soil organisms will incorporate it, but that will take a long time. You're not benefiting the overall soil, just the area of the hole. Make your entire garden soil better by amending all of it.

The amendment will eventually decompose in the soil. That's the result of microorganisms at work. Bigger pieces will decompose slower than small. If you're amending sandy soil with compost you probably won't see any indication of the organic matter in the next year; it's there in small amounts, but hard to see. On the other hand if you're amending clay soil with wood chunks, you may see the wood pieces still evident in the soil for years.

For your initial application, spread the amendment over the top of the soil to a depth of two or three inches. This may seem like a lot, but for poor soil or soil that has never been amended it is necessary. In subsequent years you can use less. In well-amended soil you may only need to add an inch of amendment each spring when you get the beds ready.

The quantity of amendment will be printed on the bag, usually in cubic feet. Determine how big your garden bed is and buy enough to cover it. One cubic foot of compost will cover an area of six square feet with two inches of compost. You can buy in bulk by the yard; a yard of amendment is 27 cubic feet. One yard of compost is enough for about five average four feet by eight feet raised beds. Three yards of compost will cover an area of about 500 square feet with two inches of compost.

After spreading it, dig it in as deep as possible. You want the amendment to get down to root level. I like to make two applications of amendments when I first amend a garden. I dig deep and turn over the soil so that the amendment falls to the bottom of the hole. After digging up the entire bed, I spread more amendment and then use a tiller to incorporate it. Tillers don't usually get as deep as a spade can so I use both tools to get more amendment into the soil.
Picture
Using a tiller
Adding organic soil amendments is different than adding fertilizer. Fertilizer is a specific nutrient for plants. Organic amendments will improve the fertility of the soil and the ability of microorganisms to make nutrients available to plant roots. Once the organic level of the soil exceeds five percent, you'll be able to use less fertilizer. A well-amended garden may not need fertilizer at all, except for a few plants that are heavy feeders and may need more nitrogen.

Also, adding "topsoil" is not the same as amending the soil. Topsoil is rarely regulated by states, while amendments often are. That means when you're buying compost you know you're buying compost, but when you buy topsoil you may not know what you're buying. Topsoil from bag to bag or truckload to truckload can be drastically different and it's possible that the soil you're buying is worse than what you have in your garden. Except for filling large holes outside the garden, stay away from topsoil.

It takes a lot of labor to add organic amendments to your garden soil. The initial application as I described is hard work, but it usually only needs to be done once. Annual amendment application is easier, but still time-consuming. Don't avoid doing it just because it's hard. Your plants will grow better and in the long run you'll save time that would be spent weeding and fertilizing. Make the effort and your garden will be better for it.
Picture
The new bed with amended compost
1 Comment

Your Soil Should Be Warm to Sow Seeds

3/28/2011

22 Comments

 
The woman in front of me as we checked out of a major retailer last night had a tree in her cart. At first I thought it was plastic because the blooming flowers that covered its branches looked too perfect.  Upon closer observation, the "flowering tree" label around its trunk identified it as real, probably a flowering plum. As I walked to the parking lot I observed a man helping her load it into the back seat of her Prius and advising, "Don't plant it now." I cringed when I saw the branches with the beautiful flowers hanging out the window.

Unless she drove home at three miles per hour in the 45-degree air, all of the blossoms were left on the roadway before she pulled into her drive. Even if she is patient, stores it in a warm area, and waits until we get through the next few nights with forecast low temperatures of around 22 degrees F, she'll probably want to plant it soon. If she does everything right from this point on, the tree's prognosis is not good; it's too early. I've offered advisories before about avoiding the temptation of pretty plants at big box stores until the proper planting time arrives. Often the best lesson is experience, and the loss of an inexpensive tree.

Most plants prefer root temperatures between 50 and 70 degrees F. That's one reason you have to be careful about planting trees that have broken dormancy and flowering plants from big box stores too soon. Early spring frost is a threat, but cold soil can wither roots, sap energy, and hinder future growth. A weakened plant is much more susceptible to disease and insect infestation.

It's tempting to start planting as the days warm, but be careful. Locally, we've set some new records for high temperatures in the last few weeks and have more warm days this weekend. Just looking at the air temperature it seems like a good time to plant, but what is the soil temperature? That may be more important.

Stick your finger in the soil at various spots in your garden. Do you have to pull it out because the cold is stinging or do you detect warmth? The mass of earth beneath our feet takes longer to warm than the air we breathe. You may assume the soil is warm enough for plants because the sun is shining, but unless you take a few moments to confirm it, you may shock the roots of your new flowering plum or stunt or prevent the growth of your vegetable seedlings.

An inexpensive soil thermometer is a nice garden gadget to own, but any probe will work for temperature confirmation. You need to measure the temperature a few inches below the surface and your finger or a meat thermometer can give the readings you need. Your finger is around 98 degrees F and you can gauge the temperature of things you touch by the relative coolness you feel. A probe thermometer is much more precise however. If your significant other doesn't like the idea of using kitchen tools in the garden, get a soil thermometer.

Picture
The raised bed is 37 degree after days into the 60s.
Seeds need specific soil temperatures to germinate. Many cool season vegetables can germinate with a soil temperature above 45 degrees F, but will do best when it's above 60 degrees F. Warm season vegetables may be able to handle 60 F, but would prefer 80 F. Of course, there is a high end; above 85 and 90 degrees F few seeds will germinate, but we usually don't concern ourselves with that problem in early spring.

Knowing the specific temperature that your seeds need can help ensure germination and growth. Gardener Supply Co. has a nice
online chart that shows what soil temperature various seeds need to germinate. As we approach our last frost date, it's important to be aware that frost is only one factor that affects new plants. If the soil hasn't warmed up enough, seeds won't grow.

Naturally, longer days with more sun will warm up the soil. You can accelerate the process if you want an earlier start to your planting. Laying a sheet of black plastic over a planting area will warm it quickly in a short time. Once you remove the plastic, however, the soil will cool if the air remains colder than the soil temperature. Using a mini green house (read my blog on that subject) to warm the soil and help maintain warmer temperatures will add weeks to your growing season.

How you garden will affect how the soil warms up. Raised beds warm up faster than open soil. Sand and loam warm up faster than clay. Dry soil warms faster than wet. Rich, dark, amended soil will warm faster than average soil. Soil in the sun will warm faster than soil in shade. Soil will warm slower in mulched areas. For the quickest warming, start with dry, amended, unmulched, loamy or sandy soil in a raised bed.

Picture
The temperature near the mulched roses is a few degrees colder.
You can track the progress of your soil's temperature by taking a reading every day. Stick your thermometer a few inches deep, wait for the reading to stabilize, and write it down. If the temperature is constant or increases for three days in a row you can use that as a baseline. If the soil is warm enough for the seeds that you want to germinate and if the air temperature will stay above freezing, you can sow. It's that easy. If the soil or air temperatures are too low, you should wait. Take more readings until you meet the appropriate threshold.

The importance of taking these steps is that they help ensure you're not planting too early. If you traditionally wait to plant until the sun is high in the sky and the trees are fully leafed out, you probably don't need to be taking daily soil temperature readings. But if you want to gain every advantage and sow as early as possible, take the time to monitor soil temperature.

22 Comments

    RSS Feed

    GardenerScott

    Join me as I discuss gardening subjects and take a look at gardens past, present, and future.

    Blog Categories

    All
    Animals
    Biochar
    Birds
    Chickens
    Compost
    Crafts
    Deer
    Environment
    Flowers
    Fruit
    Gardens
    Gifts
    Growing
    Harvest
    Herbs
    Inspiration
    Irrigation
    Lawn
    Mulch
    Pests
    Planning
    Planting
    Plant Selection
    Preserving
    Propagation
    Pruning
    Recycling
    Reviews
    Seeds
    Sites To See
    Soil
    Tomatoes
    Trees
    Vegetables
    Watering
    Weather
    Weeds

    Archives

    April 2018
    December 2015
    March 2014
    November 2013
    October 2013
    August 2013
    July 2013
    June 2013
    April 2013
    March 2013
    February 2013
    January 2013
    December 2012
    November 2012
    October 2012
    September 2012
    August 2012
    July 2012
    June 2012
    May 2012
    April 2012
    March 2012
    February 2012
    January 2012
    December 2011
    November 2011
    October 2011
    September 2011
    August 2011
    July 2011
    June 2011
    May 2011
    April 2011
    March 2011


Web Hosting by iPage