Few garden plants are as easy to propagate as strawberries. And you can multiply them for free. If you have strawberry plants and want more there are three basic methods to do it, but one stands out as ideal for home gardeners.
Strawberries are easy to grow and propagate
The first method of propagating strawberries is by division. Many strawberry plants will develop additional crowns at the base of the plant. These crowns can be separated into new plants. When done carefully and properly, a mature strawberry plant can be grown from each of these lateral crowns, but often the mother plant is compromised and dies in the process. Division requires expertise and precision, yet only produces a few new plants for each mother plant.
The second method is to grow strawberries from seed. Each strawberry fruit is covered with seeds and those seeds have the potential to become new plants. Like with most viable garden seeds, proper soil, proper water, and proper light will produce a plant. This is a great way to grow many plants if you have the necessary germinating and growing space and equipment. The biggest concern is that most strawberries in gardens today are hybrids and that means the seeds from those plants will not grow true to the parent; new plants from seed may be dramatically different than the plant you're trying to copy. While propagating from seed with heirloom strawberries is an option, it's not the best one.
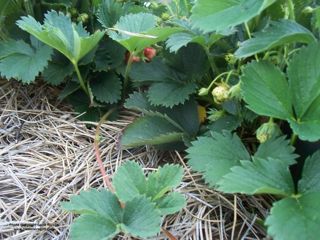
The easiest, most familiar, and best propagation method for home gardeners is to grow new plants from runners. Horizontal stems appear from the base of mature strawberry plants and new plants will grow from the nodes at the tips of these runners, or stolons. Roots grow from the nodes when they rest on soil.
The second method is to grow strawberries from seed. Each strawberry fruit is covered with seeds and those seeds have the potential to become new plants. Like with most viable garden seeds, proper soil, proper water, and proper light will produce a plant. This is a great way to grow many plants if you have the necessary germinating and growing space and equipment. The biggest concern is that most strawberries in gardens today are hybrids and that means the seeds from those plants will not grow true to the parent; new plants from seed may be dramatically different than the plant you're trying to copy. While propagating from seed with heirloom strawberries is an option, it's not the best one.
The easiest, most familiar, and best propagation method for home gardeners is to grow new plants from runners. Horizontal stems appear from the base of mature strawberry plants and new plants will grow from the nodes at the tips of these runners, or stolons. Roots grow from the nodes when they rest on soil.
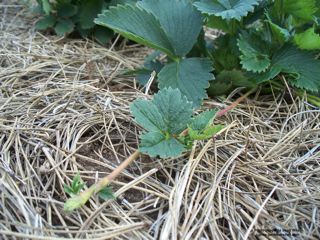
A strawberry runner
A single parent plant can provide many offspring in just a few years and each new plant is genetically identical to the original plant. Many gardeners call them daughter plants (see my blog "Should I Call You Mother, Daughter, or Sister?" link below).
When left alone, runners will develop into plants at varying distances from the main strawberry plant depending on the length of the runner and where it contacts soil. Gardeners have great control in this natural process by directing the runners or by potting them. I do both.
When left alone, runners will develop into plants at varying distances from the main strawberry plant depending on the length of the runner and where it contacts soil. Gardeners have great control in this natural process by directing the runners or by potting them. I do both.
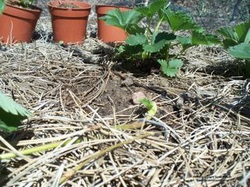
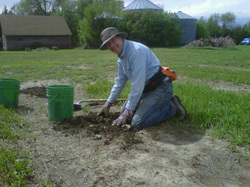
If I have a bare spot where I want a new strawberry plant and a runner is headed in that direction, I'll spend a few days keeping it above the soil, on mulch, and when it gets to a spot I'm happy with I'll let the tip rest. To ensure it stays where I want it, I'll use a small metal garden staple to hold it in place.
This is a very easy way to expand a strawberry bed, but it has limits because the runners will only extend a limited distance from the mother plant. To fill in spaces far from the mother or to create a completely new strawberry bed, I recommend potting up the runners.
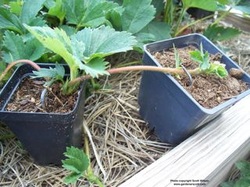
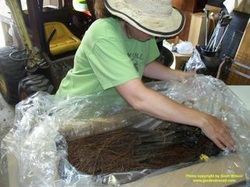
The runners are flexible and easy to direct into a small pot filled with quality garden or potting soil. I reuse small plastic pots from nurseries. I've used yogurt containers with great success; just punch a few holes in the bottom of yogurt cups for drainage.
The runners are flexible and easy to direct into a small pot filled with quality garden or potting soil. I reuse small plastic pots from nurseries. I've used yogurt containers with great success; just punch a few holes in the bottom of yogurt cups for drainage.
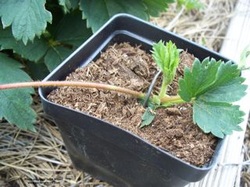
Fill the pot with soil, place the runner on top, and hold it in place. I make small staples from stiff wire to do this because they stay in place very well; I find that many commercial garden staples are too long for small pots and it's cheaper to make your own. You can also use a small stone, sticks, or anything else that will hold the runner in contact with the soil.
Do not cut the runner. Leave it connected to the mother plant. Water the small plant regularly, along with the rest of the strawberry bed. After a few weeks, roots will fill the pot and the new plant is ready to transplant. At this point, trace the runner to the base of the mother and cut it. You can trim the runner from the young plant too or just leave it to dry and break off later.
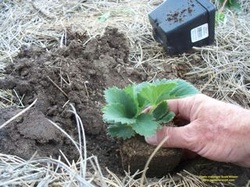
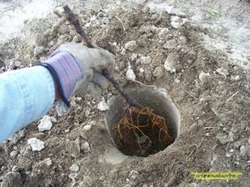
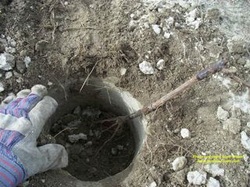
Remove the plant and soil from the pot and transplant as you would any other garden plant. Have your hole ready, place it gently, and backfill it with soil.
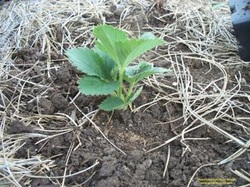
When planting a mature strawberry plant it's very important that the crown stay above soil level. Burying the crown can lead to rotting that will kill the plant. Transplanting these new plants is a little more forgiving because they're still developing the crown. Just place the soil level of the pot at the same level as the soil in the bed and you should be good.
Many strawberry varieties will send out multiple runners from a parent plant. Some will only send out a few. You can grow plants from every runner, but the mother plant is spending a lot of energy to get the little plants growing so helping to direct that energy to just a few plants is better for the new plants and the mother. After you've selected which runners will become plants, prune off the others.
Along the same line, individual runners will continue to grow even when the first node has begun to grow roots and sprout a young plant. It's normal for a single runner to produce three or four plants. For the best and strongest growth it's a good idea to prune off the tip of the runner once you have an initial node growing in a pot.
Along the same line, individual runners will continue to grow even when the first node has begun to grow roots and sprout a young plant. It's normal for a single runner to produce three or four plants. For the best and strongest growth it's a good idea to prune off the tip of the runner once you have an initial node growing in a pot.
That being said, I will often pot up multiple plants from a single runner if it is healthy, sturdy, and obviously growing well. The new plants at the different nodes will grow at different rates so be sure both the initial plant and the last one in line are growing well before you separate them from the mother and transplant them.
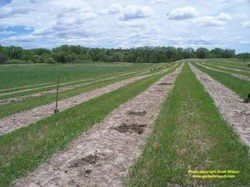
With propagation, a few strawberry plants can quickly fill in a small garden bed in a single season. By controlling how and where the mother plants send their runners you can ensure each plant has the best chance for survival and production.

 RSS Feed