GardenerScott.com
  • Home
  • How-to Videos
  • GardenerScott Blog
  • Photos
  • Tips & Tricks
  • Contact Me

Chicken Phrases in Our Speech

12/23/2012

24 Comments

 
Chicken behavior permeates what we say and when we say it. I didn't fully appreciate how much chicken culture has influenced human culture until we began to raise hens this year. I found myself describing the behavior of the chickens by using literal phrases that I'd only used figuratively before.

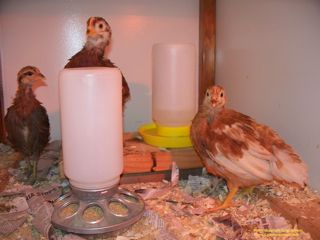
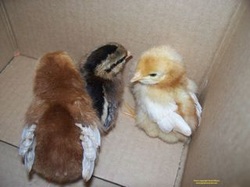
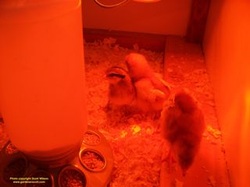
Jo is our smallest hen. She was a straight-run chick so we had to wait until she began maturing before finding out whether she was a rooster or hen. A beautiful, multi-color, Easter-Egger, she began laying small white eggs and our questions ceased. After only a month of laying she suddenly stopped. That change coincided with the loss of some of her long, black tail feathers in a round patch on her back; it revealed bare skin and an apparent increase in her stress level.
Picture
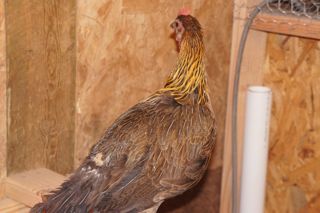
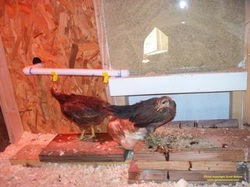
Jo's feathers are growing back
I guessed that she got too close to the fence and a fox nipped her. That was until I saw Lucy, the big Rhode Island Red hen, pecking at the bare spot. It was instantly obvious that Jo was "henpecked".

I knew chickens establish a hierarchy of dominance, but wasn't aware of how it was functioning in our coop. Obviously, big, red Lucy "ruled the roost".
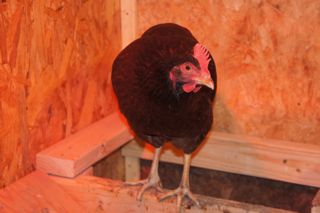
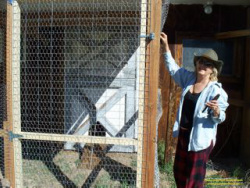
Picture
Lucy is the boss
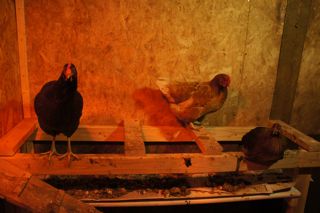
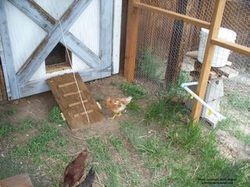
This was confirmed later when I put some yellow squash from my garden into their chicken run. They all ran to the delicious vegetable, but only Lucy began pecking at it. When the other hens stuck their beaks in, Lucy pushed them away. There was a definite "pecking order" and Lucy was number one.

As the other chickens backed away quickly, frustrated and flustered, it was apparent that Lucy had "ruffled their feathers" and "got their hackles up".
Picture
Lucy gets first peck
Those chicken-based phrases are ones I've used and are commonly heard describing human interactions. A timid husband is henpecked because his wife rules the roost. When the kids go for a car ride the oldest gets shotgun because of their pecking order. If Aunt Helen gets stuck in the back it ruffles her feathers.

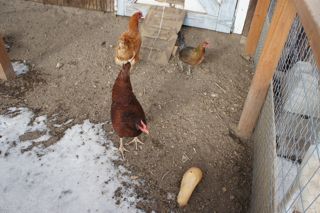
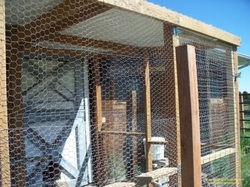
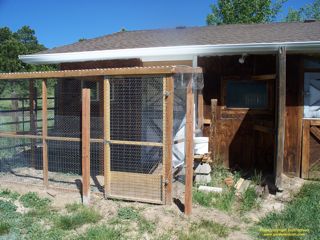
There are many other phrases we use to describe ourselves. Chickens prefer light spaces and familiar areas to sleep. When the sun goes down they’re “chicken” about the dark as they enter the coop and "come home to roost". That being said, they don't like being "cooped up" for long periods of time and often will "fly the coop" if given the chance.
Picture
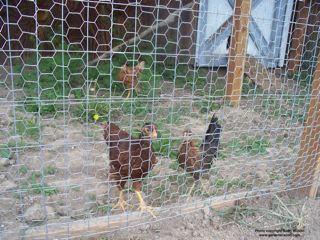
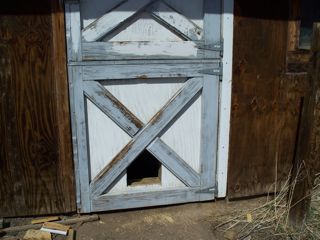
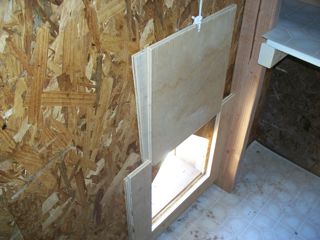
The girls are anxious to get outside
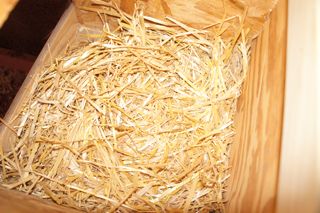
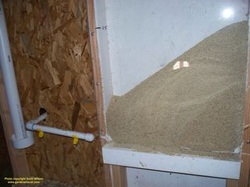
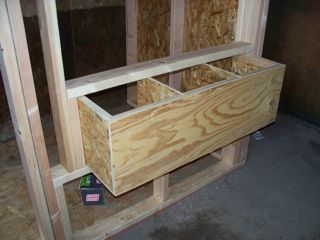
The hens we have typically won't sit on eggs for long periods expecting them to hatch. After Jo's feathers grew back, she began laying eggs again. Unexpectedly one day she sat on her "nest egg" for nearly 30 hours straight. I couldn't get her out of the nest box. She "brooded over" that egg. It was almost as though she was acting like a "mother hen". My wife was finally able to coax her out with special chicken treats.

It wasn't long before her tail feathers began to disappear again along with a regular supply of little white eggs. We were left with an "empty nest" with those eggs gone.
Picture
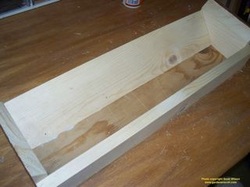
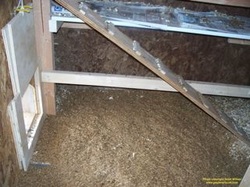
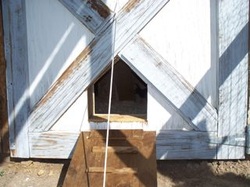
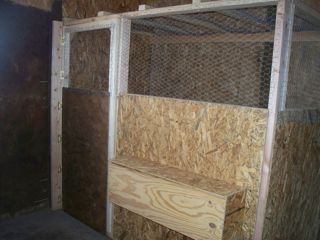
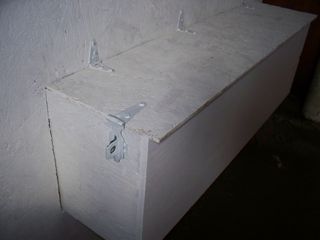
No eggs in an empty nest
We have just a few hens and have had few problems when collecting eggs. We haven't worried about "putting all of our eggs in the same basket". We've never dropped an egg and haven't had to worry about "walking on eggshells". And of course we've never had "egg on our face".

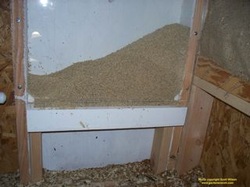
All of these phrases have obvious origins. And their transference to human actions are easily understood. When you see the bare dirt of a chicken run it's easy to understand why bad handwriting looks like "chicken scratch". Chickens are relatively inexpensive to raise; after all, the cost of their food is just "chicken feed".

We don't have a rooster so we don't have to worry about "counting our chickens before they hatch". We use the eggs regularly so we know that "you have to break eggs to make an omelet". And we know that a "good egg" is home-raised.

Many other animal actions have factored into human speech, but I have to believe that chickens have had the most impact. I can think of no other animal that formed the basis of so many common English phrases. Obviously with that much influence, chickens "have something to crow about".


24 Comments

Easy Chicken Raising

7/31/2012

24 Comments

 
Raising chickens can be easy and virtually labor-free. Though we check on them and collect eggs daily, the amount of time I spend on raising chickens averages about 15 minutes per month. Watering and feeding the chickens only requires about five minutes per month. It doesn't get much easier than that.

Labor-free chicken rearing takes planning and preparation, but when done well it pays great dividends. I have much more time for gardening and other household projects.

There are three primary tasks that chicken farmers spend the most time on: feeding, watering, and cleaning. If you can make those tasks automatic, your labor time is virtually eliminated.

I started by designing an automatic chicken feeder. There are many commercial feeders on the market, but they can be costly, take up a lot of space, and require regular filling. I designed my chicken feeder to be part of the coop, taking up very little space. My chicken coop is built with the studs 24 inches on center; the gap between studs is perfect for a feeder.
Picture
I began with a simple wooden tray to fill the space at the bottom of the feeder. This tray extends beyond the studs by two inches and holds the chicken feed. Simple 1 x 4 pine is glued and nailed to make a sturdy box. I mounted the box between the studs at 12 inches above floor level; this a good height for a full-grown chicken.

Picture
To reduce labor even more, I cut a horizontal hole in the wall of the coop so I can fill the feeder from outside the coop; I don't have to go inside to feed the chickens. A 1 x 4 board on hinges acts as the door and bent sheet metal fills the gaps so I can pour the bag of chicken feed without it spilling everywhere.

Picture
To finish the feeder I covered the entire gap inside the coop with a sheet of plexiglass. I happened to have a sheet the correct size, but this is the most expensive piece for building the automatic chicken feeder if you have to buy it.

Picture
The automatic chicken feeder holds an entire 40-pound bag of chicken feed. Depending on how many chickens you have, this can give you many weeks between fillings. Fill it once and let the chickens eat when they're ready. Sure, they spill some of the feed when they eat, but they'll peck most of it up later. This type of feeder has an advantage over others because you can easily see when it needs refilling.

For an automatic water system I purchased chicken nipples to install in PVC tubing. There are two basic styles of chicken nipples. For one you drill a hole in the PVC pipe and screw in the nipples. My research found many customers not entirely satisfied with this type because of the potential for leaks. I went with the second type of chicken nipple which is a saddle type.

There are many companies selling both types of nipples in ranch stores and on the internet. For just a few dollars you can buy a bag of either type of chicken nipple and set up your automatic waterer.
Picture
For the saddle-type chicken nipple waterer, you drill a hole and snap the nipple in place. It's important that the hole in the PVC is perfectly cut. I found in my first effort that I chipped one edge of the hole by drilling too quickly and the chip caused a small water drip when the nipple was in place. When drilled and placed correctly there is no leaking.

Picture
The PVC pipe with the chicken nipples is attached to a bucket. I used a four-gallon, food-grade, plastic bucket that I got for free at the supermarket. The bakery department gets their frosting in these buckets and they'll gladly give away the empties.

Picture
I cut a hole in the coop wall big enough for the PVC pipe, with nipples on, and inserted the automatic waterer. The bucket is outside the coop so I can fill it without having to go inside the coop.

I also build an automatic chicken waterer for the run so my chickens have water when they're outside too. Two buckets, each with four gallons of water, lasts my chickens for weeks. I add ice on hot days and freshen the water every two weeks, but they could go much longer if necessary.

To make cleaning the coop easier I practice the "deep litter" method of managing the coop litter. The concept is to use pine shavings, or a similar organic material, as litter to help keep the chicken manure off the coop floor. As the manure builds, you add more litter. The chickens walk and scratch and mix the manure with the litter. This method only requires cleaning the coop once or twice a year.
Picture
I use pine shavings as my primary litter, but to help cut costs I also use coffee chaff. Coffee chaff is the leftover organic waste from roasting coffee. Many coffee roasters will gladly give you a bag of chaff. I find that the light chaff helps keep the litter dry by absorbing much of the manure moisture and helps it clump so it doesn’t stick to the floor.

Over time the litter and manure begin decomposing. When you're ready to clean the coop, after six months or so, you remove all of it and add it to the compost pile. The litter and manure, partially decomposed, will become compost in very little time.
Picture
I also made an automatic feeder for oyster shells. Oyster shells add calcium to the chicken diet and are good for layers. I used a 2-inch PVC pipe and cut a 1-inch cutout on one end. Then I attached a 4-inch PVC cap to that end with wood screws, after pre-drilling holes.

Picture
The cutout allows the oyster shells to spill out the bottom of the pipe, but they won't overflow the cap that is about 2-inches tall. A pipe 30 inches long will hold a 5-pound bag of oyster shells. That provides calcium for many weeks until filling again.

Picture
A couple holes drilled in the side of the pipe allow for mounting the feeder in the coop. First drill a hole bigger than the screw head, then drill a smaller hole the size of the screw shaft. This allows for the feeder to be slipped over a screw in the side of the coop and then fit snugly when the PVC slips over the screw.

Picture
I have the automatic chicken feeder, the automatic chicken waterer, and the automatic chicken oyster shell dispenser lined up on one wall of the coop. It's one-stop shopping for the chickens.

Picture

All were designed for mature chickens so I had to add steps while the chickens were young so they could reach everything. The little chickens figured it all out very quickly.

With the automatic feed and water systems and deep litter method, the chickens basically take care of themselves. For someone with little time but a desire to raise chickens, any or all of these can make raising chickens virtually maintenance-free.

I mentioned the chickens take about 15 minutes of my time per month. That's about three minutes for adding water to both buckets and two minutes for adding feed, though it really takes less than that. I spend about five minutes adding pine shavings or coffee chaff and swapping out clean newspaper under the roost. That leaves five minutes that I bank for coop cleaning later. At the six-month point I have 30 minutes accumulated for removing the litter and manure.

This amount of time is based on just a few chickens in a small coop and attached run. For larger flocks and bigger coops it will take more effort, but these automatic chicken methods should reduce labor when compared to traditional feeding, watering, and cleaning methods.
24 Comments

Build a Chicken Run

5/27/2012

11 Comments

 
Chickens do well when they have an area to scratch and peck apart from their nesting zone. General guidance is that each chicken should have at least four square feet of living space in a coop. This assumes that during the day they get to walk around and stretch their little chicken legs outside. Without walking room, the recommended living space increases to ten square feet per bird. That could mean a pretty large coop for a small flock. To avoid building a chicken mega-coop, add a chicken run.
 
While some chickeners let birds roam free around their property, for those of us who live with the threat of predators it's a better idea to give our flock protection when outdoors. A chicken run is a dedicated and protected chicken space outside the coop.
Picture
My chickens enjoying their run
There are many coop and run combinations available for purchase. I find that many of them are either too small to give chickens adequate space or are very expensive, or are both. With minimal carpentry experience, you can build a chicken run.
 
Basically, a chicken run is a structure with enclosed walls that is attached to the coop. A door gives the chickens access to the run from the coop. While the run can be made from just about any material I recommend a simple wood and wire structure.

My chicken run is built with pressure-treated 2 x 4 lumber and covered with a combination of chicken wire and welded-wire fencing. It has four walls and a top; it's covered with panels to keep the rain out. The corner pieces are 4 x 4 posts. Because my coop is inside the barn the run is attached to the side of the barn.

I framed the lumber into a big box. My run is eight feet wide and 12 feet long, dimensions that allowed me to buy wood in 8-ft and 12-ft lengths and minimize cutting. The construction is similar to that for a shed or a house. For the walls there's a bottom piece and a top piece and vertical joists in between. The walls of a shed or house need to support heavy plywood and a roof so the joists are often spaced 16 or 18 inches apart. The chicken run walls are wire so the joists can be spaced much wider apart. Mine are at four-feet intervals.
Picture
The basic run structure
All around the lower walls I attached welded wire fencing material with metal fencing staples. This four-feet tall fencing is sturdy and helps hold the entire structure together.

Of primary concern is to make the run as secure as the coop. That means keeping predators out and chickens in. Identifying potential predators is an important step. I have dogs, cats, coyotes, foxes, and hawks that would all love a chicken dinner. Many people also have to be concerned with raccoons, weasels, possums, snakes, and bears.
Picture
Many of these predators will dig under a fence to gain access to the tasty birds. To keep them out, the sides of the run should extend at least 12 inches below the soil surface. My welded-wire fence extends that deep. Digging a trench all around the run during construction helps make burying the fencing easier. Having a single piece of fencing on each side, underground and above, makes a formidable barrier. If snakes or rodents are a concern, you can bury half-inch hardware cloth to help keep any small burrowing animal out.

Picture
To make the structure even stronger and to keep the paws of predators out, the entire run is also wrapped with chicken wire. The double barrier will deter all the predators I face. It extends above the walls and forms a partial roof; on top of it are the 8-ft panels to keep rain off and provide some shade. The covered run also prevents hawks from swooping in for a chicken meal and keeps climbing predators at bay. Plastic or fabric bird netting will keep wild birds out and chickens in.

Picture

The door between the coop and run doubles as a ramp to help them run up and down for entry. It's on a hinge so I can swing it up at night with a cord that I access from inside the barn. This adds an extra barrier to any animal that might make it through the run's walls and want to get inside the coop.

Picture

To give the run extra strength and stability consider burying the corner supports and anchoring them in concrete. For freestanding, permanent structures this makes the run as strong as it can be. If you plan to move your coop the run needs to be portable too so permanent anchoring should probably be avoided, but be aware it's not as strong.

Picture
Access to the run from the outside is important because at some point you'll want to get inside to mingle with the chickens, make repairs, or clean it out. I added a wide door to one wall. Two latches make it more secure. My wife convinced me to add the ability to open the door latches from the inside; you don't want to be stuck inside if the door slams shut and you're all alone.

Picture
Providing the chickens water access is a very important consideration. While they may find plants and insects to eat while outside, their primary food source is usually in the coop. But water needs to be available inside and out. Chickens can become dehydrated very quickly on a hot, sunny day.  A pan of water, a chicken waterer, a dripping hose, or any automatic system will work. I installed an automatic chicken nipple system that enables me to fill a bucket every four or five days and gives the chickens continual access to water.

Chickens like to take a dust bath and an outside run with a bare earth floor gives them plenty of opportunity to get dirty. It also gives them a chance to swallow small stones to help their digestion. Very quickly they'll have eaten or scratched up any plants inside the run so you may consider supplementing their outside diet with kitchen scraps and garden cuttings. They're smart birds and have learned very quickly to come running when I approach; I often have a snack of grubs or grasshoppers.

I'd overlooked installing a roosting pole when building the run and I came out one day to see a chicken resting on one of the horizontal wall supports. Adding a long branch to the inside gives them something to rest on.

When constructing the run consider drainage around it. You don't want to discover too late that you built your run in a depression that gets all of the rain or snow run off. Chickens don't do well in mud. If you're forced into a bad spot, consider adding a trench or drain around it to divert excess water.

Chickens also don't like to walk in snow. I plan to add 18-inch tall siding all around the base in the fall. This will help reduce the amount of snow blowing in and still allow them to spend time outside even on cold days. The roof on my run has been very efficient at keeping it dry on rainy days and should help keep snowfall out, but wind is still an issue and protecting the birds from snow drifts is beneficial.

I'm confident that my chicken run will protect them from every conceivable threat. The only thing I'm remotely concerned about is a bear problem, but so far we've seen no signs of bears in this area. They are the only creature strong enough to break through the run. Aside from a concrete and steel structure, bears can get into just about anything else. I'm not worried about it though; I dealt with the issues I have.

After initial construction we decided to board horses so they're a minor issue now. While not a chicken predator, horses will rub or lean against the run walls and add unnecessary stress. So I added buried fence posts a few inches from the run walls and will add horizontal boards to make a barrier fence to keep the horses from causing damage.
Picture
The finished run with new posts
Every coop and every run is different. Each chicken owner needs to assess individual situations and do what's best for the chickens. Each morning the chickens are awake and ready to get outside. As soon as I open the door to the run they're scurrying out to explore. Their coop is nice but they clearly like the outdoor access. They love their run.
11 Comments

Build a Chicken Coop

4/19/2012

8 Comments

 
Chickens need a home of their own. They can't be house-broken and living in the guest room isn't a long-term option. As cute as the chicks are in the beginning, when they start looking and acting like full-grown chickens it's time they have a permanent place, a coop of their own.
Picture
My chicks are outgrowing their brooder
Most chicks are ready to move into a coop at about five weeks old. My chicks are about at that point. The coop is where they'll eat, sleep, and lay eggs for the remainder of their lives. Coops can be borrowed, bought, or built. Being a can-do kind of guy, I built my own.
 
For the best health and comfort of the chickens, chicken coops have certain requirements.

Most importantly, a coop needs to be predator-proof. All of your chicken-raising time and money is wasted if a fox, dog, raccoon, or coyote finds its way into the coop to kill your feathered friends. A sturdy structure that can prevent such an onslaught is necessary. A solid floor or wire buried in a dirt floor will keep burrowing and digging animals out.

A coop needs to protect the chickens from the elements. Rain, snow, wind, and sun can be harmful. A fully-enclosed living space is all they need. Depending on where you live you may want to consider heating the coop for cold winters, but chickens can actually handle very cold conditions as long as there are no chilly drafts in the coop.

That being said, a coop needs adequate ventilation to prevent chicken respiratory diseases from developing. Especially in hot months, ventilation is a requirement to keep the chickens from overheating or becoming dehydrated. A design to allow for cooling air in summer and reduced drafts in winter is ideal.

I built my coop in a vacant horse stall in the barn. The structure of the barn itself is a deterrent to many predators, but I built the coop to withstand any animal that finds its way into the barn. It can be cold in winter and a bit stifling in summer so I designed the coop with chicken wire on the upper third of the walls to provide as much ventilation as possible. In winter I can cover the wire with tarps to help retain some heat. This design also allows me ample opportunity to watch the chickens.
Picture
My coop in a barn
For stand-alone, outside coops, windows that can be opened in summer and closed in winter offer the same advantages. Open ports in the gables or soffit can work well too. In all cases the openings need wire coverings to keep predators and other birds out.

For mental and physical well-being, each chicken should have at least four square feet of space in the coop. This assumes that they'll have access to the outside on most days. If the coop is their only living space, you should allot at least 10 square feet per chicken.

My coop is four feet by seven feet, a total of 28 square feet. Since I also have a chicken run for outside exercise and stimulation (more on that in a future article) that space allows seven chickens to reside comfortably. I don't have that many now so I have room to grow my flock.

A coop should be designed for easy cleaning. A clean chicken environment is a healthy chicken environment. I covered my coop's plywood floor with a sheet of linoleum to help with cleanup. A wide door will allow the soiled bedding material to be shoveled out.
Picture
Easy to clean floor
The coop needs its own feeding and watering system. Chickens should have access to feed and water constantly so their home needs to supply that. Standard systems can be purchased. You can also make your own easily and inexpensively; I'll cover that in a future article too.

Chickens instinctively sleep in high locations. Coops should have high roosting spots to allow the chickens to sleep high. The roosts should be two inches wide with rounded edges; a simple tree branch will work. The roosts should be long enough to allow each chicken to have at least 10 inches side to side. One long roosting pole may be all you need. For many chickens, each additional roosting pole should be at least 10 inches from another.

My roost is a long 2x4 board with the small end up, three feet off the floor. I rounded and sanded the edges. I also added shorter 2x4s at intervals with the wide side up. In very cold weather, chickens should be able to roost while fully resting on their feet; this keeps their toes from freezing. By providing both slender and wide roosts my chickens can determine which one they want based on the temperature.
Picture
A simple wood roost
I added a ladder to the roosts to help the young chickens climb up. It has little wood slats along the way for their feet to grab and not slip. Chickens can fly and will naturally seek out the roost and many sources say ladders aren’t necessary, but I feel it can’t hurt and may actually help.
Picture
Easy climb
I also added a board under the roosts. Chickens poop a lot and most of it happens when they're on the roost. By having a board to collect their droppings it means I can clean up that section easily without having to clean the entire coop as often. It also centralizes the droppings so I can add them to my compost pile. The board is covered with linoleum with newspapers and wood shavings on top of that to minimize the gross-out factor of cleaning up chicken manure.

For hens, a coop needs nesting boxes. The boxes should be raised off the floor but need to be lower than the roosts; my nests are 12 inches off the floor. If the nesting boxes are higher than roosts the chickens may sleep in the nests, soiling them excessively. The nesting boxes should provide some darkness so the hens can lay in a nice, safe spot. Each nest may be used by as many as five chickens so a few nests will accommodate many birds.

My nesting boxes are built on the outside of the main coop area. This provides more living space for the chickens in the coop and provides the out-of-the-way, dark space for layers. This design makes collecting the eggs easy too because a hinged door allows egg collection without entering the coop.
Picture
Sturdy construction will support chicken weight
A latch on the nesting box door keeps predators and children from accessing the eggs. For an outdoor coop in cold regions, having the nesting boxes inside the main coop space conserves heat, but an exterior access door can make egg collecting easy.
Picture
A latch keeps out undesirables
For chickens without outside access, the coop needs a chicken door. The door should be about 12 inches tall so they can move in and out easily. It should also close when necessary. Chickens will sleep at night, the same time many predators are on the prowl. A door that that be shut at night offers needed protection.
Picture
Outside view of the chicken door
I designed my chicken door so it can be opened and closed from outside the coop. For now I'll have to open it in the morning and close it at night. Chickens instinctively return to their roost when it gets dark and automatic door openers are definitely an option. Having an automatic door system can save time and effort when it comes to chicken care, but they add to the construction cost.
Picture
Sliding door system

Coops can be designed in many shapes and sizes. I've seen coops that are replicas of the owner's house. Pre-fab sheds work great. Using supplies you already have reduces cost; my coop cost less than $100 and most of that was on hardware like hinges, latches, and handles because I already had most of the building material. The finished coop can be painted, but chickens don't care what it looks like.

Many coops for purchase seem outrageously expensive to me. They're smaller, less sturdy, and not as efficient as one designed for a specific chicken owner. If you want chickens, consider their needs and think about building your own coop. There are many resources available to help.

For more info, take a look at:
 
backyardchickens.com
mypetchicken.com
 

8 Comments

Raising Chicks

4/6/2012

6 Comments

 
Raising chicks is a lot like raising kids. At first they're small, fragile, cute, and everyone wants to hold them. Then before you know it they’re gangly and stinky and eating you out of house and home. You still love them, but much of the overt cuteness is fading and you can't wait until they move out on their own.

Chicks don't take nearly as much of your time and money as your kids, but they still need a lot of attention. The first month of a chick's life is critical to their health and future success. With proper planning and preparation it's relatively easy to raise chicks. Our three chicks are doing just fine and are still pretty easy to look at.
Picture
Our chicks at two weeks
Baby chicks need food, water, space, and heat. Their home for the first few weeks is usually a brooder, a house specifically designed to raise chicks. I built a brooder to accommodate all of their early requirements, but many other systems can be used, like a cardboard box, a pet cage, a big plastic bin, or a horse trough. Unless you want to move them when they’re bigger the brooder should be big enough to allow two square feet per bird.

My brooder is two feet wide and four feet long, big enough for four comfortable chicks as they grow. Their house should be at least 12 inches tall. I recommend higher and made my brooder two feet tall. The chicks will experiment with jumping and flying as they grow and the extra height gives them room to exercise while reducing the chance that they can fly out. 
Picture
My wooden brooder
The brooder can be located almost anywhere. A spot that is easy to get to makes your efforts easier. Mine is in our guest bedroom. I'd planned to put it in the barn but during a cold spell last month I determined I couldn't keep it as warm as it needed to be.

Heat is the most important factor in a successful brooder. Sure, you can argue that water and food are more important; that's obvious and a given. But heat is critical to their early survival. Baby chicks need an air temperature of 95 degrees in their first week of life. In the second week it drops to 90 degrees. Then 85 degrees the third week and so on until they're ready to move to their permanent coop at five or six weeks old. Only a properly-designed brooder can provide the necessary heat.
 
Use a heat lamp to provide the high temperatures. Some sources say you can use a 60-watt or 100-watt incandescent bulb, but unless you have it fully enclosed in a small cardboard box it won't generate nearly that much warmth. A 250-watt infrared heat lamp is the only way to guarantee the heat. I recommend a red bulb. The heat lamp needs to be on 24 hours a day and a white bulb provides continuous daytime which can interfere with the chicks' effort to sleep; red is darker and gives them some rest. Also, chicks are attracted to red and have a tendency to peck each other. If blood is drawn, other chicks can continue pecking the injured bird, potentially to death. A red bulb makes a wound virtually invisible and reduces the chance of chicks hurting each other.

Because the brooder temperature needs to change each week it's design should allow for the heat lamp to be moved as necessary. Before the chicks ever saw my brooder I used a thermometer to measure the temperatures at different spots with the heat lamp in different positions. Initially it was suspended inside the brooder to generate 95 degrees in one corner. It gradually changed until at one month it is mounted outside the brooder with the bulb pointed inward. I continue to monitor the temperature with a thermometer to keep it where it needs to be.

Chicks will self-regulate their body temperatures. If they huddle together under the heat lamp it demonstrates that they're too cold; you may want to lower or move the heat lamp for more heat. If they are hanging out far away from the lamp and away from each other, with wings spread and panting, they're too hot; you should raise the lamp to reduce heat. If they're walking around the brooder pecking curiously, they're comfortable and happy.

While they're walking around, water and food need to be available constantly. You can use bowls and pans, but I recommend the specific waterers and feeders that are designed for chicks. Chicks don't know not to step in or poop in their water and food. While an open dish is quickly soiled, a chick feeder has little holes designed for their little heads to peck food. An open water pan can actually drown a small chick while a chick waterer is designed to give each chick access to water without the opportunity to swim in it.
Picture
Chicks with water, food, and heat lamp
Chicks have specific nutritional needs and buying chick feed is the only way to provide it. There's no way you can supply the necessary nutrition if you try to feed them with kitchen scraps. They'll need chick feed for at least the first four or five weeks before they can graduate to different chicken feed. Specific bags of feed will tell how long it should be used before moving on to a "grower" feed. The feeder should stay full so food is always available. A dilemma arises in whether it should be medicated feed.

Coccidiosis is a deadly chicken disease. Some chick providers will vaccinate chicks against it, but if yours aren't vaccinated, medicated feed is recommended. Coccidiosis is spread from animal to animal and your chicks may have been exposed at their place of birth. Medicated feed is only needed if they aren't vaccinated and is an easy way to help keep them healthy.
Picture
Young chicks feeding together
Fresh water is important. Chicks will hesitate to drink dirty water and can become dehydrated quickly. Since they do everything they can to dirty the water you give them, you'll need to change it many times a day. Initially the waterer should be at floor level so the baby chicks can drink it. As they grow plan to raise the waterer on blocks of wood or boxes so it is closer to the level of their heads. Do the same with the feeder.
Picture
Bigger chicks with raised, fresh water
A brooder should have absorbent bedding material. I use a thick layer of pine shavings. Cedar shavings aren't recommended because the aromatic oils in the wood can cause respiratory problems in the chicks. Some say pine can cause similar problems, but I haven't seen that. The bedding will be pecked and kicked as the chicks move around. Expect it to end up in the waterer and feeder, another reason to raise them as the chicks grow; it reduces how trashy they get.
 
Many people immediately think newspaper is an option for bedding because we're used to lining bird cages with newspaper. Newspaper by itself can get slippery when wet and slippery conditions can lead to a condition called "splayed leg" in chicks, a deformity that permanently affects the way the chick will walk. That deformity can cause the chick to be picked on, literally, by other chicks and can even result in being pecked to death.

Because "splayed leg" syndrome happens very early on, after the first week I use a layer of newspaper underneath the pine shavings. It helps keep the brooder cleaner when the chicks start kicking around the pine shavings and makes clean up easier. And easy clean up is important.

Chicks poop. A lot. And it increases as they grow. They don't care where they are when the urge strikes and the entire brooder will quickly become a mess. Having newspaper as a base allows me to pick up the messy shavings in a big mass to be distributed on the compost pile.

Depending on how many chicks you have, cleaning the brooder is a weekly event when they're small, particularly in a big brooder like mine. Lots of shavings effectively absorbs the amount of poop they produce. As they get into the teenager phase at about three weeks old cleaning needs to happen more often. Besides giving them a healthy environment, cleaning the brooder reduces the smell and depending on where you have your brooder smell can be an important and noticeable factor in your comfort.

A few other options should be considered when you're raising chicks. Birds need coarse material to aid their digestion. Chicks should have sand or parakeet gravel. You can provide it in a separate bowl but they'll probably knock it over quickly and your efforts may be wasted. I suggest adding it to their feed by sprinkling some on top when you add new feed.

Also adding a perch to the brooder when they're a few weeks old can give them a new toy to experiment with. Chickens will naturally roost on high spots. Training chicks on a low roost will get them ready for the roost you have in their permanent coop and may keep them off the feeder when they get big. A perch that is about four or five inches high is a good way to start. Half-inch dowels can be used as long as they won't spin when the chicks climb on. I use 1" x 2" wood mounted to 2" x 4" blocks. The top of the 1 x 2 is the thin portion, sanded with rounded edges so there are no splinters.

One of my chicks began roosting on the new roost after the first day. They all hop on it throughout the day. I'll raise it a little in the next few weeks to get them used to a higher roost. It's not a necessary part of a brooder but it's a nice addition.
Picture
Checking out the new roost
If the days are nice and warm, you can give them some outside time beginning when they're about three weeks old. They should be in a fully protected cage or structure that provides water, food, and shade if it gets too hot. They can actually fly so don't give them the opportunity to escape. If it gets cloudy or windy they'll soon get cold so bring them back to the comfort of the brooder. Don't leave them unattended during an outdoor excursion.

After about five weeks the chicks should be ready to release into their coop. You'll probably be very ready for that transition. If the birds start pecking and fighting when they're older it may be because the brooder is too small for them. The exact date you move them depends on the weather and coop conditions. They should still have a warm environment with ample water and food and moving them to an unheated coop too early can affect their comfort.  More on coop transition in the next chicken article.

Raising chicks is a time-consuming activity. You can't leave them unattended for a few days and expect that they'll be okay. During the important first month you'll need to watch after them daily, and many times during each day. Don't plan a vacation during that time. Remember that a happy chick is often a quiet chick. Lots of loud chirping means they're not happy. It takes work to keep them happy and healthy but it's worthwhile. Soon you'll have full-grown chickens.


6 Comments

Getting Chicks

3/19/2012

2 Comments

 
We got our chicks yesterday. My wife and I had been holding out for the chick arrival at a nearby feed store in a few weeks, but we journeyed to a different farm and ranch supply and decided to buy three small, energetic, balls of fluff on the spot. I'd avoided the urge a few weeks ago, despite their uncontrollable cuteness, because the store employees had no idea what breeds the chicks were. The other, local feed store staff knows precisely what they are getting, but we've been chomping at the bit to get chicks and didn't want any more delay so we decided to take the plunge into the unknown.
Picture
Our new baby chicks
Last year I wrote about choosing specific breeds of chickens for specific purposes (see the bottom of the page). We live in a very cold region, want lots of eggs, and have grandchildren that will play with the chickens. Not every chicken breed can handle the cold, will lay in quantity, and are calm and social enough to tolerate kids. After researching their differences, I selected a handful of breeds that fit easily into all three of those categories.

By buying chicks without a known pedigree, we were putting ourselves at risk for choosing chickens that are inappropriate for our plan. But, gosh, they sure are cute.

I was also determined to get female chicks, or pullets, because laying is our primary reason for getting chickens. When you purchase chicks you typically have two options: buy "straight run" chicks that are pulled straight from the incubator after hatching and are a mix of male and female chicks; or buy "pullets" that have been sexed by an expert to identify them as female. The sexing process adds about a dollar to the price of the pullets, but I think it's worth it to avoid the 50/50 chance that a straight run chick might turn into a rooster.

But my wife was in a gambling mood and thought it would be fun to try a straight run chick. So we went home with two unidentified pullets and a chick of unknown sex.

The brooder was ready for them. I built it a few weeks ago in preparation of our inevitable purchase. With the food, water, heat lamp, and shaved wood bedding in place, my wife placed them in their new home and we stood back, grinning, like new, proud parents.
Picture
Chicks in the brooder
And like a proud papa I took photos of the event. Partly to document the process, but also to start working on the identification of these unknown orphans. Like a TV detective, I started combing the internet for clues.

A bit surprisingly, I didn't find a central database for baby chicks. Most of the photos and identification charts have been compiled by average people who like chickens and put together websites on the subject. Most just document a few different breeds. Even many of the university or extension sites link to these website efforts of passionate chickeners. One of the best is feathersite.com. It offers pages of chick photos for comparison.

Two of my favorite sites, mypetchicken.com and backyardchickens.com, have great photos but you have to know what you're looking for to begin. They don't have the grand chart that shows all of the different chicks side by side so you can look and decide. Like feathersite.com, you enter with the name of a breed and then see what the results are.

Luckily, because on my earlier research, I had a basic idea of what chicks we had. At least enough of an idea to make the search relatively quick.
Picture
Rhode Island Red chick

The first chick I confirmed is a Rhode Island Red. This is good news because this was one of my finalists in the chicken selection competition I conducted last year. They're good layers, are friendly, and handle cold well.

Picture
New Hampshire Red chick

The second chick was a little more difficult to identify because it looks like so many other chicks in a blind, random internet search. I'm pretty sure it's a New Hampshire Red. This news isn't as good, but isn't bad. Though New Hampshire Reds were derived from Rhode island Reds, they tend to produce fewer eggs. However, they can handle the cold and are friendly.

Picture
Easter Egger chick
The third chick, the possible rooster, was the hardest to figure out and I'm pretty sure, but not positive, that's it's an Ameraucana or Easter Egger. Those names are often used interchangeably and depending on the source each is the preferred title; it depends on how purebred they are. This breed just missed the cut on my earlier list so it's not a bad determination. Easter Eggers are friendly and calm and lay colored eggs, perfect for grandkids.

So it looks like our impulse buy turned out okay. I think I might still get a couple more chicks from the feed store when they come in, assuming they are among my top-five choices, but for a starter flock these three will work fine.

Now the day-to-day chicken chores begin. They need regular and clean food and water. They also need lots of warmth and cleanliness in their home. I have little doubt they'll get much attention and love.

I'll write about the entire chicken journey as it progresses. It's already great fun.

Link to:
 
My "Choosing Chickens" blog
feathersite.com chick page
backyardchickens.com
mypetchicken.com

2 Comments

    RSS Feed

    GardenerScott

    Join me as I discuss gardening subjects and take a look at gardens past, present, and future.

    Blog Categories

    All
    Animals
    Biochar
    Birds
    Chickens
    Compost
    Crafts
    Deer
    Environment
    Flowers
    Fruit
    Gardens
    Gifts
    Growing
    Harvest
    Herbs
    Inspiration
    Irrigation
    Lawn
    Mulch
    Pests
    Planning
    Planting
    Plant Selection
    Preserving
    Propagation
    Pruning
    Recycling
    Reviews
    Seeds
    Sites To See
    Soil
    Tomatoes
    Trees
    Vegetables
    Watering
    Weather
    Weeds

    Archives

    April 2018
    December 2015
    March 2014
    November 2013
    October 2013
    August 2013
    July 2013
    June 2013
    April 2013
    March 2013
    February 2013
    January 2013
    December 2012
    November 2012
    October 2012
    September 2012
    August 2012
    July 2012
    June 2012
    May 2012
    April 2012
    March 2012
    February 2012
    January 2012
    December 2011
    November 2011
    October 2011
    September 2011
    August 2011
    July 2011
    June 2011
    May 2011
    April 2011
    March 2011


Web Hosting by iPage