Biochar enhances plant growth and is ideal for short-season gardens. In my experimental garden bed, biochar added an extra two weeks to my harvest schedule. For many of us who grow in challenging regions, that can be more than 10 percent of our growing season.
Biochar is reported to improve the development and growth of plants. Most of the benefits have been reported through anecdotal evidence so I decided to conduct as scientific an experiment as I could to prove or disprove the claims. I've written about biochar before and about the beginning of this experiment (see my article "Using Biochar in the Garden", June 4, 2012).
I was convinced by others on the internet that biochar could improve my garden, but I wanted to prove it to myself, and others looking for statistical analysis. With a calendar, metric ruler, and scale, I set out to document the effectiveness of biochar. I must acknowledge that a new friend, the daughter of very good friends, is a strong advocate of biochar and is a director at Soil Reef Biochar, a company selling and marketing the product. That had no effect on my analysis.
Using 100 percent biochar from Soil Reef Biochar, I amended the soil in one half of a four feet by eight feet raised bed. As a control effort, the other half of the bed remained unamended, aside from an addition of compost that the entire bed received one year earlier. As mentioned in my earlier article, I inoculated the biochar with beneficial bacteria. After amending the soil I let the bed rest for three days, keeping the bed's soil moist in the process.
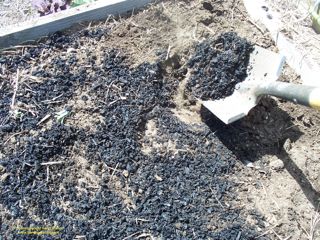
Amending with biochar
In each four feet by four feet half I placed 24 'Straight Eight' cucumber seeds at the recommended depth, spaced approximately six to eight inches apart in a grid. 'Straight Eight' is a common slicing cucumber that I've had success with in the past. Normal germination ranges from 3 to 10 days with about eight days being the norm. Maturity is reached in about 50-75 days with about 60 days being the norm.
The growing season in my garden at 7500' elevation (2285m) is short, typically ranging from 110 to 130 days. Late frosts are common in spring and delay sowing and planting of warm season plants. My seeds were sowed on May 30, 2012, and I began the diary of plant development at that point.
The first obvious difference in the biochar side of the bed began with the germination time and rate. On June 3, five seedlings broke the soil surface. That is four days after placing in the soil, half of the typical germination time. The first non-biochar seedling appeared on June 4, but the biochar germination rates exceeded the other half. Here are the results for the germination of each side:
Biochar seedlings Control group seedlings
June 3 (Day 4) 5 0
June 4 (Day 5) 13 1
June 5 (Day 6) 19 13
June 6 (Day 7) 23 16
June 7 (Day 8) 23 18
June 8 (Day 9) 23 19
All of the biochar seeds sprouted earlier than the expected germination time. After nine days, 23 of the 24 seeds sprouted on the biochar side, a 96% germination rate. Only 19 of the 24 in the control group sprouted, a 79% rate. The soil was kept consistently moist on both halves and no pest damage was evident. There is no clear reason for the lower germination rate of the control group.
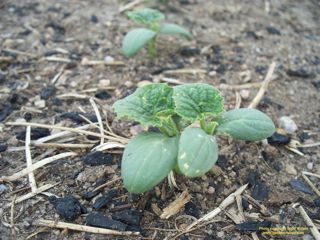
Cucumber seedlings in biochar soil
It's obvious that the biochar plants got an earlier start than the control group and that advantage carried through for the rest of the experiment.
On June 25 (Day 26), I measured the height of all the plants. The average height of the biochar cucumber plants was 7.53 cm. The average height of the control group was 5.34 cm. In an effort to avoid skewed numbers, I deleted the measurement of the smallest and tallest plants in each group before averaging. The biochar plants were 41% taller than the control plants.
On June 25 (Day 26), I measured the height of all the plants. The average height of the biochar cucumber plants was 7.53 cm. The average height of the control group was 5.34 cm. In an effort to avoid skewed numbers, I deleted the measurement of the smallest and tallest plants in each group before averaging. The biochar plants were 41% taller than the control plants.
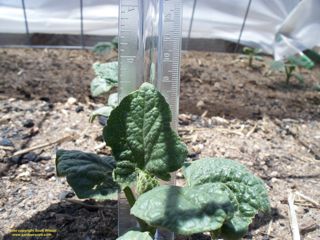
Measuring a seedling
At this point I thinned the plants to 14 in each half of the bed. Each section's plants were staggered in four rows spaced about one foot apart. This spacing is closer than commonly recommended, but not out of the ordinary. It does add a minor stress factor.
All of the plants were watered at the same rate and received addition of a balanced liquid fertilizer on days 26 and 37.
On July 6 (Day 37), I measured the plants again. The biochar plants averaged 16.2 cm and the control plants measured 12.22 cm. The biochar plants were 33% taller than the control plants at this point.
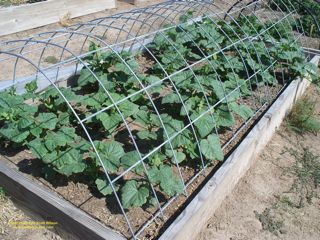
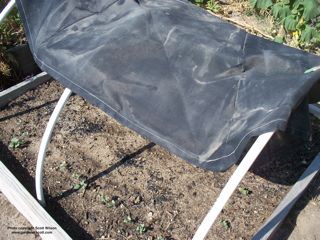
The test bed
The first flower appeared on a biochar plant on July 15. The first flower in the control group appeared on July 21; eight flowers were on biochar plants at that time. That six-day difference continued the trend of accelerated growth in the biochar plants.
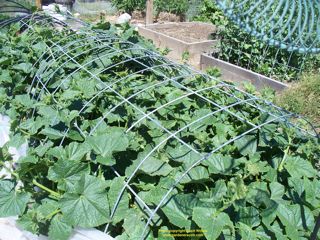
Cucumber plants nearing harvest
All of the fruit was harvested when it was at least 18 cm (7 inches) long. The average in both groups was 19 cm (7.5 in) at the time I picked them. I harvested the first fruit on a biochar plant on August 10 (Day 72). The first fruit on a control plant was harvested on August 22, 12 days later.
The accelerated growth in the biochar bed allowed me to begin enjoying juicy cucumbers almost two weeks earlier than a standard garden bed in my garden. I harvested four biochar cucumbers before I picked the first one in the control group.
It should be noted that the maturity/harvest point of the biochar cucumbers was at 72 days, at the high end of normal maturity and past the expected 60 days. The control group reached maturity/harvest at 84 days, well past expected maturity. This isn't unusual in a high-altitude garden. Our summer nights are cooler than gardens at lower elevations and this temperature variation delays maturity of many warm season plants.
I expected that the biochar cucumbers would be bigger and more robust that the control group, but that wasn't the case. The average biochar cucumber was 19.14 cm long and weighed 272.2 grams. The average control cucumber was 19.02 cm long and weighed 279.1 grams. The control group cucumbers were about 2.5% heavier, but that isn't statistically significant with my measurement methods. Basically, the cucumbers in both groups were about the same size at harvest.
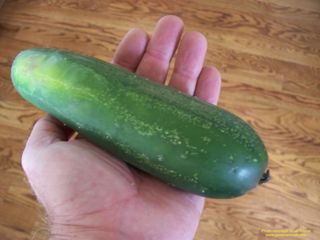
A biochar cucumber
Ultimately I harvested 13 cucumbers from the biochar plants and 12 from the control ones. The stress of growing the plants close together reduced the potential number of fruit, but that was partially intentional so I wasn't overrun with cucumbers to measure. I was also on vacation for 10 days during the middle of the experiment and our house sitters enjoyed a few cucumbers that weren't measured.
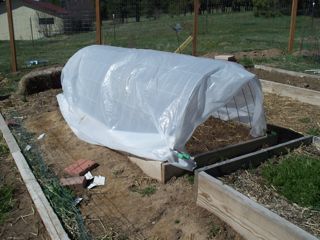
I had the first frost damage to my garden in the middle of September at about 110 days into the growing season. Though I covered the cucumber bed with plastic and was able to keep the plants alive for a few more weeks, the cooler weather effectively ended new growth and flower and fruit development. There were still a number of cucumbers, of varied sizes, on the vine when I let them succumb to the climate.
I think the results of this experiment are clear. Biochar speeds and enhances germination in cucumbers. The earlier germination and effect of biochar in the soil leads to greater plant growth rates. This enhanced growth results in earlier flowering, fruiting, and harvest in biochar-amended garden beds.
Biochar offers a clear advantage to gardeners like me who have concerns about short growing seasons. For gardeners in warmer climates and more gardener-friendly regions, two weeks of extra harvest time may not seem like much, but for me it's substantial. My tomato beds are almost always two weeks short of reaching full maturity.
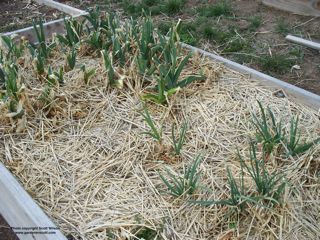
We can infer that the results of this experiment with cucumbers can be carried over to other plants in the garden. I've started another experiment using biochar in one bed of cool season plants and no biochar in another bed of the same plants. The biochar plants are already larger than the others.
Next year I'll add biochar to my tomato beds and I anticipate bigger growth and earlier harvests. I plan experiments to determine if the ultimate harvest amounts of biochar beds is larger than non-amended ones.
Biochar adds an exciting component to gardening. As advertised, it does influence the growth of plants in a very positive way. Currently about 10 percent of my garden is amended with biochar. I look forward to the day when all of it is enhanced.
I had the first frost damage to my garden in the middle of September at about 110 days into the growing season. Though I covered the cucumber bed with plastic and was able to keep the plants alive for a few more weeks, the cooler weather effectively ended new growth and flower and fruit development. There were still a number of cucumbers, of varied sizes, on the vine when I let them succumb to the climate.
I think the results of this experiment are clear. Biochar speeds and enhances germination in cucumbers. The earlier germination and effect of biochar in the soil leads to greater plant growth rates. This enhanced growth results in earlier flowering, fruiting, and harvest in biochar-amended garden beds.
Biochar offers a clear advantage to gardeners like me who have concerns about short growing seasons. For gardeners in warmer climates and more gardener-friendly regions, two weeks of extra harvest time may not seem like much, but for me it's substantial. My tomato beds are almost always two weeks short of reaching full maturity.
We can infer that the results of this experiment with cucumbers can be carried over to other plants in the garden. I've started another experiment using biochar in one bed of cool season plants and no biochar in another bed of the same plants. The biochar plants are already larger than the others.
Next year I'll add biochar to my tomato beds and I anticipate bigger growth and earlier harvests. I plan experiments to determine if the ultimate harvest amounts of biochar beds is larger than non-amended ones.
Biochar adds an exciting component to gardening. As advertised, it does influence the growth of plants in a very positive way. Currently about 10 percent of my garden is amended with biochar. I look forward to the day when all of it is enhanced.


 RSS Feed