GardenerScott.com
  • Home
  • How-to Videos
  • GardenerScott Blog
  • Photos
  • Tips & Tricks
  • Contact Me

Get Rid of weeds Before They Grow

3/31/2011

13 Comments

 
Picture
Few gardeners enjoy weeds. Like most problems, we wait until they're in our way before we deal with them. Spring offers a great opportunity to eliminate weeds. Today, the weeds I'm talking about are the ones we all recognize as problems in the lawn.

When confronting these nuisances, it's important to remember that weeds are plants and they have the same life cycle of all other plants. There are annual weeds and perennial weeds. Knowing which kind you have can help you battle them appropriately too.

The first action you can take in the spring is the application of pre-emergent herbicides. They work well at controlling some of the seasonal weeds. You'll often see them packaged as "weed and feed" products where a pre-emergent herbicide is combined with a fertilizer. The herbicide hinders growth of weeds while the fertilizer encourages growth of grass.

Pre-emergent herbicides are chemicals that keep weeds from growing. Note that they don't kill established weeds or the seeds, they just keep new weeds from growing, usually by affecting germination of the seed. Most importantly, they need to be applied before the weed is growing. If you wait until you see weeds, it's too late to apply a pre-emergent herbicide. Also, if you apply them too early they can dilute or dissipate and have no effect when weeds begin to grow.

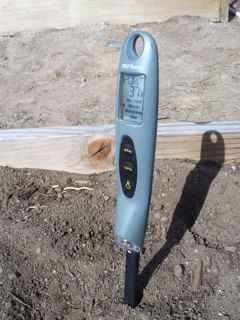
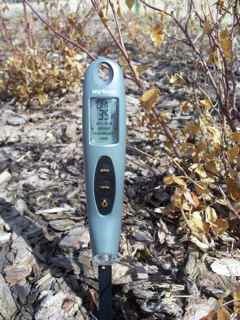
When average soil temperature reaches about 50 degrees, some time between March 15 and April 1 in most areas, weeds like crabgrass and clover beginning emerging. Pre-emergent herbicides are specifically designed for those summer weeds. So now is a good time to apply them; waiting much longer will lessen their effect. In cooler areas like mine, it's okay to wait as late as April 15. In very cold regions you can wait until May 1 and in warm areas you might want to apply as early as March 1. 

Yes, I know you missed the opportunity if you live in a warm region, but you can save yourself time and effort by realizing it's too late. Applying a pre-emergent herbicide now will do no good.

To determine the best time to apply a pre-emergent herbicide in your yard, think about next year. Note when the weeds start growing this year, subtract two or three weeks, and choose that date as the time to apply the herbicide next year.

Also, be aware that a pre-emergent herbicide is not picky about the seed growth it hinders. That's valid for grass seeds too. If you plan to re-seed your lawn, think twice about pre-emergent herbicides. Any grass seed you sow will be prevented from growing.

Once weeds are growing, it's time to turn to post-emergent herbicides. These are the ones that are specifically designed to kill the weed after it is already growing. There are two types: selective, which will only kill targeted weeds; and non-selective, which will kill any plant. Herbicide labels will tell you which weeds they are for and when and how they should be applied. Rules for herbicide labels are very strict and they include a wealth of information, so read the label carefully because all herbicides are not created equal.

Selective herbicides like 2, 4-D (Weed B Gon) will kill broadleaf weeds like clover while leaving the slender grass blades alone. Non-selective herbicides like glyphosate (Roundup) will kill the weed, the grass, and any flowers that the mist blows on. Make sure you use the correct one for the weeds you're targeting.

There are natural pre-emergent herbicides too. Corn gluten is the most prevalent and one that you can find at many nurseries. It will be more expensive than chemicals, but achieves the same result using an all-natural component.

For post-emergent action, full-strength vinegar can kill weeds, but it often takes multiple applications. Molasses has also been proven to work on some weeds. Boiling water can kill some weeds, but it isn't very efficient. All of these methods run the risk of killing the grass nearby too.

I don't recommend two methods that you may hear about. Under no circumstance should you use gasoline or kerosene to kill weeds. It harms the environment, is dangerous, and isn't necessary with the other options available. Also, avoid using a blowtorch. A torch will kill weeds but also kills soil microorganisms and any other nearby plants and you also run the risk of starting a fire. In dry areas it should never be considered.

If you don't like applying chemicals of any type, your best option is to take matters into your own hands. Literally. Wait until weeds are growing, but before they set seed, and get out there with a screwdriver or weed puller and dig out every weed you see. There will be uncountable seeds already in place or blowing in from your neighbor's yard, but by physically removing the weed plant you keep it from propagating. Physical removal is best for perennial weeds like dandelions.

The best control for lawn weeds is to maintain a lush lawn. When the grass is well established, it makes it difficult for weeds to gain a foothold. If you are ready to attack weeds before they find a sanctuary, you'll lessen the amount of weed control you need in the future. Focus on growing good turf and your weeds problems will be a distant memory.


13 Comments

What to Plant Before the Last Frost

3/29/2011

7 Comments

 
Picture
Some of the seeds I'm planting before the last frost.
As the snows dissipate and the sun shines longer, gardeners are chomping at the bit to put seeds and plants in the ground. Depending on your location and planting calendar, you can probably get things started now. The key is knowing which plants can handle cold soil and cold nights. The solution is cool season vegetables.

Cool season vegetables are the ones that you can put in your garden beds before the last frost. Early spring planting is ideal. They can handle a light or moderate frost, survive, and prosper. Some of them even prefer a few frosts to develop flavor and provide the maximum yield. Most of them don't like the high temperatures of summer.

Cool season plants that should thrive in cool conditions include: broccoli, Brussels sprouts, cabbage, cauliflower, celery, kale, kohlrabi, lettuce, mustard greens, onions, peas, potatoes, radish, rutabaga, spinach, turnip. Beets, carrots, chard, and parsnips are cool season vegetables that can also handle warmer temperatures of summer.

These vegetables do very well as the daytime temperatures climb in spring. When the thermometer climbs beyond 80 F, they'll begin to suffer. When the days lengthen in summer and the temperatures climb above 85 F, most cool season plants begin to "bolt". That's when the plant sends up a flower stalk, signaling the end of leaf production and the beginning of seed production. Cabbage, lettuce, kale, and spinach will all taste worse after they bolt.

Most of these cool season vegetables do best when planted two to four weeks before the last frost. Individual seed packets will offer guidance for specific planting time. With a little preparation, you can get them in the ground and growing long before the rest of your garden.

Sow the seeds directly into the soil. Check your soil temperature before planting (see my blog on that subject). As long as the soil is above 40 degrees F, the seeds should germinate if kept moist in an amended soil. A few of the plants like cabbage, chard, potatoes, and turnips will do better if the soil is at least 50 degrees F. For best results some of these vegetables do better as young plants rather than seeds; transplant broccoli, cabbage, cauliflower, and onions if you have the option.

The air temperature shouldn't be more than a few degrees below freezing on the coldest nights and should be consistently above 40 degrees F during the day. You can do a few things to help protect the plants while night temperatures remain low. Mulching the young plants with straw or grass can help insulate them and moderate soil temperatures. Row covers will help protect plants from a light frost. If a hard freeze below 28 degrees F is forecast, cover the plants with a sheet or blanket overnight; plastic will work, but can freeze any leaves or plants that it touches.

Picture
One of my early spring planting beds.
I encourage raised beds covered by a mini greenhouse. That's what I'm using. The plastic cover helps generate warmth during the day and reduces the cold at night when the soil radiates its warmth. Even on cold days, the cover keeps the plants warm if the sun is shining. On very warm days, the cover should be opened to allow airflow to keep plants from overheating.

There are perennial vegetables that also fall into the cool season category. Asparagus, horseradish, and rhubarb are great additions to a garden and will return year after year. All three can be planted as soon as the ground can be worked in spring; when it's no longer frozen. They will be among the first of your plants to break ground in future years. Choose their home carefully because they'll become permanent fixtures in your garden once established.

If you have limited room in your garden, cool season vegetables can provide multiple harvests in the same plot. An early planting of lettuce or spinach will provide ample produce for your kitchen. Just about the time they begin to suffer from higher soil and air temperatures, you can remove them and plant tomatoes or squash in the same space. The combination of cool season vegetables early in the season and warm season vegetables later in the season is endless.

Here's another secret to keep in your back pocket. Many of these cool season vegetables will grow well in the fall too. A late summer planting will provide a harvest after the first frost of fall. You may get three different crops in the same garden plot. Look forward to more information about that when I discuss it during the summer. 

For now, enjoy an edible garden with frost on the ground. By the time you start thinking about planting tomatoes, squash, and corn, you'll already have harvested radishes, lettuce, peas and more wonderful, cool season vegetables. It's not too early to begin.


7 Comments

Your Soil Should Be Warm to Sow Seeds

3/28/2011

22 Comments

 
The woman in front of me as we checked out of a major retailer last night had a tree in her cart. At first I thought it was plastic because the blooming flowers that covered its branches looked too perfect.  Upon closer observation, the "flowering tree" label around its trunk identified it as real, probably a flowering plum. As I walked to the parking lot I observed a man helping her load it into the back seat of her Prius and advising, "Don't plant it now." I cringed when I saw the branches with the beautiful flowers hanging out the window.

Unless she drove home at three miles per hour in the 45-degree air, all of the blossoms were left on the roadway before she pulled into her drive. Even if she is patient, stores it in a warm area, and waits until we get through the next few nights with forecast low temperatures of around 22 degrees F, she'll probably want to plant it soon. If she does everything right from this point on, the tree's prognosis is not good; it's too early. I've offered advisories before about avoiding the temptation of pretty plants at big box stores until the proper planting time arrives. Often the best lesson is experience, and the loss of an inexpensive tree.

Most plants prefer root temperatures between 50 and 70 degrees F. That's one reason you have to be careful about planting trees that have broken dormancy and flowering plants from big box stores too soon. Early spring frost is a threat, but cold soil can wither roots, sap energy, and hinder future growth. A weakened plant is much more susceptible to disease and insect infestation.

It's tempting to start planting as the days warm, but be careful. Locally, we've set some new records for high temperatures in the last few weeks and have more warm days this weekend. Just looking at the air temperature it seems like a good time to plant, but what is the soil temperature? That may be more important.

Stick your finger in the soil at various spots in your garden. Do you have to pull it out because the cold is stinging or do you detect warmth? The mass of earth beneath our feet takes longer to warm than the air we breathe. You may assume the soil is warm enough for plants because the sun is shining, but unless you take a few moments to confirm it, you may shock the roots of your new flowering plum or stunt or prevent the growth of your vegetable seedlings.

An inexpensive soil thermometer is a nice garden gadget to own, but any probe will work for temperature confirmation. You need to measure the temperature a few inches below the surface and your finger or a meat thermometer can give the readings you need. Your finger is around 98 degrees F and you can gauge the temperature of things you touch by the relative coolness you feel. A probe thermometer is much more precise however. If your significant other doesn't like the idea of using kitchen tools in the garden, get a soil thermometer.

Picture
The raised bed is 37 degree after days into the 60s.
Seeds need specific soil temperatures to germinate. Many cool season vegetables can germinate with a soil temperature above 45 degrees F, but will do best when it's above 60 degrees F. Warm season vegetables may be able to handle 60 F, but would prefer 80 F. Of course, there is a high end; above 85 and 90 degrees F few seeds will germinate, but we usually don't concern ourselves with that problem in early spring.

Knowing the specific temperature that your seeds need can help ensure germination and growth. Gardener Supply Co. has a nice
online chart that shows what soil temperature various seeds need to germinate. As we approach our last frost date, it's important to be aware that frost is only one factor that affects new plants. If the soil hasn't warmed up enough, seeds won't grow.

Naturally, longer days with more sun will warm up the soil. You can accelerate the process if you want an earlier start to your planting. Laying a sheet of black plastic over a planting area will warm it quickly in a short time. Once you remove the plastic, however, the soil will cool if the air remains colder than the soil temperature. Using a mini green house (read my blog on that subject) to warm the soil and help maintain warmer temperatures will add weeks to your growing season.

How you garden will affect how the soil warms up. Raised beds warm up faster than open soil. Sand and loam warm up faster than clay. Dry soil warms faster than wet. Rich, dark, amended soil will warm faster than average soil. Soil in the sun will warm faster than soil in shade. Soil will warm slower in mulched areas. For the quickest warming, start with dry, amended, unmulched, loamy or sandy soil in a raised bed.

Picture
The temperature near the mulched roses is a few degrees colder.
You can track the progress of your soil's temperature by taking a reading every day. Stick your thermometer a few inches deep, wait for the reading to stabilize, and write it down. If the temperature is constant or increases for three days in a row you can use that as a baseline. If the soil is warm enough for the seeds that you want to germinate and if the air temperature will stay above freezing, you can sow. It's that easy. If the soil or air temperatures are too low, you should wait. Take more readings until you meet the appropriate threshold.

The importance of taking these steps is that they help ensure you're not planting too early. If you traditionally wait to plant until the sun is high in the sky and the trees are fully leafed out, you probably don't need to be taking daily soil temperature readings. But if you want to gain every advantage and sow as early as possible, take the time to monitor soil temperature.

22 Comments

Starting Seeds Indoors

3/25/2011

6 Comments


The seed packs are purchased, the starter kits stand ready, and the date is here. Plant those seeds! It can be exciting, putting the first seeds of the year into soil. It can be a little intimidating and scary too. Most of us have had problems growing seeds indoors in the past and each year we're haunted by fears of spindly plants that won't survive.


If you follow a proven process and take a few precautions, seeds started in your house will give you a marvelous jump start on the growing season.


Begin with clean, sterilized growing containers. If you use store-bought seed starter kits, they should already be clean enough. If you are using pots or containers from years past, wash them, then rinse them with a mild bleach solution (one part bleach to nine parts water). Fill the pots with sterile or pasteurized potting soil. Why is this cleanliness important? One of the biggest threats to young plants is Damping Off Disease (more on that later) and sterilized conditions will minimize it.


Ready for seeds.


The soil in the containers should be moist and warm. Peat and most potting soils need to be wet before planting. If you put dry potting soil into a pot and then add water, not all of the soil will be moistened. Mix the soil with water in a separate container and then put the moist soil into the pots. Let the tray of peat pellets or starter pots sit for at least a day in the room you'll have the plants in. Most seeds don't like cold soil.


Using pre-moistened potting soil.


Follow the directions on the seed packet as to the depth of planting. Using a pencil, chopstick, or your finger, dig out a little hole in the soil to the appropriate depth. Sprinkle a few seeds in and around the hole and lightly cover them with soil. Continue doing this with each of your pots.


Preparing the hole.

Planting seeds.


When you have the entire flat or group of pots planted, spray the soil surface with a mist of water. You don't want to drown them, you want to moisten any of the surface that may have dried out.


Misting the soil surface.

After watering, cover the pots with plastic. Starter kits are nice because they have a fitted cover that matches the base. If you're using separate pots or flats with no top, cover them with plastic bags or plastic wrap. The intent is to keep the growing environment humid. One of the easiest ways to kill germinating seeds is to let them dry out.


Covered and humid.

At some point you also want to label the pots so you know what you planted. Don't trust your memory (I know I can't). Drawing your seed plan on a piece of paper, marking the flats with marked tape, or using labeled popsicle sticks are just some ways to note which seeds went where. Don't think you'll be able to recognize the plant right away. Most seedlings look alike for the first few weeks.


Labeled with masking tape.

Set the pots in a warm, well-lit area and wait for the seedlings to emerge. You probably don't need to water very often in the beginning. The plastic covers should keep conditions moist. If you can see condensation on the inside of the cover, the conditions should be good. Do a physical check of the soil surface at least once a day and spray a mist of water to keep it moist if there is any sign that it might be drying. You don't want the soil to be saturated, just evenly moist.

And that's all there is to starting seeds indoors.

Now a little about Damping Off Disease. There are a number of fungi that naturally occur in soil. When given warm, moist conditions, they grow well and can infect seeds and seedlings. Some plants are killed by a fungus before they emerge from the seed, others are assassinated after they start to sprout leaves. If you have sprouts and they disappear the next day, it's probably Damping Off Disease. If a seedling suddenly develops a very narrow waist right at the soil line right before it dies, it's probably Damping Off Disease.

Drier growing conditions, good air circulation, and sterile soil can all help prevent it. That's why I suggest you avoid saturated soil and why I recommend starting with clean containers and clean soil. Air circulation becomes more important after the seedlings emerge. You can buy fungicides to spray on the soil and plants, but I find good cultural practices work well.

After the seeds are planted and watered, it's time to wait. Have patience. Germination times vary depending on the plant and most seed packets will tell you how many days it takes the seeds to germinate. One day you'll have brown soil and the next you'll have little green plants popping out. That's always exciting.

The steps after seedlings emerge are important and I'll cover them in another article. The most important step is putting the seeds into soil. Everything else depends on that. If you haven't yet, take a calendar and determine when you'll put plants in your garden. Take a look at the seed packet to see when it recommends starting seeds indoors. Then work backward in your calendar and determine the day to plant seeds in your starter pots. If that day has passed, you're late. If it is coming soon, prepare your pots and make it happen.


6 Comments

Picking Peat Pots

3/23/2011

32 Comments

 
Peat pots offer an easy way to start planting your seeds indoors. I using the generic term peat pots to talk about a few different products, all designed to make planting easier. Technically a peat pot is peat that is compressed and formed into the shape of a pot. Like any other planting pot, you'll need to add potting soil. The advantage comes at planting time when the entire pot can be put in the ground with the plant.

I'm also referring to peat pellets. A peat pellet is peat that is compressed into a small disk. When the disk is watered it expands into a cylinder that is ready for seeds. There is no need to add potting soil as the peat acts as the growing medium. Like the pots, the entire thing can be planted in the ground.
Picture
A compressed pellet on the right and fully expanded on the left
Let's back up and discuss peat. Peat is partially decayed plant material that usually forms in very wet conditions like marshes, bogs, and swamps. As plants in those areas die and fall to the ground, they begin to decompose, but because of the high water content and resulting lack of oxygen, decomposition slows or stops. More plants grow, die, and fall on top of the partially decomposed vegetation. This process continues with new layers building on top of the others.

Peat is harvested from these bogs and swamps for many uses worldwide. As an agricultural product, peat has the important ability to retain soil moisture and as a amendment helps improve soil structure (see my blog "The Dirt on Soil"). It can hold nutrients, though it doesn't offer plants any of its own. As a short-term growing medium, it provides seeds with relatively consistent moisture and some nutrients.

When you buy and use peat pots you're using a product that was shredded, cleaned, ground, and pressed by the pot manufacturer. The primary reason is to offer you a simple way to start seeds. 

They are easy and becoming more so. Almost every store I visit (grocery, home improvement, or retail) offers complete growing kits available for home gardeners. They include a plastic tray to hold peat pellets, the pellets, and a cover to hold in moist air. If you don't have one of these kits and you plan to start seeds indoors, I suggest buying one. Though the peat pellets are intended for one-time use, the plastic base and cover are reusable. I still have a plastic kit I purchased years ago; that's what I put my newspaper pots in.
Picture
Fiber pots, a tray with newspaper, pots & a tray of peat pots
Picture
Two sizes of peat pellets, expanded
The peat pots and pellets come in different sizes and shapes. Square pots and round pots work equally well, though square ones may be a little more stable if you have a large quantity of them lined up next to each other in trays. Pellets will all grow into a tall cylinder, but the little pellets don't expand as much as the large pellets. Choosing the size of pot/pellet should be dependent on what kind of seeds you're planting.

Because the intent is to plant the pot and seedling together, you want to choose a pot/pellet that will be big enough to handle the new plant's growth. You can sow a seed, let it grow in a small pellet, and then transplant it to a larger pot, before ultimately planting it in the garden, but why not save a step and start with a larger pot in the first place. For that reason the smaller pellets are best suited for small plants or for seeds that will only spend a few weeks inside before being placed in the garden.

When you do place the pot and plant in the soil be sure that the entire pot is in the soil. Any part of the peat pot that is exposed to the air will dry out. Because of its water absorbing ability, it then acts as a wick, drawing moisture from the soil into the dried peat section. The soil around it will dry out faster and plants will be deprived of water. That's not a good thing.

When using peat pots, I usually tear off the top inch or so of the pot before planting. That ensures the pot is entirely in the soil and won't act as a wick. Peat pellets don't pose the same problem, but I make sure the entire pellet is below the soil surface.

Peat pots offer definite advantages. If you use peat pellets you can avoid the mess of dealing with potting soil. Because the peat is partially decomposed to start with, it will continue to decompose in the soil after planting. In the soil, roots are able to grow through the walls of the peat pot and pellets. By placing the entire pot/pellet in the ground you won't expose plants to the root shock that usually happens when you transplant them from plastic or terra cotta pots.

There are a few limitations. Because the pellets are entirely peat and because peat doesn't offer a lot of fertility, seeds may not grow as fast or as big as in good potting soil. Though the pots are designed to decompose, in a dry area of your garden it may take awhile; I've tilled up pieces of peat pots from the previous season or earlier. Decomposition requires nitrogen and as the pots/pellets decompose they can rob nitrogen from your plants. Be ready to use a high nitrogen fertilizer after you put them in your garden.

You can find peat pots in a number of sizes. You can find similar products made from cow manure and some zoos sell pots made from exotic animal manure. You'll also find fiber pots made from variable plant fibers; bigger pots tend to be fiber and they have the basic properties of peat pots though I think they take longer to decompose.

If you haven't tried peat as a starter, give it a try. It's definitely easy. You may find some of the limitations a problem and will need to balance that against the time saved at planting. For a large quantity of seeds, having 36 or 70 pellets in a single tray makes the task a breeze. It's something to consider.

32 Comments

The Shadow Knows

3/22/2011

4 Comments

 
Did your egg stand up on end yesterday? How was your trip to Stonehenge? The Vernal Equinox is that wonderful time of year when a few people may succumb to egg myths or travel to a pagan site to watch the sun rise from due east. This equinox is not when day and night are equal; for me that was March 17. The vernal equinox is that day when the sun is directly over the equator and marks the changing of seasons.

The vernal equinox is special for gardeners in the Northern Hemisphere because it signals the beginning of spring, just as the autumnal equinox signals the start of spring in the Southern Hemisphere. Because of the earth's tilt, our days will get longer and the sun will rise higher in the sky. That change in sun position affects your garden and all of the plants in it.

If you haven't before, begin looking at the shadows in your landscape. Make note of shadow creep in coming days. The shadows that caused snow to turn into ice and stay frozen will shift to new zones. Shadows will creep into spots they haven't covered in months. Areas that basked in the winter sun may soon be awash in shadows with the shifting sun and growth of tree leaves.
Picture
I saw my shadow today.
Think about shadows in your garden. As you create new beds and choose the seeds you sow, you need to be aware of where the shadows will be in June, July, and August; those are prime growing months. Just because your garden bed is in full sun now doesn't mean that it will have full sun at the critical time the plant needs it.

Without this foresight, tomatoes, peppers, cucumbers, squash, and all the other sun-loving plants may have difficulty producing efficiently. Just a few hours of shade during the day can affect fruit and vegetable production in a plant that needs a full day of sun. Think about your gardens in years past. Was low harvest a result of too much shade?

Unless you spend a year marking shadow lines, it may be difficult to select the perfect location of a new bed. You can estimate shadow creep by watching closely over the next few weeks. Place a tall stake in the ground and observe the shadow throughout the day. Do the same thing tomorrow and again next week. Every day you should notice a change. The sun will gradually move to the north and the shadow will move to the south. There will also be a shift to the east and west depending on the time of day as the sun is higher in the sky. If you don't use a stake, look at a tree. Observe the shadow's location on the ground.

Because you'll be planting soon, you need to guess where the sun be be in three months and how shadows will move across your garden. If you have a deciduous tree on the north side of your garden, you may think little of it because the sun has been shining from the south. But as the tree fills with leaves and as the sun creeps north, it may shade a portion of your garden in the morning or maybe in the early evening. That's not a problem if you have plants that like a little early or late shade, but it is for a plant that needs full sun.

Ideally, use the next three months to accurately mark the movement of shadows in your garden.  The next three months are important because shadows will change each day until we reach the
Summer Solstice, at which point the sun reaches its highest point and shadows will start retreating back to where they are today.

Think about your seeds and plants before you put them in the soil. Take a moment to look around at trees and sheds and fences. Look at your shadow and look at the shadow of the tall structures around your garden. Imagine the creep of the shadows over the course of the next three months. If your new plant won't get all the sun it will need, consider putting it in a different location.

Most gardeners focus on the sun when they plant. With the sun comes shadows. Without considering both components you're leaving out critical information so observe the entire process. Today is a good day to begin.

4 Comments

GardenerScott Begins

3/22/2011

3 Comments

 
March 22, 2011 is the beginning of GardenerScott.com. Join me on a journey through the wonderful world of gardening. Travel with me through the four seasons, on adventures of soil, water, and air, and with anecdotes of gardens past, present, and future.

Never hesitate to let me know if you have questions or comments. We're on this journey together.
3 Comments

    RSS Feed

    GardenerScott

    Join me as I discuss gardening subjects and take a look at gardens past, present, and future.

    Blog Categories

    All
    Animals
    Biochar
    Birds
    Chickens
    Compost
    Crafts
    Deer
    Environment
    Flowers
    Fruit
    Gardens
    Gifts
    Growing
    Harvest
    Herbs
    Inspiration
    Irrigation
    Lawn
    Mulch
    Pests
    Planning
    Planting
    Plant Selection
    Preserving
    Propagation
    Pruning
    Recycling
    Reviews
    Seeds
    Sites To See
    Soil
    Tomatoes
    Trees
    Vegetables
    Watering
    Weather
    Weeds

    Archives

    April 2018
    December 2015
    March 2014
    November 2013
    October 2013
    August 2013
    July 2013
    June 2013
    April 2013
    March 2013
    February 2013
    January 2013
    December 2012
    November 2012
    October 2012
    September 2012
    August 2012
    July 2012
    June 2012
    May 2012
    April 2012
    March 2012
    February 2012
    January 2012
    December 2011
    November 2011
    October 2011
    September 2011
    August 2011
    July 2011
    June 2011
    May 2011
    April 2011
    March 2011


Web Hosting by iPage