GardenerScott.com
  • Home
  • How-to Videos
  • GardenerScott Blog
  • Photos
  • Tips & Tricks
  • Contact Me

The Best Tips for Growing Tomatoes

3/22/2014

22 Comments

 
Tomatoes are the number one home garden crop in the United States. As a result, tomatoes are the home crop that can cause the most trouble for gardeners; something is always wrong with our tomatoes. We all want the perfect tomato, but getting it to harvest can be troublesome. Here are a few tips to help you get the most from your tomato crop by understanding more about this wonderful red (or orange, purple, yellow, or green) orb.
Picture
1. Tomatoes are either determinate or indeterminate.
 
Not all tomato plants are the same so it's important to know what kind you're growing. Determinate tomatoes are also called bush tomatoes. They seldom grow more than three or four feet tall and often don't require any additional staking or support. All of the fruit reaches maturity at about the same time so the harvest will only last over a period of a few weeks. If your plant suddenly stops producing flowers and fruit, even when everything else is perfect, it's probably a determinate variety.
 
Indeterminate tomatoes may also be called vining tomatoes and can grow as much as eight feet tall. They don't produce fruit all at once but rather they provide fewer fruit at any one time, but over a longer period of time. Indeterminate tomatoes will usually give you a harvest until the first frost in fall.

How you grow these different types of tomato can impact how successful you are. For container gardening, like in pots on a patio, determinate tomatoes are the way to go; indeterminate ones can quickly overrun your space. If you like to "put up" tomatoes in quart jars or as tomato sauce, determinate plants will provide a harvest that you can can right away. If you like to have a few tomatoes to enjoy with your meals throughout the summer, indeterminate is the way to go.
Picture
2. Select the best heirloom or hybrid tomatoes for your garden.
 
Many gardeners believe heirloom tomatoes taste better than hybrids. That can be a matter of personal preference, but there are other obvious differences between the two. Typically, heirloom tomatoes have more problems with diseases and pests; hybrids have been developed to overcome these limitations. Heirloom tomatoes tend to take a long time to reach maturity and harvest; hybrids can be selected with very short "days to harvest".

If you have a garden in an area susceptible to tomato diseases, you may want to select a hybrid tomato with letters after its name (like VFN); the letters identify resistance to disease. If you garden with a short growing season, you can select hybrid varieties that will ripen early.

Hybrids tend to follow a pattern of red, round fruit. If you want to grow purple, orange, yellow, or striped tomatoes, you'll probably want to look for unique heirlooms. Determine what you want in a tomato and then find the variety that fits, whether its heirloom or hybrid.
 
3. "Days to Maturity" and "Days to Harvest" are important.
 
Seed packets or plant tags should give you an idea of how long it takes the plant to reach harvest. That is the number of days from the time you put the transplant in your garden, not the time from when the seed was placed in soil. Even a robust plant from a nursery can take more than two months to provide fruit. If you garden in a region with late springs and early falls, you may only have about four months to adequately grow tomatoes (my season is about 134 days). If you select an heirloom plant that takes 120 days to harvest, there will only be a few weeks for harvest before the first frost and if it's an indeterminate plant there will still be many unripe fruits on the vine when cold hits.

Match the plant with your garden for best results. A tomato that takes "80 days to harvest" can provide fruit for two months more than an heirloom beefsteak tomato. Of course, if you have a very long growing season your choices are virtually endless.

4. Tomatoes need sun and air.
 
Selecting the proper location for your tomatoes can make the difference between healthy plants and sickly ones. Tomatoes need full sun; that means at least 10 hours a day and more is better. Even a little afternoon shade can have a big impact on plant growth and harvest. Of all your garden plants, tomatoes should have the sunniest spot.

Many of the disease, virus, and fungal problems that plague tomatoes can be corrected by increasing airflow around the plants. Don't plant too close to other plants. With air circulation the leaves can dry out and not fall prey to the diseases that require moist conditions.
Picture
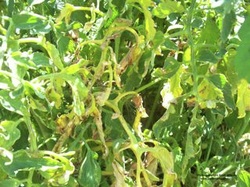
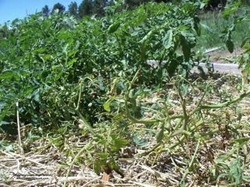
Disease is always a problem
5. Garden soil needs to be warm to plant.

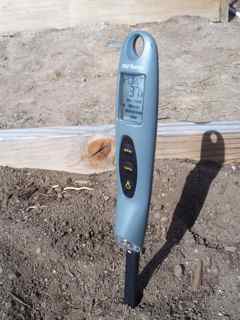
Tomatoes are a warm season plant and need warm soil and warm nights to begin growing. If planted too early, the plants can be stunted and even killed by cold soil temperatures. Some gardeners recommend planting when the air temperature remains above 50F degrees (10C), but that may be troublesome because the soil temperature at root level, six inches and more, can still be below that. Research has found that the best soil temperature is 70F; tomato roots will not grow at all below 50F.

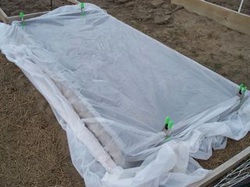
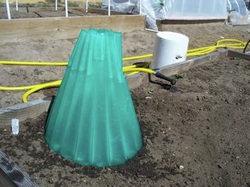
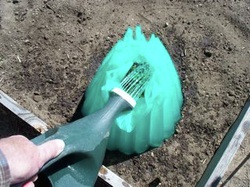
I recommend waiting a few weeks after your last frost date to put in transplants. I also suggest using a temperature probe in your soil. Wait until the soil is closer to 60F to plant; at least 55F. You can accelerate soil warming by covering your garden bed with a plastic sheet for a few days before you plan to dig.
 
Picture
6. Well-drained soil is nice, but amended is better.

Tomatoes do best in amended soil. A well-drained soil is nice to avoid pooling water, but if the water drains too quickly the plant and fruit can suffer. Tomatoes will grow in clay soils as long as they don't remain soggy. The best way to correct poor soil is with organic amendments like compost. A loose, healthy, amended soil will grow bigger and better tomato plants.

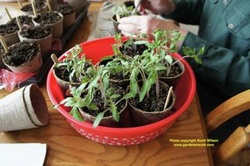
7. Pinch off flowers and fruit when you plant.
 
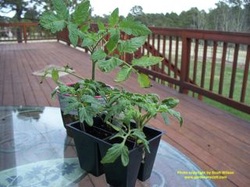
Many gardeners select young plants with flowers or small fruit on them when looking for tomatoes in the belief they'll get fruit faster; nurseries grow and price them accordingly to entice you. You can actually delay the development of future fruit by choosing a too-mature plant for your garden.
 
The main role of the plant is to produce fruit and it will expend most of its energy to that task. However, for new transplants root development is the most important task. If you put a plant with flowers and fruit in your garden bed, root development will be reduced while the plant focuses on ripening the fruit. That means that your plant may not be strong enough to handle the heat of summer and all remaining fruit development can suffer. You'll get a better harvest if you let the plant grow strong in its early days
 
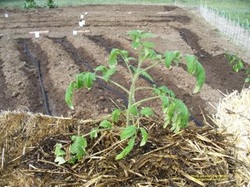
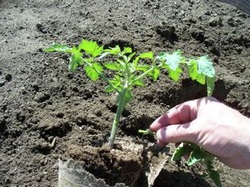
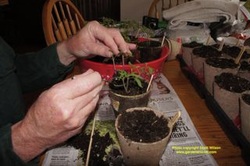
8. Bury the plant when planting.
 
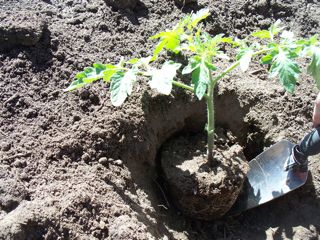
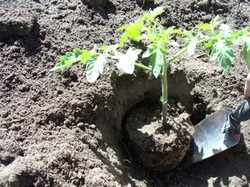
Tomatoes can grow roots along the stem and you should use that ability to your advantage. More roots tend to make for a stronger plant. Placing the plant in the soil with more stem buried than in the original pot will ultimately provide better results.
 
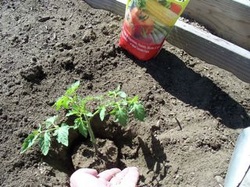
Pinch off lower leaves next to the stem, leaving the top four to eight groups of leaves at the top. If you have amended soil in a region with steady rain, place the plant vertically in a deep hole with only the leaves above the surface. For poorer soil and in regions where your irrigation may be the only water source, place the plant in a slanted trench so that the stem is horizontal; you can gently bend the top towards vertical and hold it in place with a small soil berm.
 
Picture
9. Tomatoes don't need as much water as you think.
 
Consistent moisture levels are more important than amount of water. Many gardeners think of tomatoes as tropical plants that need watering every day. Diseases, blossom end rot, and cracked skins can be the result of poor and inconsistent watering practices. Frequent, light watering can result in poor root systems.

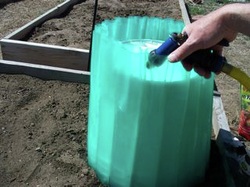
Tomato soil should be moist all the time, but not wet or soggy; think of the moistness of a wrung-out sponge. With amended soil you may only need to water every three of four days. Of course, very hot and dry conditions will require more watering, but physically check the moisture level of the soil before assuming more is needed.

10. Overhead watering can encourage disease problems.
 
When you water, try to avoid sprinklers or hand watering from above. Almost all of the diseases that affect tomatoes are soil borne. The fungal spores and bacteria are just waiting for a way to reach low leaves and splashing water is the perfect mechanism. Even a drop of water falling from a lower leaf can release these tiny organisms from the soil surface and infect the plant.

Drip irrigation and soaker hoses can drastically reduce tomato diseases. These watering methods get water directly to the roots without any of the nasty side effects of overhead watering.
 
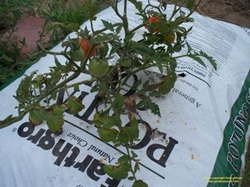
11. Mulch can help produce perfect fruit.
 
Mulching with a light, organic material can reduce the problems with soil and watering. Mulch helps to maintain a more consistent soil moisture level. Mulch also acts as a protective barrier so any water falling off the plant hits mulch and won't release soil-borne pathogens.

I like to use straw or herbicide-free grass clippings for tomato mulch. The light material allows air and water to reach the soil while helping to keep soil temperature and moisture more consistent. It will also decompose and amend the soil for the next season when I till it in at the end of the year.
 
12. Fertilizer may hurt your harvest.
 
Proper fertilization is critical to getting a harvest and improper fertilization may result in no harvest at all. With rich, amended soil you may not need any additional fertilizer. If you do fertilize, you need to do it differently at different times.

As mentioned above, root development is important for young plants. Adding a fertilizer high in phosphorus to the soil at planting can help in that development. As the plant grows and nears fruiting, a potassium fertilizer will help in fruit development.

The problem most gardeners encounter when fertilizing tomatoes is by using a fertilizer high in nitrogen. Nitrogen encourages big, bushy plant growth at the expense of flowers and fruit. If you fertilize and get a beautiful plant with no fruit, this is probably your problem.

Look for a fertilizer with higher numbers in the second and third position. The numbers on a bag or box of fertilizer represents the percentage of nitrogen-phosphorus-potassium (N-P-K). A higher first number will spell doom for your harvest. You'll find specialized tomato fertilizers with ratios of 3-4-6, or 5-6-5, or 4-7-10, or 18-18-21. Note that the first number (nitrogen) is never the highest. In my opinion, better tomato fertilizers would be 15-30-15, or 6-24-24, or 8-32-16.

13. Heat can reduce harvest.
 
If days and nights get too hot, tomatoes will drop blossoms and no fruit will form.  Tomatoes grow best when the temperatures are between 70F and 90F degrees. When day temperatures are above 95F, or night temperatures remain above 75F, fruit won't develop. You can take every step above, but if it's too hot in your garden you won't get any tomatoes.
 
14. Pinching suckers may not always be the best idea.
 
Many gardening "experts" say to pinch off all suckers that develop in the crook between the main stem and branches. While this won't hurt the plant, it may not be as necessary as proposed. The key is knowing whether the plant is determinate or indeterminate.
 
Indeterminate tomato plants can get very big. Pinching the suckers can focus growth where you want it so the plant doesn't become too cumbersome while focusing plant energy for developing large fruit along main branches. Leaving the suckers on the plants will produce more foliage and potentially smaller fruit. Because the fruit is produced over a longer period, allowing it time and energy to grow big may be beneficial. Fewer, bigger fruits can be a good thing.
 
Determinate tomato plants don't require any pruning and removing suckers can actually reduce harvest. Tomatoes can develop on the branches that grow from the suckers. Because a determinate plant produces all of its fruit at the same time, more branches and more flowers means more fruit. For many gardeners wanting to preserve their tomatoes, more may be better than bigger.

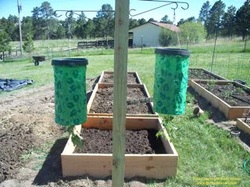
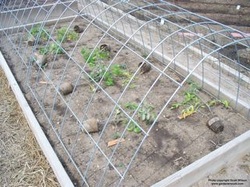
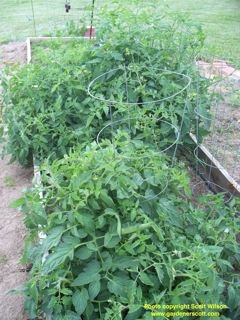
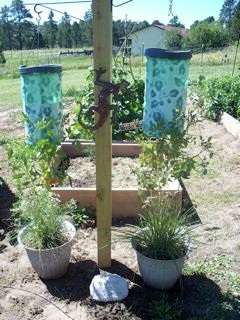
15. Use a strong trellis.

There are many options for trellising tomatoes and it's worth spending the time and money for a sturdy one. While a single metal rod or flimsy wire cage will support a young plant, a mature indeterminate plant loaded with fruit will soon flop to the ground, damaging fruit and exposing the plant to all of those disease-causing soil pathogens.

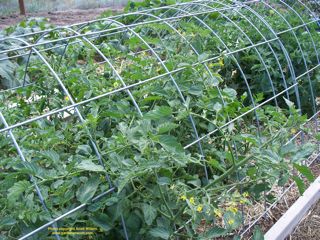
I like to use heavy-gauge steel cattle panels to form a curved trellis over the entire bed. Home improvement centers sell steel lattice panels used for reinforcing concrete; these can be cut and bent into strong towers to support tomato plants. 4 x 4 wood posts set in the ground can be used to train vines on strong wire strung between them. Whatever you use, ensure it can handle the weight of a big plant.
Picture
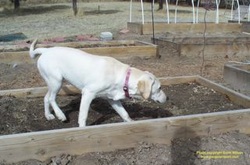
16. Rotate the location of your tomatoes.

As mentioned earlier, the pathogens affecting tomatoes reside in the soil. Once a plant is infected the soil is infected. Continuing to grow tomatoes in that same location the next year means that those new plants are very likely to be infected.

If your garden space allows, it is best to avoid planting tomatoes in the same bed as recent tomatoes. Time will dissipate the pathogens' viability. Wait at least three years between plantings in the same bed. Ideally, wait at least seven years between plantings. The more you can rotate with longer periods between, the less likely you are to encounter the same diseases.

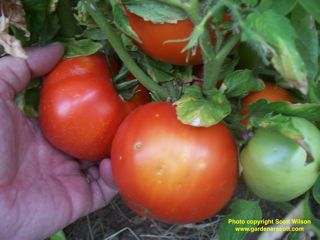
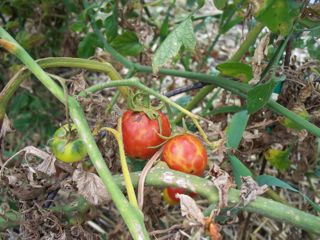
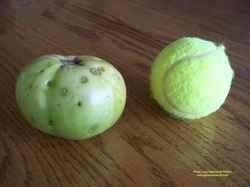
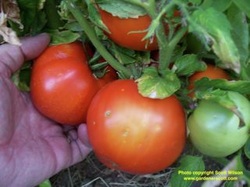
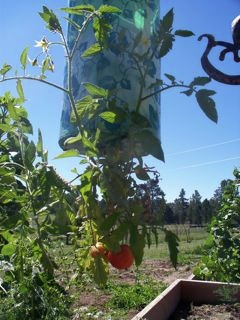
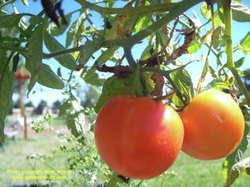
17. Harvest before the fruit is overripe.

Tomatoes should be harvested when they're ripe but before they soften. Left too long on the vine, tomatoes can become mushy and bland. Green tomatoes can continue to ripen after they're picked. For that reason it's better to pick a little early rather than a little late.

The fruit may crack or develop circular rings near the stem when they've been left on the plant too long. Because the fruit often grows in clusters, you can use these signs on one fruit as a signal to harvest nearby fruit.

As indicated by these tips, tomatoes can be a finicky crop. A little too much water, a little too much heat, and a little too much fertilizer will affect your crop. I grow in a very challenging environment and I regularly meet gardeners unwilling to try tomatoes again after a disappointing season or two. It can be a challenge, but there's a reason tomatoes are the number one home garden crop. When you do it right, few other garden crops can be so satisfying.


22 Comments

Home Garden Crop Rotation

3/2/2013

15 Comments

 
Growing the same crop in the same location year after year can deplete essential soil nutrients in that area, subject plants to harmful diseases, and adversely affect the crop's growth, health, and production. To avoid this, for thousands of years farmers have practiced two, soil-enhancing, growing methods. The first is allowing a field to lie fallow. Periodically after harvest, plants are turned into the soil and allowed to decompose for a year; essentially it is in-place composting.
 
The second method is crop rotation. Different crops are planted in different years in a single field. For home gardeners, allowing a garden to remain unplanted goes against the very essence of why we garden so practicing crop rotation to prevent a cycle of diminishing harvest is the best idea.

Crop rotation is used to keep soil from losing nutrients that a specific plant needs. A plant like corn needs a lot of nitrogen from the soil. When it is planted in the same spot repeatedly, it will ultimately deplete all available soil nitrogen, committing a slow suicide. On a commercial level, farmers add tons of nitrogen fertilizer to soil to artificially feed the plants. On a local level, home gardeners add nitrogen fertilizer to their soils when they notice reduced plant growth too.

Effective home garden crop rotation can drastically reduce the need for supplemental fertilization and helps maintain a healthy, balanced, nutrient-rich soil. For organic gardeners it is almost a must.
Picture
Every year my garden looks different with crop rotation
The concept of crop rotation is simple. Crop A is planted in year one, Crop B is planted in the same location in year two instead of Crop A, Crop C is planted in year three instead of Crop A or B, and so on until the cycle is repeated.

The simplest cycle is a two-crop rotation where a plant like corn is planted one year and a crop like peas is planted in the same bed the next year. Then the cycle repeats each year with corn followed by peas followed by corn followed by peas; each cycle is completed in two years. A three-crop rotation takes three years to complete. A seven-crop rotation takes seven years.

The selection of the plants for each year is the most important aspect of crop rotation. To be effective, each successive planting should grow differently than the previous planting. In the two-crop example above, corn grows in a spot, depleting soil nitrogen. The next year a legume like peas is planted to replenish soil nitrogen. Many legumes have root nodules that harbor beneficial bacteria that takes nitrogen from the air and fixes it into the soil.
Picture
Peas are a perfect legume to plant
In a home garden, legumes are a great choice in an easy crop rotation cycle. Peas, beans, lentils, and soybeans provide a nice harvest while adding nitrogen to soil. Other plants like clover, alfalfa, and vetch don't offer a harvest, but have the same beneficial properties. I use vetch in my garden as part of my crop rotations; the vetch is attractive with pretty little purple flowers. After a season of growth that fixes nitrogen into the soil, the plants are tilled in to add additional organic material.

I like to practice a three-year crop rotation in my garden. In recent years I've done a tomato-pea-cucumber cycle, a garlic-pea-spinach cycle, and a beet-bean-cucumber cycle. In each of those cycles I also grew vetch. Vetch can handle cold weather so I sow it in fall after I've harvested and cleaned up a bed. The vetch grows into winter and again in early spring; I turn it into the soil about six weeks before planting the new season's crops. For plants with early summer harvest, I'll sow vetch and allow it to grow during the remaining summer and early fall.
Picture
Vetch looks good and adds nitrogen
A basic three-crop cycle of sowing plants that produce nitrogen, followed by plants that are heavy nitrogen feeders, followed by plants that are light feeders is easy to start.

A four-crop cycle is also easy if you divide plants into groups. Fruiting plants like tomatoes, cucumbers, and pumpkins is one group. Leafy plants like spinach, kale, and broccoli is a second. Root vegetables like carrots, beets, and potatoes is a third. Legumes like fava beans, peas, and lentils is a fourth.

Another important reason to rotate your crops is to reduce disease and pest problems. Tomato plants are very susceptible to soil-borne pests and pathogens. In the first year of planting a new bed, tomatoes often do very well, but after being in the same spot for a period of years they suddenly seem to have problems with early blight, fusarium wilt, or leaf spot. The fungus or bacteria that causes many potential tomato problems lives in soil.
Picture
Tomatoes with problems will infect soil
Once a plant is infected it spreads that pathogen into more soil. Any new plants in the bed will become infected and help spread it further. Crop rotation breaks this cycle. An infected plant may adversely affect soil, but if there is no new plant to spread the fungus, bacteria, or virus, it will eventually diminish and no longer cause problems.

This works because the pathogens are plant specific; tomato disease will not affect corn, peas, spinach, or pumpkins. Crop rotation helps keep plant problems from becoming established in your garden. Before tomato pathogens develop, another plant like beans grow in the bed, then a plant like spinach is planted before bean problems develop.

Knowing what plants you want to grow and the most likely diseases in your region will help you determine the best cycle. Many fungi that affect tomatoes remain viable in soil past three years so a four-crop rotation is recommended. By the time tomatoes are planted again, the threat is gone.
 
It's important to be aware of plant families when planning and planting. Tomato, eggplants, and potatoes can be susceptible to the same pathogens. Tomatoes and peppers have similar problems. For that reason similar plant families should not be included in a crop cycle; avoid planting tomatoes and peppers or tomatoes and potatoes in the same bed within a single crop cycle.

I practice a three-crop cycle because it's easy to plan and easy to do. It reduces the potential for problems, but isn't foolproof. If I do encounter problems in a bed, like tomatoes, I'll make note and transform that bed's cycle into a four-crop or five-crop model.

Occasionally I get lazy or behind in planting and repeat crops in a bed. Problems don't automatically develop, but I do try to get back on track for the next year.
Picture
Only perennials like rhubarb stay in the same spot
For virtually flawless results, a seven-crop cycle can be followed. There are very few pathogens or pests that will survive seven years in soil. Extra effort should be taken to insure adequate legumes are added in the sequence. If you have the space and the inclination to develop this more-complicated cycle plan, seven is the magic number.

Home garden crop rotation also provides a great opportunity to amend your garden soil. Because you're cleaning up each bed before planting a new crop, the addition of compost is easy to do as part of soil preparation before sowing or planting. Tilling in the spent plants from the previous season, like I do with vetch, also adds important organic material to soil.

The combination of crop rotation and soil amending acts to maintain a healthy soil environment. Beneficial soil bacteria and organisms thrive while harmful ones diminish and the microorganisms help make soil nutrients available to plants, enhancing overall garden production.

It does take a minimal amount of extra time to plan and initiate a new crop cycle. Depending on the size of your garden you may have to forgo certain crops in some years if there isn't enough space for a complete cycle for all garden plants. I accept these limitations as a tradeoff for a better garden overall. Occasionally doing without chard or parsnips or butternut squash is okay.

Home garden crop rotation is easy to do and has many benefits. While you're planning your next garden, think about doing it a little different than last time.
15 Comments

The Best Way to Grow Tomatoes

4/26/2012

12 Comments

 
Tomatoes can be found in most American vegetable gardens. For many gardeners, growing tomatoes consists of little more than buying a plant from a big box garden center and placing it in a hole in the ground. There are many other options and for you there may be a better way -- actually, six different ways to plant tomatoes.
Picture
Let's begin with a bale of straw as the planting spot. That's right... straw. I had good success by placing a tomato plant in a hole bored into the middle of a straw bale. Begin by soaking the straw a few days before you plan to plant. This softens the straw making it easier to dig a hole; it also begins decomposition within the bale. Use a trowel to scoop out a hole 12 to 18 inches deep (30-45 cm) and fill it with compost. A standard straw bale can easily hold two or three tomato plants.

Any time you plant tomatoes you should bury as much of the plant as you can to help encourage a vigorous root system (see my May 24, 2011, article "How to Plant Tomatoes"). By placing your plants deep into the holes in the moist straw bale you give the tomato roots plenty of space to expand. The straw retains moisture well and requires watering less often than other garden beds. The compost and decomposing straw provide some nutrients but you should plan to fertilize regularly.
Picture
The easiest and simplest way to plant tomatoes is in a bag of potting soil. The bag is the garden bed. Make slits in the top of the plastic potting soil bag and insert the end of your hose. Soak the potting soil well; you want it thoroughly moist. I recommend punching holes or making small slits in the bottom of the bag for drainage. Place the bag flat on the ground and wait a few days for excess water to drain, then plant your tomato horizontally through the top slit.

You can use this method in any spot that's just a few feet square, in between raised beds, at the end of paths, or in garden corners. The bag is very effective at retaining moisture so this method also requires less watering. However, it is a little more difficult because you have to apply water and fertilizer through the slit; it won't catch any rain or sprinkler water.
Picture
Another flexible variation is to grow tomatoes in pots. This is a great option for gardeners without a garden spot that gets full sun or who have limited space. Big root systems make big tomatoes so use at least a 14-inch pot filled with potting soil; bigger is better. Pots tend to dry out faster than normal garden beds so these tomatoes will probably need watering every day. As the plants grow a small trellis or support will help keep the vines from sprawling everywhere.

Tomatoes in pots work well for apartment dwellers. My daughter had good results with a single pot on her balcony. Pots can be moved to take advantage of sunny spots and can be brought indoors if cold weather threatens, extending the growing season. They can also be grown just outside the kitchen door making harvesting fast and easy.
Picture

Growing tomatoes upside down is another option that has found a following in recent years. Shiny advertisements and catchy names for upside down containers make the concept appealing. Anywhere you can hang a bag becomes a potential tomato garden. Growing tomatoes this way gives you the opportunity to fill the growing bag with good potting soil and deliver water and fertilizers straight to the roots.

You don't need to water as often with this method, but the structure supporting the hanging bag needs to be sturdy enough to handle the weight of soil, a big plant, and ripe tomatoes. Some manufacturers offer movable supports that can be used on a deck or patio.

A raised bed is an ideal way to grow tomatoes. Raised beds heat up sooner than open ground so tomatoes can be planted earlier than standard rows. The soil is often better and has fewer compaction issues. When mulched, watering requirements drop. Weeding and harvesting is easy because of easy access. More plants can often be grown in a smaller space.
Picture

I find that trellises work well in a raised bed because the bed structure helps support them; last year I used welded metal panels bent into an arch. It supported plastic sheets to warm the plants early on and supported the plants as they grew large.

The most common way gardeners grow tomatoes is in rows in open beds. This method has worked well for many gardeners for a very long time and is a good way to grow if you have the space. To be most effective the entire bed should have amended soil and have a good irrigation method. Tomato plants can grow large and a trellis system is almost always needed; open bed growing limits the trellis options.

I've used all six methods with varied results.

Last year big tomatoes came from the straw bale. The plants did very well but as they grew large I was concerned that their weight would topple the bale or that they would sprawl too much; a trellis system was difficult to set up. Regretfully deer damaged the plants before they caused a problem.

The first tomato of the season came from the potting soil bag. That plant also had the biggest root ball. The plant did well but the specialized watering requirements added time to the process. I also found that my feet and garden hose had a tendency of snagging on the bag because it was too close to my garden path.
 
Claims for bumper crops abound, but I've grown upside down tomatoes with mostly negative results (see my May 6, 2011, article "Upside Down Tomatoes"). The plants were stunted and not nearly as large as with the other methods.

Tomatoes in pots do well with extra attention. It's nice being able to bring the pots inside when a frost threatens and the other plants are injured; however, bigger pots are harder to move. As long as the soil doesn't dry out this method works very well.
 
My favorite way to grow tomatoes is in a raised bed. I can keep my plants contained in a designated area, mulch and water as needed, and keep basic chores like weeding to a minimum. The biggest tomato plants in my garden, by a large margin, were in raised beds.
Picture
Best success in raised beds
Open row plantings work well but the space is often better used by other sprawling plants like melons or squash. For harvest, you need paths between plants and this takes up more space. Any one of the other methods of growing tomatoes is more efficient for limited garden plots.

Another option for some gardeners is hydroponic gardening. Tomatoes can be grown in water only, but this method requires specialized equipment and procedures and isn't suitable for most home gardeners.

Experimenting with new options is fun and informational. I plan to repeat the straw bale and pot plantings, but will probably bypass the potting soil bag. Upside down tomatoes are probably gone from my garden for good. My focus will be on growing tomatoes in raised beds. I wouldn't know about how all of these methods worked for me if I hadn't tried them.

Regardless of which method you use, tomatoes should probably find a place in your garden. If you have a successful method continue it, but think about trying something new. Have fun.
12 Comments

Dogs and Tomatoes

8/11/2011

3 Comments

 
Labrador Retrievers love fresh green tomatoes. I've seen no empirical studies on this other than my own. Through the years we've had three Labs:  a Black, a Chocolate, and a Yellow. All of them at one time or another were caught red-pawed with green tomatoes retrieved from the garden. Therefore, I submit that Labs love green tomatoes.

Shaca, the Chocolate Lab, was my garden buddy for many years. In her youth, after a busy and respectful day in the garden, she would prance into the house proudly displaying a large, green tomato between her chompers. A terse response from me usually followed as I removed it. A few minutes later she would return, tail wagging, with another one. She liked that game.
Picture
Shaca
As much as she enjoyed it, tomatoes are notoriously difficult to grow along the Front Range of the Rockies in Colorado, and losing large ones late in the season, just before they ripen, is stressful.

Shaca learned to stay out of the garden beds. Whenever I was gardening she would lie in a prime shaded spot along the garden edge and watch me. In my absence, particularly when the squirrels were active, she would forget the boundaries. In addition to pilfered green tomatoes, some plants were occasionally damaged. To minimize garden losses I put a fence up and only allowed her in when I was present. I didn't like the restrictions, but she still had lots of yard to play in.

Rosie, the Black Lab, was much older when she ventured into my garden for the first time. In my new, unfenced garden, she learned to stay out of the raised beds. I only caught her gnawing on a green tomato once or twice after the first frost had already killed the vines. I didn't have a big problem with her retrieving garden refuse and let it go.
Picture
Shaca and Rosie
We lost both Shaca and Rosie this last year. Their gardening transgressions are memories, pleasant ones now.
 
Lily, a Yellow Lab, is new to our household that also includes two older dogs. Lily is the newest garden criminal. She's been in the garden since she was a puppy, which hasn't been long since she's only 10 months old. I no longer have to tell her to get out of the beds. She does a wonderful job of walking the paths and avoiding new plants. But her inner dog was encouraging her to live up to the legacy of Shaca and Rosie.
Picture
Young Lily
One evening this week we heard her running and pouncing along the deck. Loud scurrying was interspersed with careening against the house and rails. She was attacking a green tomato as it rolled along the wood planks.

It was humorous, or rather it would have been humorous if it wasn't the largest green tomato in the entire garden and was just about to change color. She had plucked it from a plant in a pot on the deck. It was obviously too nice a prize to leave on the vine and she was quite proud of the new toy that was entertaining her.

I was annoyed and a little angry. The next day, though, my deductive light bulb turned on. The answer to the unasked question of why Labs love green tomatoes was suddenly clear. I'd seen Lily behave in the same manner before.

There's a reason Labrador Retrievers are called retrievers. Sticks, stuffed dog toys, and socks are all items Lily loves to fetch. Not all of them on command. She loves to steal my socks in the morning and then bring one to me while I'm searching for them. Shaca would occasionally present me with a dead bird that I suspect one of the other dogs had killed. Rosie would wander in with various items of clothing from the bedroom. Their tails were always wagging joyfully.

Retrieving balls is a special love. A throw across the yard, a breakneck run, a deft snatch, and a speedy return with the prize. Tennis balls are the toy of choice. Their bounce and ease of heft made them perfect for master and dog alike. Nice, green, tennis balls.

It's taken three dogs and many years to realize the similarities between tomatoes and tennis balls. To a dog they're virtually the same thing. Firm, round, and green. I don't recall any of the dogs bringing me juicy, red tomatoes, just the green ones. After a full day when I was ready to relax and enjoy the evening, a young dog's energy is still amped and ready for more play. Dad doesn't want to participate so let's grab one of these balls hanging in the no-no place.
Picture
Which one is the ball?
It's difficult to fault an animal for something they do naturally. Retrievers have been bred for generations to retrieve. When we play fetch with an object that could just as easily be a green tomato, can we blame them for finding their own outlet for play. Even if it's our treasured garden.

Netting and fencing will help alleviate the problem in the garden, but I'm not sure if the tomato plant on the deck will ever be safe again. I lose more tomatoes to insects and birds than I do to the dogs so it's not something I'll lose sleep over. And as I think about it, it brings a smile to my face and a tear to my eye.

Dogs are smart. Labs are friendly, loving, playful, and not vindictive at all. It makes perfect sense that they would break life into simple elements:  play, fun, ball. We reward them with praise or treats when they bring back the tennis ball. Why wouldn't they wag their tails and anxiously bring us a green tomato.

I think back to Shaca skipping through the patio door with her prize and it heightens a sense of nostalgia. She was young and eager to please. Lily continues in the same vein, tail wagging, morning sock in mouth, anxious for attention and play. I suspect more green tomatoes will be lost to her sharp mind and desire to entertain herself and me.

I'm okay with that. The cost of a few tomatoes creates priceless memories. She'll lose her puppy mentality soon and before I know it both of us will be too stiff and tired to play fetch. There will always be green tomatoes, but as we've seen with Shaca and Rosie there won't always be Lily. The next time I find her with a green tomato there won't be any harsh words. We'll both enjoy the moment.

3 Comments

Tomato Problems

7/25/2011

6 Comments

 
Tomatoes are the number one backyard food crop in the United States. Virtually every gardener has tomatoes in their garden or has tried to grow them. In a pot on a deck, in garden rows and beds, or hanging upside down, tomato plants offer relatively easy opportunities for delicious fruit. But try as they do, some gardeners don't  understand why they don't get many or any fruit from their pampered plants.
Picture
Few things as good as a fresh garden tomato
As robust as they can be, tomatoes have some specific requirements that will hinder fruit production if not met. And there are natural forces at work to make things difficult.

Sun, or lack of it, is one of the most common reasons for a poor harvest. Tomatoes need at least eight hours of full sun each day of the growing season. With less sun the plants may get spindly and will produce little fruit. Many garden plants can handle some shade with little adverse effect, but not so for tomatoes. If your plants aren't producing fruit, check their sun exposure. When planted in late spring they may have started in full sun, but as the season progressed the sun's angle changed and they may have ended in shade at the critical time of fruiting. If they're in a pot you can move the pot into the sun but if they're in a garden bed you'll have to make note of it and plant them differently next year.

Tomatoes need consistent soil moisture levels. Too much or too little water can cause the blossoms to fall off the plant, the fruit to split, or blossom end rot to develop. To help with this issue, tomatoes should be planted in well-drained soils amended with organic material and they should be mulched well. The soil shouldn't be allowed to dry out or stay soggy. A consistent moist environment is important.

Blossom end rot usually appears when the fruit is about half its full size. On the bottom of the fruit, the blossom end, a small, water-soaked spot develops. As the fruit grows, the spot gets bigger and darker. It may remain small and dark or it may get black and leathery and cover half of the fruit. Once it develops it cannot be removed or "fixed". It's caused by a calcium deficiency in the plant. Seldom the problem is due to not enough calcium in the soil, though you can help by adding eggshells, oyster shells and other calcium supplements to your soil. The most common cause is the soil drying out during fruiting. With no water uptake from the dry soil, the plant stops absorbing calcium from the soil and blossom end rot develops. The cure is to never allow your soil to dry out.

Another common reason for low fruit production is blossom drop due to temperature extremes. Tomatoes grow best when the day temperatures are between 70F and 85F degrees (21C and 29C) and the night temperatures are above 55F degrees (13C). Plants can handle temporary temperatures outside these parameters but if they are exposed to sustained extreme conditions the blossoms will literally fall off the plant and no fruit will develop. When summer days stay at 90F and above, fruit production will falter. In cool climates if the plants are planted too early, steady nighttime temps below 55F will hinder fruit development. At the height of summer if the night temperatures get above 70F degrees (21C) the same problems will happen.

Like all plants with flowers, tomatoes require pollination. Bees, flies, butterflies, and wind will all help pollination but in the extreme heat of summer all of those pollinators may be reduced. Without pollination fruit won't develop. You can help by hand pollinating the flowers but a better approach may be to plant a variety of flowers near your tomato plants to attract the bees and butterflies.

Fertilization benefits most plants and tomatoes like a boost too, but too much nitrogen early in the plant's growth will give you big, lush, green plants with very little fruit. It's best to limit nitrogen fertilizers early on. A balanced fertilizer (5-5-5 or 8-8-8) is okay at planting but wait until the plants flower before applying more.

Many tomatoes are susceptible to fungal diseases. Just about the time the fruit is getting large and beginning to turn red the leaves begin to turn yellow, then brown and black, and the fruit is left to wither away; Fusarium wilt is a common cause. Over and under watering can cause similar symptoms so that's another reason to maintain proper irrigation methods.
Picture
Yellowing may be due to a wilt or recent torrential rains
When yellow blotches develop on lower leaves that turn into brown dead spots, it's probably Verticillium wilt. The best way to approach both of these problems is to buy plants that are labeled with a code like "F", "VF", "VFN", "VFNA", or "VFNT" that shows they are resistant to these fungal concerns.

How you water can reduce some problems. Overhead watering on bare soil can introduce problems like early blight, caused by another fungus. When the water splashes on the soil it sends the spores onto the leaves and stems to cause brown and black spots and dead leaves. It can spot the fruit but more often causes problems like sunburn because of reduced leaf cover. Sunscald and sunburn discolors and toughens areas of the fruit. Use an irrigation method like soaker hoses with mulch to reduce these issues.

Rotating crops can also help. Avoid planting tomatoes in the same spot every year, especially if you've had fungal problems. Ideally you want to wait four or five years before planting tomatoes, eggplants, and potatoes in the same spot. Plant other types of crops in the interim and put your tomatoes in a new, sunny bed each year.

Always, always remove infected or diseased plants and throw them away. This is one time you don't want to add plants to the compost pile. Allowing an infected plant to stay in the garden or compost gives the fungal spores and other pathogens an opportunity to infect future plants.
Picture
Regardless of the problem this withered plant has to go
Of course there are a number of insects and pests that affect fruit production. Caterpillars and grasshoppers will eat the end of the blossom stalk and prevent fruit from ever developing. If you have stubs where your flowers used to be, do a thorough inspection of the plant to try and find the culprit. If you can pick them off by hand, do it. If you decide to use a pesticide choose one that is intended for the specific insect and only apply it on the plants you're trying to protect.

There are also bacteria and viruses that affect tomatoes. Hail and wind can cause damage. If you're having difficulty, take a little time to try and analyze the issue. There are a number of sources for more information about tomato problems. Colorado State University has a good fact sheet: "Recognizing Tomato Problems".

Tomatoes are wonderful plants that have a place in almost every garden. When conditions and gardener actions are good they seem to produce abundant fruit with little work. When an imbalance develops due to weather, nature, or gardener oversight, little fruit develops regardless of the effort.

I know many gardeners who stopped growing tomatoes, particularly in Colorado, because it was hard and didn't seem worth the attempt. With a little extra knowledge and attention, tomatoes can be successful. My 7,500' garden produces tomatoes. It's not always easy, but the fruit always tastes better when you have to work for it.
6 Comments

How to Plant Tomatoes

5/24/2011

1 Comment

 
Tomatoes are the favorite backyard crop in the United States. The reason that gardeners focus on this fruit above others usually comes down to taste. No other produce has such a varied spectrum of flavor. Supermarket tomatoes have the texture and taste of cardboard, if they're lucky to have that much flavor. Tomatoes fresh-picked from the garden burst with color and deliciousness.
Picture
There are few things as good
Most home gardeners transplant tomato plants. Few regions have the warm temperatures and season length to allow growing tomatoes from seed sown directly in the soil. Seed choices are great and many of us start our seeds indoors and transplant the plants. Those who don't start their own seeds tend to buy plants from nurseries or garden centers. Either way, it's tomato plants and not seeds that most of us put into the ground.

Planting tomatoes in your garden is easy. You've probably done it before and will again. The process is basic, but there are a few things you can do to get the most out of your plants.

The most important aspect of planting tomatoes is doing it at the appropriate time of year. Tomatoes are a warm-season plant originally from tropical regions and therefore can't handle cold weather at all. Waiting to plant until two weeks after your Last Frost Date is very important. The warmer the conditions, the better for the tomatoes.

Air temperature should be consistently above 50F (10C) degrees; that includes night time too. Soil temperature should be at least 60F degrees and ideally around 70F; roots will not grow below 50F soil temperature. If you plant with the air or soil temperature too low, you can expect issues with your plants. Growth and fruit may be sparse, they may become more susceptible to disease and pests, and they may be stunted and small. Waiting just one extra week until conditions are right can make the difference between success and failure. If unexpected cold temperatures hit after planting, it's important to cover the plants with a blanket, tarp, or plastic sheet to retain warmth.

The location of your planting is the next most important component. Tomatoes need sun. Full sun, for the whole day. Seven hours of full sun is a minimum. Even a little shade can make the difference between abundant fruit production and a sparse harvest so put tomatoes in the sunniest spot in your garden.

Plant selection is important, but not critical. There are two different types of tomatoes, determinate and indeterminate. Determinate tomatoes are often called "bush" tomatoes. They grow until they begin to put on their flower clusters and then they stop growing taller. Determinate tomatoes tend to mature earlier, set fruit earlier, and produce all of the fruit at about the same time for harvest. Indeterminate tomatoes will continue to grow throughout the season and are what we think of as tomato vines. They grow longer, mature later, and will continue to produce flowers and fruit until the first frost in fall.

The cultivars of tomatoes are numerous. You can get tomatoes that mature in as early as 45 days to as many as 80 days; that's the time it takes to produce fruit after planting outside. "Early Girl" is a popular cultivar that produces fruit close to the 45-day point, "Better Boy" and "Celebrity" produce fruit mid season at about the 60-day point, and many heirloom tomatoes like "Brandywine" or "Mortgage Lifter" take a full season of 80 days to bear fruit. When you select tomato plants, look at the plant tag or ask a nursery worker to find out how many days it will take for tomatoes to ripen. Compare that to your growing season length and select one that gives you plenty of time to enjoy your harvest.
Picture
Harden off the plants before transplanting
Transplanting tomatoes in your garden is just about the same as with any other plant (see my blog "How to Transplant, Part 2"). The primary difference is that the planting hole should be deeper for tomatoes. Tomato plants will sprout roots along the entire stem that's placed in the soil so bury about two-thirds of the plant. The extra roots give the plant a better foundation for growth and help it absorb the maximum amount of water and nutrients. If you start with a plant that is nine inches tall, place it in the hole so only three inches are above the soil level. You can also bury the plant a few inches deep in a shallow trench with the plant almost horizontal on its side. This is good if only the top few inches of your soil is amended and it also keeps the roots growing in the soil level that stays warmest because of direct sunlight.
Picture
Bury deep
Before you place the plant in the hole, pinch off the lower leaves. Leave three or four sets of leaves at the top depending on the size of the plant; these will remain above soil level. You only want the stem buried; don't bury leaves that are still connected to the stem. There are mixed opinions about this and you'll find some gardeners who say you don't need to remove the leaves before burying. This is true, but no roots will grow from the leaves and as long as they're on the plant, they'll receive nutrients, even when buried. Removing the lower leaves allows more energy to go into root and new leaf development. Pinching off the leaves can also expose the layer of cells along the stem that develop into roots, accelerating the process.
Picture
Remove the leaves
Adding some compost or balanced fertilizer at planting time can help give the plants a boost, particularly if your soil isn't well amended. Just sprinkle some granules of a 10-10-10 fertilizer, or something similar, into the hole. Or throw in a handful of compost. It's a good way to amend your soil one plant at a time.
Picture
Add a little fertilizer
You want to space the plants between 18 and 36 inches apart. If you're in a humid area you should give them extra space so there will be plenty of air circulation around the plants; this will help reduce fungus and disease issues. If you live in a very hot region you can plant closer together to allow the plants to shade each other and help prevent the fruit from being sunburned.

With the plant in the ground, water it well. Don't allow the soil to dry out after you place it in the hole. If you're planting a number of plants, this means watering each one after it's in the ground. Expect to use between a quart and a gallon of water per plant, depending on its size. Until the root system is fully established the soil should remain moist. Moist, not saturated. A primary reason for tomato plant failure is overwatering. Even though they have a tropical origin, tomatoes don't like to be waterlogged.

At some point you'll need a stake or cage to help support the plant. You don't need to worry about that at planting; I usually do that a few weeks after planting. You'll also want to mulch the area with straw, grass, or pine needles, but that can wait a week or two as well.

The last step, if you didn't do it earlier, is to mark the plant. Use some type of tag, stick, flag, or marker to allow you to identify the plant. Especially when planting a number of different cultivars of tomatoes, it's nice to know which ones are which. At the end of the season you'll know which plants did the best. This allows you to grow the successful ones again.

That's all there is to it. Your plants are in the garden and on their way to producing a bumper crop. There are still many more things to do until harvest and I'll cover those in the months ahead.
1 Comment

Wall O'Water, Aqua-Shield, and Other Season Extenders

5/7/2011

19 Comments

 
Wall O'Water revolutionized gardening several years ago. The plastic, tubular, plant protection system allows gardeners to plant warm season plants like tomatoes, peppers, and eggplants several weeks earlier than usual. With the success of the product, other gardening companies followed suit and there are imitators available. Burpee offers their own product called Aqua-Shield. You can find similar, generic products at home centers and nurseries.

The concept is simple: surround plants with a wall of water that collects sun energy during the day and releases it at night, protecting the plant from cold temperatures. It's like a mini greenhouse with extra insulation.

Wall O'Water advertises that you can plant six to eight weeks early, without fear of freezing. Burpee suggests using Aqui-Shield up to one month early. As efficient a system as it is, I feel more comfortable with the one-month guideline.
Picture


You begin by planting your plant normally. Tomatoes prefer a soil temperature of at least 60F degrees. Below 50F degrees and roots won't grow. If your soil hasn't warmed sufficiently, cover the bed with plastic for a few days to help raise the soil temperature.

After the plant is in the ground, cover it with a five-gallon bucket. This is the support you need for the plastic. Don't try to fill the tubes with water without a bucket in place. You'll make a mess, probably break your plant, and waste a lot of effort.
Picture
Arrange the plastic season extender around the bucket. It doesn't need to be perfect, just try to space it as evenly as you can. Fill each of the tubes about two-thirds full with water. I recommend using a hand-controlled hose nozzle. You can just let the hose run free while you fill the tubes, but it will create a mess. Control is better.
Picture
With water in each tube, carefully remove the bucket, making sure you don't snag or injure your plant.
Picture
The tubes will collapse at the top, forming a teepee. This is the key to early season protection. The plant is full enclosed by the plastic and water and the temperature inside stays nice and toasty, just what the warm season plants like.
Picture
In a few weeks you can expect the plant to start peaking through the top of the teepee. Average day and night temperatures will be warmer and you won't need full enclosure of the plant. At this point, fill each of the tubes to the top with water. The extra water will expand the plastic and create a cylinder with the top open. The plant will be able to grow through. You may need to add water every few days to keep them filled.

You still need to water the plant too, though it shouldn't be as often as other unprotected plants. The plastic teepee will help keep the moisture levels of air and soil higher. Don't assume the plant is doing okay with this protection. Check the condition of the plant and of the soil moisture regularly.
Picture
After all danger of frost is past, at least two or three weeks after the last frost date, it's time to remove the season extender. This can be a little tricky because you have a great deal of water in the tubes and the plant is almost certainly growing out the top. I recommend laying a mulch like straw around the base of the plastic and squeezing the tubes to try and push out as much water as you can. This helps avoid a muddy mess. As carefully as you can, without breaking or injuring the plant, slide the plastic up and over the plant.

With the plastic system off and out of the way, drain the water out and lay it in a place where it can dry out completely. You'll be able to reuse it for years, but you don't want to put it in storage if there is still water in it; mold will definitely develop. If you are impatient and it's not drying quick enough, you can try using a blow dryer on the cool setting to blow air into the tubes.

These season extenders definitely work. In conjunction with a mini-greenhouse hoop system like I showed in my blog, "Extending Your Growing Season with Mini Greenhouses", I think you could plant six to eight weeks early as long as the soil temperature is warm enough when you first plant. Especially in very cold regions with short growing seasons, these extenders will allow you to grow plants you might not be able to grow otherwise.

At a cost of between four and five dollars each, they're affordable and considering that they can be reused for years, you're investing an extra dollar or so on each plant. The extended season that you gain should more than repay that investment with additional produce.

19 Comments

Upside Down Tomatoes

5/6/2011

10 Comments

 
Yes, you can grow tomatoes upside down. Based on the claims in the large number of newspaper, magazine, and television ads, you'd think it is the best way to grow tomatoes. I conducted a test last year using methods as scientifically consistent as I could manage. The results ran counter to the advertising claims.
Picture
Upside down tomato
The concept of growing tomatoes upside down is interesting and intriguing. You put a plant in the bottom of a hanging bag, fill the bag with soil, water it, and you have an abundance of disease-free and pest-free tomatoes. Wanting to see if it really worked, I tried it.

Using two tomato hanging bags, I planted a "Better Boy" tomato plant in one and a "Sweet 100" tomato plant in the other. I also planted the same two varieties, purchased from the same tray in the same store, in a raised bed. The primary difference in the beginning was that the hanging bags were filled with a name brand potting soil that contained some balanced fertilizer, while the raised bed was filled with soil amended with compost and no fertilizer.
Picture
Planted and hanging
All of the plants were located relatively close to each other and received the same amount of sun and other weather. I watered the plants regularly and similarly. The hanging plants did receive more water because the water tended to drain out faster and the bags dried out sooner.

It was noticeable right away that the hanging plants grew faster, but not bigger than the ones in the raised bed. By the end of the season, the plants in the ground were bigger, bushier, stronger, and bore more fruit.

The hanging plants flowered and set fruit, but in dramatically smaller numbers. For the "Sweet 100" plants (a cherry tomato) I harvested nine tomatoes from the hanging plant and more than sixty from the plant in the ground (there were many more unripe tomatoes on that vine when the first frost hit). For the "Better Boy" plants I harvested four tomatoes from the hanging plant and about 20 from the plant in ground (it too had many more unripe fruits that were affected by the frost).

The obvious conclusion is that tomato plants in a raised bed will produce much more fruit than ones grown upside down in a bag. I didn't notice any difference in taste.
Picture
Tomatoes in the bed are much bigger
To be fair to the makers of the upside down growing system, they don't directly compare their promised results to traditional garden beds. They do say that you can expect bigger and better fruit, but that is a bit vague. They are marketing to people who don't have desire, time, or space to grow in the ground.
 
Topsy Turvy, the one you see advertised so much, guarantees 50 pounds of tomatoes from their Tomato Tree set that holds multiple plants. That averages out to a little more than 12 pounds of tomatoes per plant, not a lot. If you look closely at their advertising photos you can see that the individual plants only have a dozen or so tomatoes on them when fully grown. I'm used to more than that on my garden plants.

Online reviews from many of the customers of these systems seem to show similar results to those I had. If you plant upside down and expect abundant fruit, you'll probably be disappointed. However if you plant upside down on a deck or patio because you don't have garden beds, then it gives you the chance for tomatoes that you wouldn't have otherwise.

I've tried to analyze the results and have a few conclusions. Though the claims are that the system uses gravity to draw nutrients into the vine and fruit and make them bigger and better while it allows roots to grow up, this is counter to the natural way plants grow. The tomato vines in my upside down planter were still trying to grow "up", using extra energy and distorting the vine, while the roots also tended to grow "down" and not expanding well within the container; this led to fewer flowers and less fruit.

The weight of the fruit put them low while the vines grew up. The foliage was thin and didn't shade it normally. This exposed the fruit to more direct sun and some of them developed sunscald. Sunscald is a white or yellow area on the fruit and can render it inedible. Though growing upside down is supposed to shade the fruit with the additional mass of the growing container, I didn't find that to be the case. The plants in the ground shaded the fruit well.
Picture
Hanging fruit exposed
While the hanging tomatoes did have better exposure to air flow and should consequently have fewer fungus and disease issues, there is less heat to blanket the plant. This makes a difference in a region like mine when the nights start to cool off early. Plants in the ground can use the heat of the soil to help moderate night temperatures. Hanging plants cool off faster and late fruit and flowers are less likely to develop in cool conditions. You should expect fruit later into the season with plants in the ground.
The bigger mass of the plants in the raised bed raised the overall temperatures near the plants and that may have helped produce more flowers. I also saw more bee and fly activity near these plants than in the hanging containers. That may also help explain why more fruit developed in the bed.
Picture
Midseason.. the other tomatoes are on the right
It was an interesting experiment. I can recommend upside down growing only to gardeners who have no other options. Based on previous experience, I suspect that tomatoes grown in a large pot will grow better than in an upside down bag. If given the choice, plant and grow tomatoes in a raised bed with amended soil. Sure, you may have to stake and tie the vines to keep them from sprawling on the ground (one of Topsy Turvy's negative claims), but that gives you the opportunity to help your tomatoes grow best.
10 Comments

How to Transplant, Part 1

4/25/2011

2 Comments

 
It's time to transplant your seedlings into a bigger pot. You sowed the seeds, kept them moist, gave them light, and now they have some true leaves. They're a little crowded in the planting tray with the rest of their siblings and they need more room. So move them to a pot of their own.

I sowed my tomato seeds a few weeks ago and they're strong enough to move (see my blog, "Growing Tomatoes From Seed"). The first set of leaves that appear on a new sprout are the cotyledon leaves. They begin the photosynthesis process and get the plant growing. Typically they're oval shaped and don't look like the leaves of the adult plant; that's why it helps to label your seeds so you know what's growing. Soon after, true leaves develop. At that point there is enough root growth to support the plant and avoid the stress of transplanting. Wait for one or two sets of true leaves before transplanting.

My tomato seeds were sowed in small peat pots. When done properly you can expect all or nearly all of your seedlings to survive the transplanting process. Just for extra insurance, I leave some of the seedlings undisturbed in the original pot while I move the overcrowded ones to their own new pots. After the danger of frost I'll transplant all of them into the garden.
Picture
Lots of seedlings ready for transplant
To begin, fill the new containers with fresh, sterile, moist, potting soil. Place the new pots and old pots together on your workspace. You don't want to be walking across the room carrying a tender seedling. Keep all of your activity confined to a small area.

Using a fork, a chopstick, a spoon, a popsicle stick, a knife, or any other small utensil, gently dig out out the seedling or group of seedlings that you are ready to move. Try to dig deep enough that you don't disturb too many of the young roots. Digging out the seedling with a clump of soil attached is fine.
Picture
Digging out a clump of seedlings
If there are multiple seedlings in the same clump, lay them down on a clean surface and gently pry them apart. Try not to tear the little roots. I use a wooden skewer for this. Gently grasp one or more of the seedlings with the tips of your fingers. It's important that you hold them by the leaves. Don't grab the stem! Pulling or holding these young plants by the stem can crush it and cut off all nutrients. This is a primary reason some transplanted seedlings don't survive the process.
Picture
Gently separating the seedlings
Dig out a small hole in the new container and gently place the seedling in it. I use the same wooden tool to rough up the soil and then cover the roots lightly while I support the seedling with my fingertips. Most seedlings should be planted at about the same depth as in the old pot. For tomatoes you can plant them deeper because roots will develop along the buried stem and help make a stronger plant
Picture
Placing the seedling in a new pot
I always sow more seeds than I'll use in my garden. I also transplant more seedlings than I know I'll plant. When I move them to a new pot I'll put two or three in the same one. This helps ensure that at least one plant will endure the stress. I may be overcautious because I rarely lose a plant. What results is multiple plants growing strong and I choose the strongest, removing the weaker ones.
Picture
From seven pots to 19
After the seedlings are in their new homes, water all of the pots, old and new. If you're using fluorescent grow lights, go ahead and put all of the plants back under the light. If you're growing on a windowsill, keep the plants out of direct sunlight for a few days while they adjust to their new pot.
Picture
All the seedlings back under the lights
If you moved them to bigger pots they won't need to be moved again until they're ready to go outside. If they begin to outgrow the new pot before the weather cooperates, you can repeat the transplanting process again by choosing a new, bigger pot.

That's all there is to it. Transplanting seedlings will double or triple the amount of space required to store them, maybe more. Anticipate where you'll put the new pots before you begin the process. If you don't have adequate light for all seedlings, it may be better to leave them in the original pot and just thin out the smaller seedlings. That's one reason I recommended starting seeds in pots and avoiding transplanting.

With proper water and light all of the seedlings will continue to grow and be strong enough for the garden soon. I'll cover that step in a few weeks.
2 Comments

Growing Tomatoes From Seed

4/12/2011

1 Comment

 
Picture
Little tomato plants.
All gardeners know that a tomato tastes best when it's grown in your own garden. They are the number one home vegetable crop: more people grow tomatoes in their backyard than any other plant. It's no surprise that nurseries and home centers sell tomato plants by the millions.

Buying a plant and putting it into the garden is the primary method most people try. Quite a few gardeners have attempted growing tomatoes from seed, not had success with it, and reverted back to buying plants. By following a few key steps, growing tomatoes from seed is very doable. You'll save money and after all your effort the fruit tastes even better.

Start by choosing seeds that will do well in your garden. Just because seeds are sold in your neighborhood store, it doesn't mean they'll do well in your garden. One variety named "Delicious" sounds too good to pass up, but it takes 90 days to produce fruit after planting; that may be too long if you live in a cool region. One variety I'm trying this year, "Rose", takes just 70 days; that means I'll have a nearly an extra month of harvest compared to "Delicious".

Tomato seeds should be started indoors six to eight weeks before the last frost date. Then the seedlings should be planted about two weeks after the last frost date. That means you'll have tomato seedlings in your house for a full two months or more before they go in the garden. Anticipate the space required and choose an area that you can spare for two months.

You can fill a large planting tray with sterile potting soil or seed-starting soil mix and sow your seeds. Plant about 1/4 inch deep, lightly cover with moist soil, and keep moist until they germinate. If you follow the large tray method, at some point you'll have to transplant the individual seedlings into larger containers of their own. Transplanting can help develop stronger root systems. This is also a good method if you are planning to grow dozens of plants, but transplanting can be stressful to the plant and the gardener if not done correctly.

You can use large peat pots or pots filled with potting soil as the primary growing location to avoid transplanting. Spread five or six seeds per pot. You'll probably have very good germination and all of the seeds should sprout. This means that at some point you'll have to sacrifice some of the smaller seedlings so that one one or two plants remain in each pot to grow strong. Thinning out or cutting the small seedlings can be stressful for the gardener too, so you have to decide which method of sowing you prefer.
Picture
Tomato seeds planted.
Your planting container should be kept in a warm location to aid germination and growth. That means a spot that stays at least 70 degrees F (21C). A few degrees cooler is okay, but germination may be slower. Cover the tray or pots with a plastic cover to help keep the soil surface from drying out. In just a few days you'll see the seedlings start to emerge.
Picture
I re-used a plastic bag.
Picture
Seedlings emerging.


As soon as you see the little stems, it's critical that they begin receiving a strong light source. Let me repeat that point because it is the most important aspect of starting tomato seeds indoors. As soon as the seedlings begin to emerge from the soil, they need to receive strong light.


Many people think they can put the tray on a south-facing windowsill and the sun will do the work for them. This leads to the reason most seeds fail when started indoors. The spring sun is not strong enough to provide the best light. The seedlings that result in this case are spindly, weak, and light-colored because they're reaching for the light. If you do this, occasionally turn the pots to try and balance the light levels.

To get the strongest plants, the light source should be directly above the plant by just a few inches. This may mean the tray or pots are placed in special grow racks designed for this purpose. I built a wooden frame that holds a fluorescent shop light. The chains that support it can be shortened as the plants grow so that the light is always just above them. You can buy grow lights with stands that do the same thing. Whatever light source you use, it must remain as consistent as possible, with the light remaining on 12-16 hours per day. I attach my light to a plug-in timer.
Picture
My grow light stand.
You don't want to over water the seedlings after they have their first few sets of true leaves. Letting the soil surface dry out very slightly will help keep them growing strong, but don't let them wilt from lack of water. It's better to keep the soil moist, not wet. If you occasionally blow hard on the seedlings or drag a pencil or chopstick gently over their tops, you can stimulate growth that will produce a stronger stalk too.
Picture
Egg shell pots.
You can grow tomatoes in just about any container. Paper milk cartons is a perennial favorite. Starting the seeds in egg cartons can make transplanting to a larger container easier. Yogurt cups work well too. You can even try planting them in eggshells.

When growing seeds in eggshells, punch a few small holes in the bottom of the shell to allow water drainage. Use a small nail from the inside of the shell for best results. Fill with potting soil and sow the seeds. When the plants have grown large enough for transplanting, put the entire shell (gently crushed) and plant into a larger pot.


One of the most common issues with tomatoes in the garden is Blossom End Rot. One of the causes of this problem is a deficiency of calcium in the soil. By planting tomatoes in an eggshell you are introducing the roots to the calcium in the shell. Though not all of the calcium in the shell is available for the roots directly, it is an innovative way to add minerals to your soil.

Growing tomatoes from seed can be done if you follow the few suggestions above. The most important key is the strong light for the seedlings. If you can solve that step in your home seed starting setup, you are almost assured success.
1 Comment

    RSS Feed

    GardenerScott

    Join me as I discuss gardening subjects and take a look at gardens past, present, and future.

    Blog Categories

    All
    Animals
    Biochar
    Birds
    Chickens
    Compost
    Crafts
    Deer
    Environment
    Flowers
    Fruit
    Gardens
    Gifts
    Growing
    Harvest
    Herbs
    Inspiration
    Irrigation
    Lawn
    Mulch
    Pests
    Planning
    Planting
    Plant Selection
    Preserving
    Propagation
    Pruning
    Recycling
    Reviews
    Seeds
    Sites To See
    Soil
    Tomatoes
    Trees
    Vegetables
    Watering
    Weather
    Weeds

    Archives

    April 2018
    December 2015
    March 2014
    November 2013
    October 2013
    August 2013
    July 2013
    June 2013
    April 2013
    March 2013
    February 2013
    January 2013
    December 2012
    November 2012
    October 2012
    September 2012
    August 2012
    July 2012
    June 2012
    May 2012
    April 2012
    March 2012
    February 2012
    January 2012
    December 2011
    November 2011
    October 2011
    September 2011
    August 2011
    July 2011
    June 2011
    May 2011
    April 2011
    March 2011


Web Hosting by iPage