GardenerScott.com
  • Home
  • How-to Videos
  • GardenerScott Blog
  • Photos
  • Tips & Tricks
  • Contact Me

When to Plant Bulbs in Fall

10/11/2013

26 Comments

 
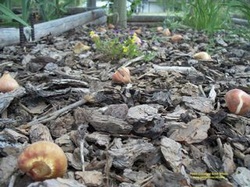
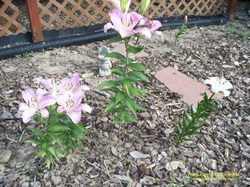
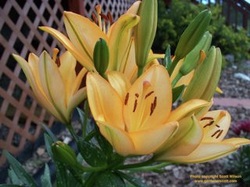
Though they bloom in spring, flower bulbs that are planted in fall are known as "fall bulbs". Popular spring-flowering plants like daffodils, tulips, crocus, and hyacinth are fall bulbs. Allium, scilla, anemones, and Asiatic lilies are planted in fall too. With a seasonal range of three months, when to plant fall bulbs is a question many gardeners struggle with.
Picture
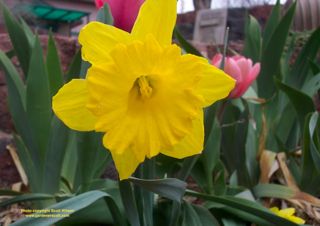
Daffodils are a welcome sign of spring
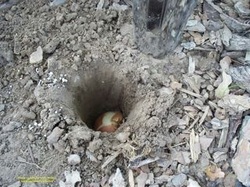
Timely fall planting allows roots to develop before the ground freezes and prepares the plant for quick spring growth and flowering. If you plant too early the bulbs may use critical energy reserves and can begin to send up new shoots, exposing the young growth to winter kill. Prolonged exposure to warm, moist soil may promote fungal problems and rot. Plant too late and root growth may not be enough for the plant to flower properly.
 
To flower in spring, fall bulbs require exposure to cold temperatures. This chilling period triggers them to break dormancy when temperatures warm in spring. It's all about planting early and warm enough for the bulbs to begin developing, but late enough for them to stop developing shortly after to start soaking in the cold.
Picture
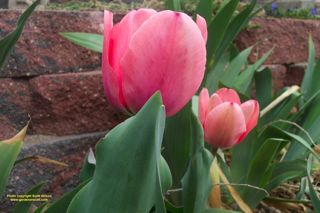
Tulips need to be planted in fall
There is no single right time for all gardeners. The proper time for planting fall bulbs may be September in Wyoming or North Dakota, October in Colorado or Kansas, November in Oregon or Nevada, and December in Virginia or North Carolina. Gardeners need to find out what's right for their individual gardens; one-size-fits-all advice from gardening books or magazines may lead to incorrect guidance.

Cooler soil temperatures are a primary indicator for proper planting time.  Ideally, soil temperature needs to be below 60F; a temperature of 55F degrees is perfect. The problem for the average gardener is that few gardens come with soil thermometers. As a guideline, soil temperatures usually cool to this target after a few weeks of nighttime temperatures regularly between 40 and 50.
 
There are also natural indicators that some gardeners use:

Plant just after fall foliage peaks
Plant when you no longer hear crickets at night
Plant when you see flocks of birds heading south
Plant when you regularly need a jacket to work in your garden
Plant the week after you smell your neighbor's fireplace for the first time
Plant when you have to turn your car heater on in the morning
Plant when your dog moves from the shade to the sun
Plant when your grapes are ripe
Plant on Columbus Day, Halloween, Veteran's Day, or Thanksgiving (depending on your zone)
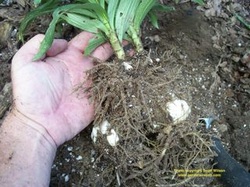
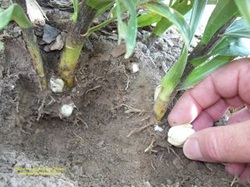
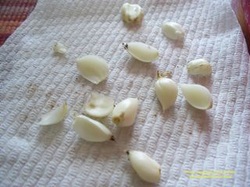
Plant garlic on the first day of school
Plant after you blow out your lawn sprinklers
 
These suggestions are very unscientific and rely on local conditions that may not match your climate. But if you find a natural indicator that works for you, use it.
 
Some gardening experts recommend planting bulbs six weeks before a hard, ground-freezing frost. That's a little too hard to predict for many regions. If unseasonal warm weather lingers, bulbs may end up waiting in the ground for the cold to arrive for two months or more. That's much too early.
 
Planting within a few days of your average first frost date is a good guideline. That's what I typically use. The average first frost date means that historically half of first frosts occur before that date and half occur after. For me, that's the first week of October. By that time cool nights have cooled the soil but there are still enough warm days ahead to keep the soil warm enough for root development.
Picture
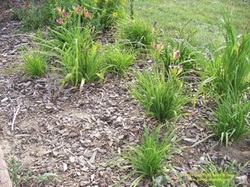
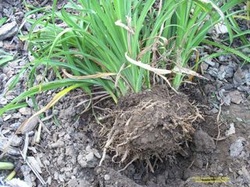
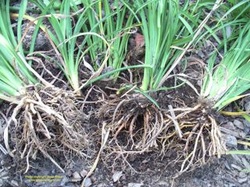
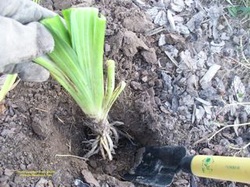
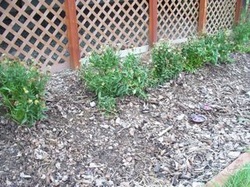
Irises aren't true bulbs and do best when planted in late summer or early fall
Check with local gardening experts for recommendations on planting fall bulbs. Diane Brunjes, Certified Colorado Gardener and the gardener for the Horticultural Art Society of Colorado Springs, recommends October planting versus September for our area too. In our climate, "It's too warm early in the season," she says. She's right.
 
A little too late is usually better than a little too early. There is a four to six-week target window for planting bulbs, but as long as you can still work in the soil it's probably not too late. Crocus, scilla, and snow drops do better planted earlier. Daffodils, hyacinth, and tulips can handle late planting. In fact, tulips can be planted in frozen ground and will probably still do fine.
 
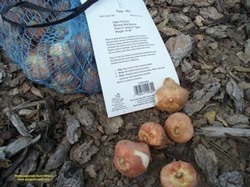
If you miss the ideal planting time and still have bulbs you purchased, plant them anyway. Most bulbs will dry out and be worthless if left to sit in their bag over the winter. They stand a chance of growing while in the ground. Plant them and hope for the best; you may be surprised by the results.

If you’re still wondering when to plant your bulbs take a look around your garden. When you walk outside at night are you cold without a jacket? Have your pepper and tomato plants withered from frost? Are your raspberries fruiting? Are mum flowers drying on the plant? These are all signs that the season is changing and winter is coming. Don't delay too long. It may be the perfect time to put those bulbs in the ground.

26 Comments

Planning a Deer Resistant Garden

4/17/2013

0 Comments

 
There is just one way to have a deer proof garden -- plant everything within the borders of a strong fence eight feet tall. For the rest of us, the best we can hope for is a deer resistant garden. Like all animals, deer have foods they prefer, foods they tolerate, and foods they avoid. The key for gardeners desiring a beautiful garden that deer walk past is to select plants in the latter category.
Picture
Shasta Daisies are beautiful and deer resistant
Let me qualify what "deer resistant" means. A deer resistant plant is one that deer do not eat as a primary food source. They may chew a few buds and occasionally pull off a leaf or two, but the plant is allowed to reach maturity with little molestation. Deer are browsers and will nibble on what they find; deer resistant plants are the ones they test and then walk away from.

It's important to acknowledge that deer, like all animals, will eat anything if they're hungry enough. Deer resistant plants are not a normal part of their diet, but under drought and low vegetation conditions deer will devour plants they have ignored for years. A doe with a new fawn won't venture far from it, so she will feed on less-than-desired plants nearby. Also, there are plants that hungry deer will only eat in winter and leave alone the rest of the year.
Picture
Deer usually leave Purple Coneflowers alone
It's also important to acknowledge that deer will go out of their way to indulge in a garden offering plants they consider delicious. A garden loaded with roses, azaleas, geraniums, hosta, tulips, and fruit trees screams to the deer that the smorgasbord is open. The problem is that many gardeners also desire those same plants in their garden. Trying to maintain this kind of garden in the presence of a local herd can be nerve-wracking.

A deer resistant garden can be abundant and beautiful, but it requires careful plant selection. As I begin planning the landscape for my new house my focus is on gardens that will give me everything I want while denying the numerous deer a tasty lunch.
Picture
Black-eyed Susans add color and deer resistance
As with all garden planning, there are important steps to take to get it right. An analysis of sun, shade, water, soil, USDA Hardiness Zone, and available space is critical to a good garden plan. Plants will do best when they're matched with the proper soil and location for their growth habits. Once this analysis is done, plants can be selected.
 
Generally, deer don't like plants with a strong aroma or with thorns or spines. They tend to stay away from decorative grasses. Many native plants are resistant to deer in areas where deer are native.
Picture
Salvia is a safe bet with deer
An assumption in growing deer resistant plants is that there are other food sources available to local herds. When deer have access to water and plants they like, they'll leave less desirable plants alone. When their only food sources are deer resistant plants, then that's what they'll eat. That's why there are so many conflicting discussions by gardeners as to whether a plant is deer resistant. For every gardener who has never had deer eat his plants there is another gardener who has deer eat every one of hers.
 
Let's begin with deer resistant plants for full sun locations. Lucky for me, many of the plants I like to grow are naturally deer resistant; I have a minor deer problem at my current house and have never had a problem with these plants:

Agastache
Allium
Artemisia
Barberry
Columbine
Coneflower
Coreopsis
Daffodil
Dianthus
Foxglove
Gaillardia
Hens and Chicks
Lantana
Lavender
Penstemon
Potentilla
Rose Campion
Rudbeckia
Russian Sage
Salvia
Shasta Daisy
Snapdragon
Spirea 'Magic Carpet'
Yarrow
Yucca

There is no lack of color, texture, and variety in this list. All of them are very resistant to deer in most landscapes. Many of them require little irrigation, which is a plus in my arid region.

Here are some plants for shade or partial shade areas.

Allium
Ajuga
Astilbe
Bleeding Hearts
Coral Bells
Fuchsia
Monkshood
Peony

I don't currently grow these plants but will in my new landscape. I also plan to add:

Apache Plume
Buddleia
Fountain Grass
Miscanthus
Pampus Grass

The key to identifying deer resistant plants for your landscape is to conduct a little research. Many county Extension offices have fact sheets for local deer resistant plants. The internet allows cross referencing this government information. I easily found that New Jersey, Minnesota, and Colorado Extension information matches my own experience with the plants listed above.
Picture
Daffodils are on everyone's list of deer resistant plants
One of the best sources for local information about deer resistant plants is to ask a fellow gardener. Find out what your friends have trouble with and what they have success with when deer are involved.
 
I have a gardening friend who likes to grow Arborvitae and has to fence in each plant to prevent damage; Arborvitae is on the list of plants deer like to munch. I've tried to grow cherry, apple and plum trees in my current landscape and the deer have devastated them; they'll even push through the protective netting to nibble the buds. Those of us who have built structures to try and keep deer out will gladly share our experience.

Asking for advice can save valuable time, energy, and money. Geraniums cover the gamut of deer preference. Some varieties of geranium are like candy to deer while others are like vinegar. Find out what your friends are growing and copy their successes. I haven't seen Asian Lilies on any deer resistant plant list, but in my neighborhood they leave all of mine alone.
Picture
My lilies have always been safe
It's possible to get away with tricking deer. A few plants that they might eat may survive if they're planted among groupings of plants that they avoid. They'll tend to leave the whole group alone when they see an abundance of deer resistant plants.

I also believe in creative sacrifice. If you want to grow plants that deer may like to eat, also grow plants that they definitely like to eat. Grow plants like wild strawberries, raspberries, Virginia creeper, and sunflowers as a friendly offering. When they venture into your yard they'll gravitate toward those tasty morsels and are more likely to leave your treasured plants alone.
Picture
My sacrifice to save my vegetable garden
With proper planning and plant selection, maintaining a successful and beautiful landscape in the presence of deer is not only possible, but easy. Choose deer resistant plants and let your gardens prosper.


0 Comments

How to Plant Fall Bulbs

9/16/2011

16 Comments

 
Many of the most popular and most beautiful garden flowers grow from bulbs. Bulbs are grouped in two basic categories, fall bulbs and spring bulbs. The flowers they produce are generally spring flowers and fall flowers, respectively. Deciding when to plant is relatively easy: if it flowers in the spring, plant in fall; if it flowers in fall, plant in spring.
Picture
Daffodil and tulips
Crocus and tulips, the first colors of spring, come from fall-planted bulbs. These bulbs need to be exposed to long periods of cold temperatures to grow and flower properly. Planted in fall, they enjoy the winter cold in the frozen ground and burst to life when the warmth of spring raises the soil temperature. While not every spring flower from a bulb needs cold to bloom, it's still a nice rule of thumb to follow. Plant spring flowers in the fall.

To support the flowers, the bulbs need to establish a root system. Planting in the fall allows the bulbs to develop the strong roots needed for quick spring growth. Plant bulbs when the soil begins to cool after the heat of summer. Roots will grow until the ground freezes so the earlier they're planted, the more time they have to develop that system. Generally, this means at least six weeks before the first hard freeze. You want the soil to be warm enough to sustain root growth, but the conditions shouldn't be so warm that foliage growth happens; that's why we don't call them "summer bulbs".

If you delay and have bulbs in storage, having missed the perfect time to plant, it's best to get them in the ground even late in fall or into winter. With time bulbs will dry out and when they do they lose the energy needed for plant growth. This year's bulbs need to be planted this year. They may not develop a healthy root system before spring but at least they have a chance for survival.

Very warm regions, like Zones 8 and 9, can grow spring flowers from bulbs, but some of this timing needs to be modified. Most of the spring flowering bulbs, particularly hyacinth, crocus, and tulips, need cold saturation so the bulbs should be stored in the refrigerator for six to eight weeks before planting. The bulbs should be planted in early winter and treated as annuals; bulbs need to be re-planted each year. Either purchase new bulbs or dig up old bulbs and put in cold storage, but they need the cold temperatures to bloom again. Amaryllis, lilies, and daffodils don't need the cold treatment.
Picture

The bulbs you choose should be large, firm, and show no signs of mold, fungus, or decay. Buying from reputable online sources or a local nursery or garden center where you can actually examine the bulb ahead of time is the best idea. Typically you get what you pay for. If you buy bargain bulbs from a discount online or mail nursery, you may get scrawny, dried out, damaged inventory; I know because it's happened to me. Inexpensive bulbs in garden center bins can be fine, but examine them before you buy.

While buying bulbs from the bulb capital of the world, Holland, seems appealing, be careful. Bulbs in the Netherlands are grown by the millions for export. The hybrids they've developed over the centuries are beautiful, but many have been selected for the big bulbs they produce to make importing them more appealing. Often the plants that result may not be best suited to your garden; they may not be able to sustain the energy needed to keep producing the beautiful flowers. It's not unusual for foreign bulbs to produce plants that only survive one or two years.
 
Look to bulb producers that develop bulbs in a region similar to the one for your garden. Do a little research and select bulbs that are appropriate for your climate and plant growing zone. Don't just focus on how pretty the flowers will be. The plant must survive your winter to bloom in spring.

When choosing a location for planting fall bulbs look for a sunny, well-drained area; bulbs don't like wet feet. Be sure to look into the future. The sun needs to shine on the plants in the spring. Deciduous trees won't have leaves in the spring and the sun's position in the sky is different than fall, so areas that might be shaded in fall may be in full sun in spring, and vice versa.

Consider how you want to establish your bulb bed. Remember that fall bulbs bloom in spring and most of the flowers don't last longer than a few weeks. For the entire summer and into the next fall, the area will be devoid of color as the foliage gradually begins to brown. Many gardeners prefer to intersperse other flowers in the same beds during that time. Whether annuals or perennials, having other plants in a bulb bed helps sustain continued color throughout the growing season.
 
If you're developing a new bed it's best to prepare the entire plot by amending the soil and adding a slow-release fertilizer to a large area all at once. The bulbs can be planted in the fall, grow and bloom in spring, and lay the framework for additional plants. At the appropriate time, other flowering plants can be placed among the bulbs.
 
If you're adding bulbs to an established bed with other perennial plants already in place, you'll need to plant one hole at a time. This is more time consuming, but follows the same basic idea of interspersing plants that flower at different times of the year.

With bulbs in hand, and the weather cooling, begin fall bulb planting. Generally speaking, use a "rule of three". Plant bulbs about three times as deep as the height of the bulb and space them apart at least three times the width of the bulb. Some large daffodil bulbs may be almost three inches tall and thick (8 centimeters). Yes, they should be planted about eight inches deep (20 centimeters) with eight to nine-inch spacing. Keep this in mind when you buy mass-produced, bargain bulbs. The directions for planting tulips and daffodils were exactly the same for bulbs I bought at a garden center though the bulbs were markedly different in size.
Picture

You can use special bulb tools or the ones you have already. I have a bulb planter, a special cylindrical tool than is designed to twist in the soil and pull out a plug, producing a perfectly-shaped hole. If you want to buy one of these, look for one that has inch or centimeter markings so you know how deep you're digging. I also have a trowel with depth markings. They both were a little more expensive than generic tools, but they come in very useful when I want to measure the hole depth for different bulbs.

Picture

In a bed with other plants already in place, I lay out my bulbs ahead of time in the desired pattern on the surface. In a brand new bed you can dig a trench or large hole of the appropriate depth to place the bulbs in. Some gardeners like long, orderly rows of flowers. Others like clumps of flowers. Others like a totally random arrangement where the bulbs are tossed on the ground and planted where they land. I use all three methods and vary them depending on which bed I'm planting. Clumping or planting a lot of bulbs in one area is better than a few, single ones because the concentration of color can provide quite a visual impact.

Picture

Using the bulb tool or  a trowel, dig the hole, or prepare a trench. Place the bulb with the pointed end up. The flat end is wider and fatter and should be at the bottom of the hole.  With smaller bulbs it may be difficult to discern which is the base and which is the top; just put it in the hole and the plant will adjust when it grows.

Picture

If you weren't able to amend the soil in the entire planting area, do it one hole at a time. Mix some compost and fertilizer with the soil at the base of the hole. While the bulb has all of the energy needed to produce a plant and flowers in the first year, slow-release fertilizer high in phosphorus (the second number on the box) helps with plant development in poor soil like mine. I use a triple phosphate fertilizer. If the soil has been amended and is rich with organic matter, fertilizer isn't necessary. Avoid just adding the fertilizer directly to the hole because it can burn the developing roots.
 

After placing the bulb, cover it with amended soil and tamp down gently. You don't want to compact the soil, just ensure it is completely covering the bulb. Especially after amending it you'll have more soil than will fit in the hole with the bulb in it. That's okay. You can mound it slightly because it will settle in time.

That's all there is to it. Dig a hole, place the bulb, cover with soil. As with most plants, adding mulch to the bed will help moderate soil temperature and avoid frost heave in the winter. Once in the ground, most fall bulbs have a long life ahead of them and you'll have flowers every spring.
 
Be as creative as you want when it comes to planting fall bulbs. Generally, low plants are planted in front of high ones, but consider blending and mixing different bulbs in the same bed. When flowers bloom at different times they'll provide an ever-changing spring portrait. Consider planting different bulbs in the same hole with smaller ones on top of large ones. When they grow and bloom the flowers will be mingled with each other for a distinctive look. Bulbs do well in pots too.

As easy as they are to plant and as beautiful as the flowers are, it's hard to come up with an excuse for not planting fall bulbs.
16 Comments

How to Propagate Daylilies

9/14/2011

11 Comments

 
Daylilies are a rugged perennial that can endure sustained neglect and still grace the gardenscape with beautiful strokes of color. I know because I've been a daylily abuser. They do so well in poor soil, harsh weather, bad light, and bone-dry conditions that it's easy to forget that they can thrive with a little help. With just moderate maintenance the plants will prosper and you'll realize you want more in your garden. That's no problem because daylilies are very easy to propagate.

Daylily flowers provide a rainbow spectrum of color that bloom over a long period and the plants offer sizes that vary from small feathery clumps to large, fans of green foliage. Because of these differences in color and size, I've found that I occasionally plant with an aesthetic vision in mind but when the plants mature I want to adjust their positions and multiply the plants I especially like. Easy propagation is a godsend in those situations.
Picture
A daylily bed that needs more
There are only two primary forms of propagating daylilies. The first is by seed. After blooming and pollination, the flowers dry and a small, green seed pod develops at their base. The seed pod will grow over the course of a few months and the seed pods will turn brown as they mature. The brown pods will eventually crack open. Inside will be glossy black seeds. These young seeds need cold exposure to germinate so they should be planted in the fall for natural winter cold or they should be stored in the refrigerator in a plastic bag for about a month. After this cooling period they're ready to sow outside in spring.

Collecting and sowing seeds from daylilies in your garden is a crapshoot. The daylilies you grow are probably hybrids. They won't grow true to the parent plant when grown from seed because it is a cross of other varieties. If you have multiple varieties of daylilies in your bed, there is no telling which flower pollinated another. With varied hybrid parents or different hybrid cultivars involved with pollination, the resulting seed will grow into an unknown, future plant.
 
It can take three years for a seed to germinate and grow into a plant that flowers. After all that time, be ready for a surprise when the plant produces that first bloom. There's no way to tell what color or size it will be ahead of time, but with so many positive attributes that daylilies offer, it will probably be a nice surprise.

If you don't plan to save the seeds, remove the seed pods. Plants that produce seeds will usually have fewer flowers the next year. Since one of the reasons you grow daylilies is for the flowers, there's no reason to intentionally restrict future flowers.

The second form of daylily propagation is division. Large clumps of daylilies can be divided easily and this is the preferred method of propagation when you want your plant to have the same size and color as the parent. It also will produce flowers faster. Each plant grows into a clump that will be ready for division about every three or four years. Undivided plants will begin to produce fewer flowers so you're doing yourself and the plant a favor by dividing regularly.

Daylilies can be divided in spring or fall. The plants that are divided in spring grow quickly afterward, but they seldom bloom in that first year. Primarily for that reason, I prefer to propagate in the fall. Fall propagated plants will almost always bloom the next year. You should wait until after the plant flowers, but dividing and transplanting the divisions should happen at least six weeks before the ground freezes.
Picture
Start by digging up the entire plant. Beginning about six to eight inches away from the plant, push your spade as deep as you can in a circle around the plant. Lift out the plant with the spade, trying to keep the rootball intact. This shouldn't be too difficult but larger plants may have roots deeper than the hole and can be torn in the process; that's okay, but try to avoid it.
 
Brush or wash away the soil attached to the roots to expose them. Many daylily roots are enlarged and tuberous. This is where the plant stores food and water and enables the divisions to grow well after transplanting. The more roots in the division, the better chance for survival of the transplant.

Picture

You'll be able to see how the fans form distinctive and individual sections where they attach to the roots. Each of these sections can be pulled apart from the others. I find it easiest to begin by lightly shaking the plant and seeing where it begins to separate naturally. Then I gently pull apart the plant into two divisions. Often each of those divisions can be pulled into two or three additional divisions.

With larger plants and clumps, they may not separate with gentle pulling. You may need to slide two garden forks, back to back, in the middle of the clump and pry it apart. You can do the same with two spades but that causes more damage; garden forks reduce root damage. As soon as the divisions are smaller, they can usually be further divided by hand.
 
Divisions should have three or four fans with stout roots attached. These will establish more quickly, grow into good clumps, and flower within a year. You can also divide to the point where you have individual fans with just five or six slender leaves. These individual fans can be transplanted with no problems but may take a few seasons before they reach a size where they will begin flowering.
 
Some old, large clumps may have roots that are so extensive in the center that it is virtually a solid mass. These clumps may need to be cut apart with a garden knife or sharp spade. Try to cut in such a way that you keep the integrity of the individual fans intact.
Picture


The divisions should be transplanted soon after digging up so the roots don't dry out. On each division, cut the leaves so that only five or six inches remain above the crown. This reduces water loss and stress. The crown is the part where the leaves and roots meet and is usually cream colored. Place the plant in the hole with the crown about one inch below the surface level.

Daylilies do best in full sun in moist soil with organic matter added. If you can prepare the transplant area ahead of time with organic matter, do it. Adding a high phosphorus fertilizer will help stimulate root growth. If you're transplanting divisions among other, established plants, as I often do, at least add a handful of compost and fertilizer to the soil in the hole for each plant. Firm the soil around the roots and fill the hole.

After the divisions are in the ground, water thoroughly. Keep the soil moist until the ground freezes. Use a few inches of mulch to moderate soil moisture and temperature levels. Mulch also reduces weeds and highlights the beauty of the plants.
Picture
New transplants in place
There is a third propagation method that is available for some varieties of daylily. Miniature plants may grow along the stem, or scape, of some daylilies. This miniature plant will form leaves, a crown, and even roots if left on the plant long enough. These miniature daylilies are called proliferations and are clones of the parent. The proliferations can be potted up or transplanted. Cut the scape above and below the proliferation. If roots haven't developed, dipping the crown in rooting hormone helps initiate root growth. None of the daylily varieties I grow form proliferations, so I don't have personal experience with this method.

In time daylilies will form dense mats of plants. By dividing them you can keep the plants under control and looking their best. Propagation is a great way to expand their wonder to other areas. And don't forget that you may have many gardener friends who would love to have some of your extra divisions.

11 Comments

How to Propagate Daisies

9/10/2011

14 Comments

 
Shasta Daisies are wonderful garden flowers that deserve a primary spot in most gardens. They grow well in many different regions and are even hardy in my Zone 4 garden. They prefer well-drained soil but are resilient enough to handle most soil conditions. They require very little maintenance, produce beautiful flowers, and return bigger and better every year. And they are very easy to propagate.
Picture
My two Shasta Daisies
Propagating Shasta Daisies follows the same typical processes as many other perennial plants. You can use any of the three primary methods: saving and sowing seeds; rooting stem cuttings; or dividing the adult plant into new divisions. Each of these methods is easy and effective.
Picture

Daisies will readily grow from seed. Let your flowers stay on the plant and seed heads will develop after the petals dry. I like to deadhead the spent flowers in early fall and collect them in a paper bag. After a week the flower heads are completely dry and ready for seed collection. Simply squeezing the dried heads with your fingers will release seeds. If you do this in or over the paper bag the seeds collect at the bottom, along with the seeds that fell out during the drying process.

The seeds can be sown in fall or spring. I prefer to distribute the seeds widely over the planting bed in the fall. This allows for the natural cycle of the seed to play out. They settle over the soil and will be pressed in by autumn leaves and winter snow. They'll get a good cold soaking during the winter months before snow melt and spring rains awaken them. When the spring sun warms the soil they'll begin to sprout and new growth becomes evident by early summer.

You can prepare your bed and sow in spring and achieve the same results as well. Either way, don't expect flowers in the first year. It will probably be the second year before you see blooms on the young plants. You can easily dig up and transplant the small plants to new garden beds if too many of the seeds sprout or if they pop up in areas you don't want them.
 
Always remember that hybrid seeds don't produce true to the plant you're propagating and most Shasta Daisies in the garden are hybrids. "Becky" is a very popular hybrid variety. If you have one of the hybrid daisies and save the seeds hoping to grow many more of the same, you may be disappointed. It's worth a try because you may be pleased with the outcome, but the other two propagation methods will ensure you get the same plant and flowers as the parent.

Dipping a five- or six-inch long stem cutting in rooting hormone, or just placing it in damp sand or potting soil, will produce a new plant that is a clone of the original. Remove flowers and leaves from the lower half of the stem and place the cuttings in a spot with indirect sunlight. Keep the soil lightly moist and in a few weeks to a month roots will develop along the cutting and the new plant is ready for transplanting. The plant and flowers will be exactly like the parent from which you took the cutting, but like with seeds you may not get many flowers in the first year of planting.

The method I prefer is division. This propagation method results in an exact duplicate of the plant and will flower in the first year. The roots are already established and take hold well when transplanted. Division can be done in fall or spring. I prefer early fall so the plants can continue to put out new roots while the soil is still warm. In spring the transplanted plants are already in place for a full season of growth.
 
When I've divided Shasta Daisies in spring, I've noticed that the separated plant sections don't always produce as many flowers in that first season; possibly because of the stress on the plant. Also, the divisions aren't always even and same-sized and that disparity remains evident during the first year. With fall-divided plants, the garden tends to look more symmetrical as the plants grow the following season. In the second year these visual discrepancies fade and all of the plants tend to grow similarly, regardless of the initial time of division.
 
Shasta Daisies can grow quite large into big clumps and may take over a garden bed. The center of big plants will often die as the edges grow and spread out. Eventually the clumps should to be thinned, for the plant’s health and for garden aesthetics. I take advantage of this normal garden maintenance and use the opportunity to expand daisies to new areas.
Picture

Begin to divide a Shasta Daisy by digging up the entire plant, digging as deeply as possible and retaining the entire root ball if possible. In spring, wait until you see new green growth; in fall, wait until after the flowers have faded. The plant is pretty tough so you don't need to be too gentle with it. There are many potential transplants in that clump so decide how many you want. My winters are harsh and I want the new plants to have a good chance at survival so I keep the separated divisions relatively large with lots of roots in place.

Picture


To start dividing, simply press a spade through the middle of the root ball. You can also use a garden knife. The center of the mass may be thick so using a sharp tool helps separate it.

Picture


Grabbing each of the two halves, simply pull them apart. You now have two plants. Often I'll stop the division at this point and plant just two divisions, effectively doubling my plants. Depending how big the clumps are, you can further divide the halves into four, eight, or more sections. If the center of the clump is dead or dying, this is the time to cut it out and throw it in the compost pile.

Picture


Dig a new hole in a spot with full sun, amend with compost, and place the division in. Firm the soil around the roots and water well. Space plants at least a foot apart. Each division will grow into a new large clump of daisies and in a few years will be ready to divide again.

Picture

For the maximum number of divisions look closely at the clump you dug up. Particularly around the edges you'll be able to see where individual stems are growing up from the root base. This is how the plant naturally propagates by enlarging its base. You can easily pull apart these individual stem sections with roots attached. Each of these sections can be potted up or transplanted. It will take longer for these smaller divisions to grow into full size plants, but it allows you the opportunity to fill in a large garden area with just one or two parent plants.

After the divisions are planted, deadheading and pruning any damaged stems or leaves will focus the plant's energy on developing more roots. Daisies will stay green through most of the year and until the ground freezes roots will continue to grow even when the weather is cold above ground.
Picture
Two plants are now seven
If left alone, natural propagation by seed and plant expansion will allow daisies to readily take over many garden beds, but the results can look ragged and uneven. With a little effort you can have Shasta Daisies under control and looking good for years to come.
14 Comments

How to Propagate Lilies

8/20/2011

38 Comments

 
Propagating lilies is easy. Though the image of an eccentric English lord patiently growing rare jungle lilies in a Victorian greenhouse may be intimidating, the reality is that garden lilies can be propagated with very little fuss. Asian lilies, Oriental Lilies, Tiger Lilies, and American hybrids all can be propagated in the garden.
Picture
When cared for and left to themselves, lilies will quickly spread out and can fill a garden bed over the period of a few seasons. When a gardener intervenes to propagate them, the process is accelerated and new plants can be strategically and deliberately placed. Early fall is a good time to propagate lilies.

By their basic nature, lilies want to multiply and have evolved to do so in a number of different ways. Many plants will multiply through just a couple processes, but lilies offer no less than six methods of propagation. All are easy enough for any amateur gardener to undertake.

Propagating lilies by seed is an obvious method, but takes longer than the others. Letting the flowers go to seed and then collecting it is simple, but the plants require more time to fully develop from seed. It may be a few years before you see flowers. Professional growers and dedicated amateurs will cross pollinate different species to collect seed and develop new hybrids. While this may be a fun way to propagate lilies, it isn't something most gardeners need to do, especially since their are better and faster methods.
Picture
Lily offsets
Division is a propagation method most gardeners are familiar with and perfectly suited for lilies. Lilies grow from bulbs. As the plant matures, the bulb grows to a certain size and naturally splits to create a clone. It divides into two bulbs with the divisions called offsets. Each offset will grow into a separate lily plant. If left alone in the garden, each of the offsets will eventually split into new bulbs. This process eventually results in a clump of lily plants.
 
Propagating from the first division is easy. You can see this in your garden by looking for two plants emerging from the soil very close to each other. Carefully digging up the plant reveals the two bulbs. They're still connected but are easily separated by hand or with a sharp knife. Each of the individual plants with bulb attached can be planted and will continue to grow. It's best to do this after the plant has flowered so all of the plant's energy will be focused on root development.

Separating just two offsets works well, but you can also dig up a clump of lilies and carefully separate each bulb for planting. Clumps may not come apart as easily as just two bulbs and often requires cutting apart the thickest sections. To keep your lily bed balanced and healthy, you should divide clumps periodically.
 
Some species of lilies, particularly Tiger Lilies, offer propagation with bulbils. Bulbils are small, round, dark-colored, mini bulbs that grow on the plant at the junction of leaves and stems. Each bulbil can be pulled from the plant and planted in the ground. If left in place long enough they may even begin to grow roots and sprout right on the plant. In a natural setting, they fall to the ground and grow where they land. Bulbils will grow faster than seeds. I don't grow Tiger Lilies and haven't tried planting bulbils, but it's about as easy as it gets.
 
You can also lay a lily stalk with bulbils horizontally on the ground and cover it with soil. A new plant will grow from each bulbil. Remember that not all lily species develop bulbils so if you don't see them don't be upset.
Picture
Collecting bulblets

A method I like is propagating with bulblets. Bulblets are young bulbs that develop underground along the stem root between the primary bulb and the soil surface. Though smaller than mature bulbs, they'll grow into full plants. Dig up the lily, snap off each of the small bulblets growing along the roots, and place the main plant back in the ground. Or you can leave the plant in place and carefully remove the soil below it, digging down to the bulb. Along the way you'll see the little, light bulblets.

Picture
Bulblets along the stem root

The bulblets can be planted pointy end up anywhere you want another plant. Wait until a few weeks after flowering before collecting them; this allows the bulblets to develop and increase in size. Ideally you should have at least two months of temperatures above freezing for the bulblets to begin growing in the soil. You probably won't see any growth above the surface in the fall, but in the spring a new plant should emerge where each bulblet is planted.

In cold regions you can harvest the bulblets and grow them over the winter for transplanting in spring. Most lily bulbs require between three and six weeks of cold temperatures before they'll grow leaves. They'll get that naturally outside, but for bulblets that you want to grow inside, place them in a plastic bag and put it in the refrigerator for at least a month before potting them up. Then you can grow them like any household plant before transplanting later.

The fifth method of propagation is with scales. This method requires a little more effort but is the one that can produce the most new plants from a single parent. Lily bulbs consist of overlapping scales and each scale has the potential of developing into a new plant. Wait until after the plant has flowered to collect scales. Like with bulblets, you can either dig up the plant or carefully remove soil down to the primary bulb. Carefully remove the scales from the outer layer of the main bulb. Removing eight or ten scales from the bulb shouldn't harm a mature lily. When you break off the scale try to ensure you have a section of the bulb base, the basal plate, attached to each scale. This is where the roots form.
Picture
Lily scales
Bulblets also consist of scales. You can collect the bulblets and then separate them into the individual scales but they may not be as developed as scales from the main bulb.

After collecting the scales, wash them and place them in a plastic bag filled with moist vermiculite, peat, or potting soil. Place them in a warm, lighted area and in a month or two little bulblets will begin forming along the basal plate. Like with bulblets from along the stem root, cold soaking is needed before leaves and a plant will grow, so after this period of development put the bag in the refrigerator.

Picture
Placing a scale in peat
You can also put the scales directly into a moist growing medium with about a third of the pointy end above the surface. Over the course of the same period, bulblets will begin to form. After another month in the cold they'll be ready for potting.

After either of these preparation methods, these new bulblets can be separated from the scale and planted in individual pots. Over the winter the plants will begin growing and should be ready to place in the ground in the spring. Don't expect flowers from these plants in the first year but after a few seasons you won't know which lilies came from scales or bulblets, or full-size bulbs.

The final propagation method is common to many other garden plants. You can propagate using the stems or leaves too. Pull off a leaf with a little stem tissue attached, dip it in rooting hormone, and put in in wet sand or a moist potting soil. Or take a stem piece and do the same. After about a month a little bulb and roots will form. The little bulb can be transplanted and treated as a new plant.

With any propagation method you should start with healthy, disease-free plants. If your lily is infected with a virus, each of the offsets, bulbils, bulblets, or scales will be infected too; viruses are not spread in seed. If you have a diseased plant it's best that you discard it rather than try to propagate it. You can also coat the bulbils, bulblets, and scales with a fungicide before planting if you have a problem with fungus.

For an orderly planting it helps to label the result of the propagation so you know which plant is where. Or you can do as I often do and randomly pick spots for random bulbs, letting chance select the best location. That results in different colors spattered throughout the bed. Either way you'll have ample new plants to fill in bare spots by using any of the easy lily propagation methods.

38 Comments

Fill Gaps in the Garden

8/18/2011

8 Comments

 
When your garden is at or close to its growth pinnacle, enjoy the impressive visuals and reward yourself for a job well done. Also take advantage of the opportunity to identify obvious bare spots that you prefer were filled.
 
There are a number of different approaches to gardening and I subscribe to many of them. In some areas I strive for simplicity and intentionally grow individual plants, well spaced, to accent there presence; my fruit trees fall into this category as they become focal points in various parts of the landscape. In other beds I hope for a mass effect with an explosion of different colors, textures, shapes, and sizes. In some gardens, particularly new ones like mine, it takes awhile before that goal to be reached.

At the peak of the season before plants begin their decline in fall, take the time to analyze your garden beds to determine if they're meeting your expectations. Take pictures. View them from all angles. Be critical of your own design. Identify what you like. Make decisions about what you want to change.

I'm using this time to note specific gaps and holes in my beds that need to be filled with new plants. When I first planted my beds last year I had a plan and placed plants accordingly. Not everything grew as expected. Some died during the harsh winter. Some turned out better than anticipated. Overall, I'm pleased with the results, but there is always room for improvement.

In one bed friends helped me plant dozens of daylilies. Only a portion have made it this far, due primarily to poor stock from the online source and poor storage methods before planting, by me. Most of the plants that survived are doing well, but there aren't as many as I'd like. An analysis of the site shows gaps that I want filled.
Picture
Lots of space between daylilies
Originally I intended the bed to be overflowing with daylilies. The bare spaces between plants now offer me other options. I can plant more daylilies to achieve the original plan, or I can mix it up with something different. The bright yellow Heliopsis nearby is doing great; it's taller than the daylilies but maybe I can plant more of it as a backdrop. The Yarrow at the edge is doing great too; maybe I can add a few of those plants interspersed with the daylilies to create contrast. I can change my original plan easily.

Across the yard I have two daisy clumps that are doing amazingly well. They're a Shasta Daisy variety that overwintered fine while the many echinacea and snapdragons that were planted in the same bed last year failed to return. Obviously the daisies like that spot so I'll reward them by expanding their presence. I'm also thinking of adding other flowers from the same family like Aster, Chrysanthemum, and Calendula; I have a few mums and marigolds in other areas and may move them there.
Picture
Daisies looking good
In another bed my lilies are looking good too. Many of the bulbs we planted didn't grow; same online source, same storage issues. I still want that bed to be filled with lilies so I'll focus energy in that direction and plant more. I'll pick up some end-of-season bargains at the nurseries and get them in the ground soon. I'll also plant next spring. By seeing the gaps in the bed it makes me want to fill them with many more plants.
Picture
Room for more lilies
Another approach in each bed is to leave things alone. Most flowering plants will fill in over time. Daylilies and Daisies can grow quite large in big clumps. A bare space now may provide ample room for them to grow larger later. Other flowers self-sow and spread quickly. I've set the stage for the beds and letting them determine their own growth patterns is definitely an option. In one of my beds red Knautia is spreading rapidly, filling in open space, adding vibrant color to the area; I like the way it looks.

Gardening is a process. Planting according to a plan and then never returning to that plan may work for some people, but not for me and many other gardeners. While letting the flowers in a bed determine their own destiny may be an intentional option for now, without oversight and continual analysis a few plants can overrun and choke out the others, undermining overall intentions. I still like order and want my beds to fulfill certain visions I have for them.

Once you've identified an area that deserves new plants determine the best time for action. Not all plants should be planted in the fall after you've decided to fill in spaces. Spring may be a better time. Sure you have to wait six months or so before acting, but you give the specific plants a better chance at survival. Marking the locations for new plants becomes important.

Whether planting right after your analysis or waiting until spring, use the photos you took (you did take photos didn't you?) as a template. Print the photo and actually draw the new plant on it. It helps to give perspective of how a new plant will look and acts as a treasure map if you have to wait through winter before planting. In spring you pull out the photo, observe where the established plants are in the photo, look for their new green growth in the garden bed, and put new plants in the appropriate spot marked on your map.

Whether changing a plan by adding different plants, expanding a bed with new plants, multiplying the plants already in place, or letting things spread out naturally, by pausing to determine the best course of action you will ultimately improve how your garden looks and how you feel about it. It's often difficult to determine how a garden bed will look in the future and we often choose the wrong time to try and figure that out. When the other plants have reached their peak, it's usually a good time. So look for the gaps and bare spots and decide if you want to do something.

8 Comments

Color in the Landscape

7/29/2011

1 Comment

 
I love vegetable gardening and eating the varied delicious results. Harvesting potatoes, tomatoes, beans, spinach, carrots, and the many other crops offers a literal "fruits of my labor" success. My raspberry plants and fruit trees thrill me each time I swallow a warm, ripe berry or savor a juicy plum. Consequently, many of my articles focus on that type of gardening, the growing of edibles. An arena that seems to receive much less literary attention is flower gardening, but it's no less rewarding to me.

Much of my gardening enjoyment comes from the endeavor. I like getting my hands dirty, caring for plants, and struggling to encourage growth in a challenging gardening environment. Vegetable gardening is a series of daily events with planting, weeding, fertilizing, thinning, pruning, and harvesting on the list of chores. For me, my flower beds require much less residual work. I focus on perennials and once the initial planting and mulching is complete, they pretty much take care of themselves and fade on my activity roster. But when they burst into bloom it fosters the same sentiment as my veggies and fruits.

Many of my summer flowers are finally blooming. My season is much later than most due to the high elevation and I seem to enjoy new flowers as other gardeners are watching their gardens wane. The flower beds were put in and planted last year so this is the first season when they've been able to assert their own authority. I'm pleased with the results.

My wife is enchanted by the Kniphofia, the Red Hot Pokers. One long bed is filled with xeric plants and the Kniphofia steal the show. Among the flashy Gaillardia, the stately presence of the rainbow stalks draw immediate attention to their display.
Picture
Kniphofia showing some color
I devoted an entire bed to lilies of different varieties. Not all of the bulbs produced plants, a deficiency at the nursery I think, but the ones that survived the winter are setting the stage for a regal production. I'll add to the bed in the years ahead to create a mass of plants. Based on this year's display, it will be worth the effort.
Picture
Lovely lilies
A small corner of the yard by my stone patio plays host to a desert rock garden. That's a new type of gardening for me and one I'm expanding slowly. The star of that production is the mass of purple ice plants. They require little care once established and are in continual bloom for a lengthy run. The group creeps ever larger and will engulf the small hill next year, just the way I want it.
Picture
Ice plants are among my favorites
Daisies are a perennial favorite and I always have them in my garden. The gorgeous mounds of white star flowers create a grand visual attraction. The plants have grown to a great size that will enable me to divide them to enjoy even more flowers next year.
Picture
Daisies are a nice addition to a garden
Even the thyme and sedum I have as groundcover around stepping stones are getting into the act. Their small flowers blast color at foot level. Like walking on a woven carpet, they add a vibrant element to the landscape.
Picture
Butterflies enjoy the groundcover
The penstemon flowers are just beginning to peek into view, but the hummingbirds have already discovered the early arrivals. Yesterday I watched a petite hummingbird sitting on the fence line just above the plants, patiently looking down as if to encourage them to come onto the stage.

It took a lot of work by me and many friends to break the sod, amend the soil, and plant the plants. Besides the ones I’ve mentioned, many other beautiful flowers have roles in the landscape. This season I'm able to sit back and enjoy the vivid visual fruits of last year’s labor. It's a success story that once again proves how beneficial gardening can be.

I still have many gardening tasks before me in the weeks ahead and almost all of them center around the vegetable garden. It makes those tasks less of a chore when I can take a break and lean from the deck railing or sit on the patio and be surrounded by the colors of nature, colors that I had a hand in creating. The butterflies and birds enjoy the same theater. It makes me glad that I'm not a one-act gardener.

1 Comment

    RSS Feed

    GardenerScott

    Join me as I discuss gardening subjects and take a look at gardens past, present, and future.

    Blog Categories

    All
    Animals
    Biochar
    Birds
    Chickens
    Compost
    Crafts
    Deer
    Environment
    Flowers
    Fruit
    Gardens
    Gifts
    Growing
    Harvest
    Herbs
    Inspiration
    Irrigation
    Lawn
    Mulch
    Pests
    Planning
    Planting
    Plant Selection
    Preserving
    Propagation
    Pruning
    Recycling
    Reviews
    Seeds
    Sites To See
    Soil
    Tomatoes
    Trees
    Vegetables
    Watering
    Weather
    Weeds

    Archives

    April 2018
    December 2015
    March 2014
    November 2013
    October 2013
    August 2013
    July 2013
    June 2013
    April 2013
    March 2013
    February 2013
    January 2013
    December 2012
    November 2012
    October 2012
    September 2012
    August 2012
    July 2012
    June 2012
    May 2012
    April 2012
    March 2012
    February 2012
    January 2012
    December 2011
    November 2011
    October 2011
    September 2011
    August 2011
    July 2011
    June 2011
    May 2011
    April 2011
    March 2011


Web Hosting by iPage