Thinning plants in your vegetable garden can lead to bigger, better harvests. When plants are crowded with others they compete for water, sun, and nutrients and tend to be stunted and unproductive. When plants have plenty of room to grow they're more likely to perform well. Thinning plants also provides improved air circulation, helping reduce the likelihood of fungal diseases. Gardeners can give their plants the best chance for success by removing competition; this is thinning out the garden bed.
Thinning should not be confused with pruning. Pruning is the practice of removing branches and parts of a specific plant, thinning is removing the entire plant.
Thinning should not be confused with pruning. Pruning is the practice of removing branches and parts of a specific plant, thinning is removing the entire plant.
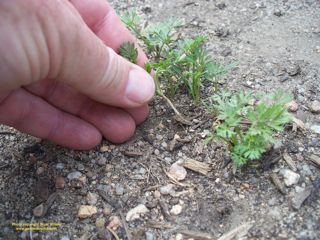
Carrot seedlings often need thinning
When you thin plants choose an appropriate method of removal. Small seedlings can be pulled from the ground. But be cognizant of nearby plants. If you yank one plant you may disturb the roots of its neighbor and effectively destroy both plants.
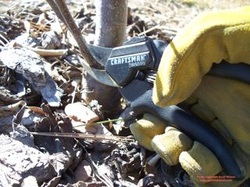
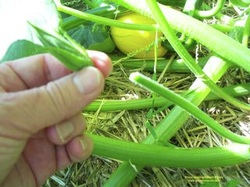
If plants are close together and you suspect pulling one of them will affect another, cut the plant to be thinned. Pruning shears or small scissors work well to cut the stem close to the ground. Cucumbers, beans, peas, squash, and melons have tender roots and are best thinned by cutting if the plants are anywhere near each other.
If plants are close together and you suspect pulling one of them will affect another, cut the plant to be thinned. Pruning shears or small scissors work well to cut the stem close to the ground. Cucumbers, beans, peas, squash, and melons have tender roots and are best thinned by cutting if the plants are anywhere near each other.
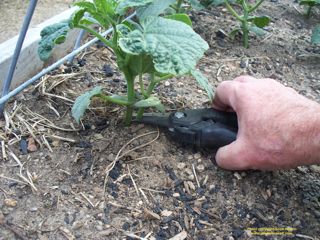
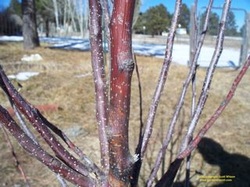
Thinning a crowding cucumber
Plants that sit alone can be dug up with a trowel or shovel. Digging up a plant may provide the opportunity to transplant it to another location. I'll often thin out my flower beds and transplant the thinned seedlings to another part of the bed or pot them to be given away.
Thick groupings of plants like lettuce, spinach, and other greens can be thinned with a rake. When the plants are about an inch tall lightly drag a rake across the soil surface. The tines will remove some of the small plants while leaving others spaced apart.
When determining how to thin and how much space to provide, think about the final size of the plant.
Seed packets often provide guidance for thinning. A carrot seed packet says to thin to 1 to 3 inches; carrots are narrow and don't spread so you only need enough space for the big root to grow. An onion seed packet says to thin to 2 to 5 inches; onions grow bigger than carrots and need more room between them. Lettuce may need 8 or 10 inches, or more, depending on the size of the mature head.
Big, vining plants like squash take up a lot of garden space and thinning them enables the gardener to direct the growth. Thinning also controls the future harvest. I planted six zucchini seeds but I only want two plants; six plants would produce more zucchini than I could ever use while two is very manageable. The strongest, best-spaced plants remain.
Thick groupings of plants like lettuce, spinach, and other greens can be thinned with a rake. When the plants are about an inch tall lightly drag a rake across the soil surface. The tines will remove some of the small plants while leaving others spaced apart.
When determining how to thin and how much space to provide, think about the final size of the plant.
Seed packets often provide guidance for thinning. A carrot seed packet says to thin to 1 to 3 inches; carrots are narrow and don't spread so you only need enough space for the big root to grow. An onion seed packet says to thin to 2 to 5 inches; onions grow bigger than carrots and need more room between them. Lettuce may need 8 or 10 inches, or more, depending on the size of the mature head.
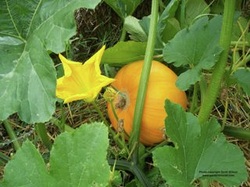
Big, vining plants like squash take up a lot of garden space and thinning them enables the gardener to direct the growth. Thinning also controls the future harvest. I planted six zucchini seeds but I only want two plants; six plants would produce more zucchini than I could ever use while two is very manageable. The strongest, best-spaced plants remain.
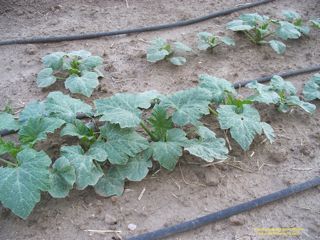
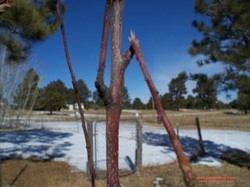
Squash plants are too close together
Plants can be thinned at any stage of their life cycle, but it's most beneficial to do it when they're young. After the second set of true leaves emerges, seedlings are usually strong enough to survive. That's a good time to decide which ones stay and which ones go. Thinning small plants before they stunt the growth of a neighbor is better than waiting until after they become a problem.
You can delay thinning edible plants like lettuce, spinach, and beets until the leaves are big enough for a salad. Thin these out to give room for the remaining plants and then use them in the kitchen. Root crops like carrots, radishes, and turnips will be quite tasty when small; thin out these plants periodically at different sizes and eat them too.
I often conduct two phases of thinning. I'll remove seedlings before they stunt the growth of their neighbors and then wait a few weeks for the plants to get healthy and strong. Then I thin a second time to choose the strongest plants with the best spacing for the bed. This works particularly well for plants like squash and cucumbers when I want the biggest and healthiest plants headed into my short growing season.
You can delay thinning edible plants like lettuce, spinach, and beets until the leaves are big enough for a salad. Thin these out to give room for the remaining plants and then use them in the kitchen. Root crops like carrots, radishes, and turnips will be quite tasty when small; thin out these plants periodically at different sizes and eat them too.
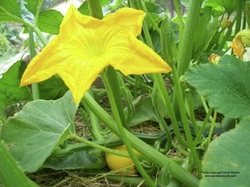
I often conduct two phases of thinning. I'll remove seedlings before they stunt the growth of their neighbors and then wait a few weeks for the plants to get healthy and strong. Then I thin a second time to choose the strongest plants with the best spacing for the bed. This works particularly well for plants like squash and cucumbers when I want the biggest and healthiest plants headed into my short growing season.
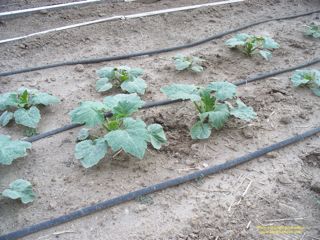
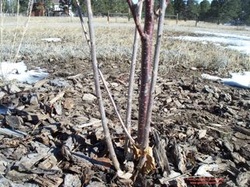
The same squash, after initial thinning, will be thinned again
It's best to thin in the early evening with the soil damp. Damp soil allows small plants to be pulled easily and the absence of harsh sun allows the remaining plants to get used to their new conditions before immediate exposure to heat and light. Watering well after thinning a bed also gives the remaining plants an extra boost along with their newfound spacing.
It's possible to plant a garden and never thin out anything. Sowing seeds and placing transplants with perfect spacing between them means you don't need to remove overcrowded plantings. This can work well for big seeds like pumpkins and plants like tomatoes and peppers. I place them in my garden where I want them and wait for the harvest. I sow my beans and peas in a perfectly spaced grid that allows them to grow up a trellis; their seeds are big and easy to place. Blocks of corn are planted with ideal spacing too.
Many other seeds like carrots, lettuce, onions, and spinach are sown randomly in rows and then thinned out after the plants emerge. The seeds are too small to place with exact measurement and it's easier to wait to thin after germination reveals which small plants need to be removed. Other seeds like beets are easy to place but multiple plants will emerge from a single seed and then need to be thinned.
Plants with bigger seeds like cucumbers, melons, and squash are often sown closer together than the final plants will be. Varying rates of germination, insect damage, and uneven sowing means some plants will start off better than others. It's common to plant six of these kind of seeds in a mound, get four or five that grow, and then reduce them to two or three plants. This allows you to choose the biggest and best plants for that garden area.
This year I planted many, many pickling cucumber seeds in a raised bed. I've had problems in the past with low germination rates, sun and hail damage, and insects eating seedlings. Extra attention by me, and gentle, warm weather resulted in more than 80 plants emerging. That's many more than that bed can support so about 75 percent need to be thinned out. The remaining 20 plants should provide plenty of cucumbers. Because they won't have to compete for water, sun, and nutrients, those 20 plants will produce more fruit than 80 overcrowded plants in the same space.
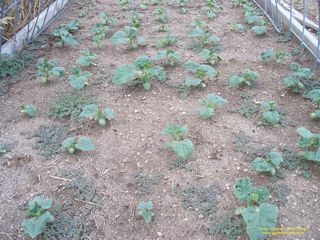
Too many cucumbers for one bed
All of those seeds came from the same packet. Seed packets may provide dozens of seeds when you only need a handful of plants. Because seeds are only viable for one or two seasons it makes sense to plant many of them and select the ones you want after the plants begin to grow.
Emotionally, it can be difficult to thin out healthy plants. Most of us work hard to get our plants to grow and then we have to intentionally undo our labor. That's one reason I transplant the thinned out plants when I can. For those who are hesitant to thin, try an experiment. Thin half of a bed and let the other half grow as sown. At harvest or the end of the season, compare the two sections. Chances are the thinned half will be healthier and more productive.
When the thinned out plants find a place in the kitchen or compost pile you can gather solace by knowing that they served a purpose in the garden.
Like weeding, thinning is a necessary activity to keep garden plants healthy and productive. When done properly the beneficial results will be obvious.

 RSS Feed