GardenerScott.com
  • Home
  • How-to Videos
  • GardenerScott Blog
  • Photos
  • Tips & Tricks
  • Contact Me

How to Plant Garlic

9/12/2011

20 Comments

 
Garlic is a plant that many gardeners are curious about growing, but too few do. Fans of garlic tout its medical benefits, its culinary virtuosity, and its pest control effectiveness. With so much going for it, I find it mildly shocking that I'm one of the few gardeners I know who actually grows it. It's surprising because garlic is about as easy to grow as anything in your garden and provides such wonderful rewards.
Picture

There is nothing mysterious about planting garlic, but deciding on where you'll plant is important. Garlic is in the ground for six to nine months so you'll need a spot that is dedicated to it, where it won't interfere with or be impacted by other plants. I've planted my garlic in its own four-feet by four feet (1.2 meters) raised bed. The location should be in full sun.
Picture

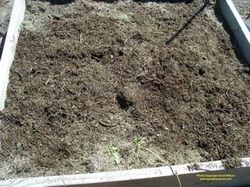
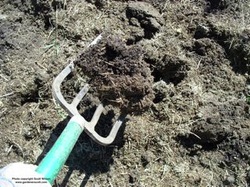
Garlic will grow in a variety of soils, but it will do best in well-draining, well-amended soil. If you spend extra time preparing the bed you'll be rewarded with large, healthy bulbs. Add two to four inches of compost or aged manure on the soil surface. Work it into the soil with a tiller, spade, or garden fork. You want it to be incorporated throughout the soil to a depth of at least six inches (15 centimeters) and deeper if you can.

You can also add blood meal and bone meal to the soil to provide extra nitrogen and phosphorus. If you have pets that have access to the garden you may skip those amendments. Dogs and cats love to dig through soil with fresh, wet blood meal as they search for the source of a "fresh kill". Alfalfa meal is a good alternative. A balanced fertilizer works well too.

Garlic tends to do best in most regions when planted in the fall. The cloves are able to develop basic roots before the ground freezes and are in place to grow quickly when spring warmth returns. Garlic needs exposure to cold temperatures to sprout in spring and being in the ground during the winter provides that. One old tradition is to plant garlic on the shortest day of the year, 21 December or 21 June depending on your hemisphere. That may work for some temperate regions where the soil can still be worked, but for those of us who have frozen ground in winter it's a little too late.

For many gardeners, fall is the ideal time to plant. As long as they're in the ground at least three weeks before the ground begins to freeze, the cloves will have time to begin their development. It's okay if little green shoots poke through the soil during warm periods that will occur during winter. Garlic is very durable and can handle the cold.

In warm regions, planting garlic in early spring works well. The cloves will still need cold saturation so you'll need to store them in a cool, dry spot for three to four weeks. The temperature needs to remain below 50F degrees (10C) the entire time. Refrigerators (which should be set below 40F and 4C degrees) are a good solution.

After you've selected which garlic you'll grow (see my blog, "Choosing Garlic for the Garden") and when you'll plant, find a good source for the bulbs. Your local nursery should have a selection of the best varieties for your location, but shop early because garlic tends to sell fast to the gardeners who have already discovered its benefits.
 
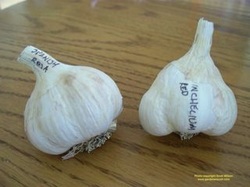
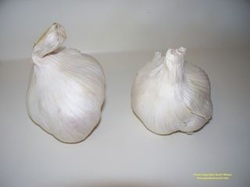
You want to choose symmetrical and firm bulbs. Avoid bulbs that have mold or fungus on them. There should be no soft spots when you squeeze them. Though many of the bulbs will be fully encased in the papery skin, look for the outline of the cloves; they should be full, consistent, and plump. Pass on the bulbs that already have green shoots sprouting from the top.
Picture
If you buy more than one variety, be sure to label the bulbs or bag them separately. Many of the cloves will look alike and you'll want to know which ones you've planted. Marking the row in the garden and planting the appropriate cloves will give you feedback as to which ones grow best and taste best after harvest.

The bulbs will store for weeks after purchase so there's no rush to get them in the ground. It's a good idea to buy early and spend your time preparing the bed. When it is time to plant, separate the bulbs into the individual cloves. Don't pull apart the cloves until shortly before planting time. If they dry out it impacts their root development.
Picture

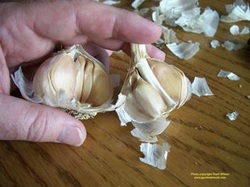
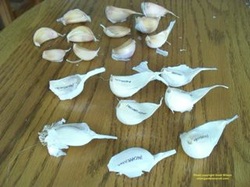
 When you're ready, crack open the bulbs by gently prying off the outer cloves with your fingers, working your way to the center. With hardneck garlic, you have the center stalk exposed with the cloves growing around it; softneck garlic won't have the little stalk. Each clove will be attached to the basal plate at the bottom of the bulb, where the roots are. Separate all of the cloves. Some may want to stay attached to the basal plate. Try to remove it, but don't damage the clove in the process. It's okay if some of the old root base is attached when you plant the individual cloves.
Picture

While all of the cloves should grow into a garlic plant, you'll have best results by planting the larger ones. You can eat the smaller cloves or use them in pickles as I do. A typical bulb from the most popular varieties should provide you eight or ten good cloves for planting. If you crack the bulbs in a location other than right at the planting bed, label the cloves with a permanent marker or bag them separately. Again, you'll want to know which garlic is planted where.
Picture

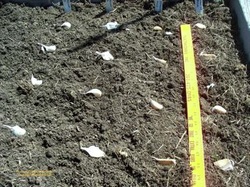
Plant the cloves four to six inches apart (15 centimeters). Consider the ultimate size of the mature bulb when determining your spacing. Some garlic grows quite large so you'll want to plant farther apart. Some bulbs will be smaller when full-grown and can be spaced closer together. In a bed like mine, there is enough room for more than 60 cloves to be planted, allowing space around the borders for the bulbs to grow.
 
I like to lay out all of the cloves I plan to plant on the surface of the bed. I can adjust the spacing as needed and it provides an "assembly line" process. I simply dig a hole with the trowel, place the clove, cover it with soil, and move on to the next. In the past when I planted without laying them all out, invariably I ended up planting two cloves in the same hole or got my rows out of alignment.
Picture

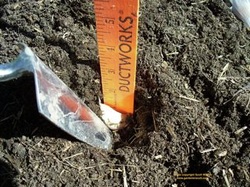
The cloves should be planted three to four inches deep (8 to10 centimeters).  Three inches is fine for most cloves, but plant large cloves deeper and also plant deeper in very loose soil that will settle and compact later. Place the clove in the hole pointy side up. The flat end that was attached to the basal plate is where the roots grow from and should be on the bottom. There should be about two inches (five centimeters) of soil from the top of the clove to the surface.
Picture

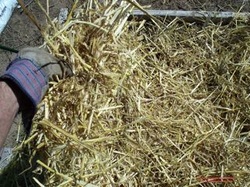
Cover the bed with about four to six inches of mulch (10 to 15 centimeters). I consider this a critical step. Mulch helps moderate the soil moisture, but more importantly moderates the soil temperature. In very cold regions the freezing and thawing of the soil during winter and early spring can heave the cloves out of the soil. This frost heave can tear roots and expose the cloves to damage. Mulch also helps reduce winter kill and reduces heat stress on hot summer days. Use thicker mulch in colder areas.

In wet regions, the thick mulch isn't necessary and should probably be avoided. Mulch can keep waterlogged soil from drying out and that spells doom for the cloves that can rot when exposed to excess water. A thin layer to suppress weeds is appropriate.

Straw is a good mulch. It insulates well and allows the shoots no barrier to new growth. Dried leaves or a mix of dried leaves and dried grass is good and often in abundant supply in fall. I don't recommend hay grass; as I've written before, it tends to be full of seeds that sprout and turn into a blanket of weeds. Use an organic mulch that you can turn into the soil to amend it after you harvest the garlic. Pine needles are a good initial mulch but won't decompose as quickly when turned into the soil.
 
Winter snow and spring rains will compress the mulch into a soft, thinner layer that effectively manages the soil through spring and summer. It will suppress weeds and help keep soil moisture and temperature under control. If a heavy layer was used in frigid winter zones, be prepared to remove some of it in spring. A final, spring layer two to three inches thick (5-8 centimeters) is all that is needed.

Water the garlic after planting and periodically through the winter. When the soil isn't frozen it should remain moist but not waterlogged or soggy. As I've said before, check the soil moisture before watering. With the mulch you will probably need to water much less than you expect. Avoid letting the soil dry out; not enough moisture will result in a smaller bulb that hasn't reached its full potential. Garlic won't need a lot of water in the fall and watering too much can hasten excess green growth.

Basic care for garlic is similar to other garden plants. Garlic likes minerals with its nutrients so fertilize about once a month in spring and early summer with a weak fish emulsion unless you have pet and animal pests. Compost tea, worm tea, and manure tea can be good alternatives.

I'll follow up in the months to come with more about garlic care, diseases, and, of course, harvesting. For now, get out there and get planting.
20 Comments

Choosing Garlic for the Garden

8/23/2011

3 Comments

 
Garlic is an essential culinary component in our household. Also, it's a nearly essential component in my garden. Like many vegetable garden crops, harvesting garlic and using it in your kitchen just seems to make it taste better. My famous pickled green beans rise to another level when I make them with green beans, dill, and garlic from my garden.
Picture
Garlic from the market
Garlic is a member of the Allium family. That family includes many edible bulbs like onions, shallots, and leeks. It also includes Giant Allium flowers. All of them can send up long stalks with a star-burst flower that will produce seeds. This year I'm growing onions, shallots, and leeks from seed and they're all doing well. Garlic, however, is best grown from cloves.

Each garlic bulb consists of many individual cloves. Each of these cloves has the potential of growing into a single garlic plant, forming a new bulb. Those new bulbs will have multiple cloves with each of those able to grow and develop into a plant. In that way, garlic is a self-sustaining plant that doesn't require pollinators or other special propagation methods. That simplicity makes garlic easy to grow in the garden.

What makes garlic different from many other vegetable crops is that it is best planted in the fall. Cold temperatures are needed to initiate the growth of the buds that will form into cloves. The plant will overwinter in the soil and emerge in spring. Bulbs will continue to grow in size until they're ready to harvest in early to late summer. You can get away with very early spring planting in some areas, but the bulbs may not fully develop by harvest time.

Choosing what kind of garlic to grow may seem daunting when you look at a catalog (Territorial Seed Company offers 29 different ones), but it really comes down to a simple choice. There are just two basic garlic types: soft neck and hard neck.
 
Chances are if you bought garlic in a store it was a soft neck variety. This is the garlic that tastes like garlic. Softneck garlic has a white, papery skin, has many cloves around a central core, and keeps well for a long time, up to nine months. The plant stalk is flexible and allows the bulbs to be braided together, a decorative method of storing them. There are many types of softneck garlic with "silverskin" and "artichoke" being the most common.

Hardneck garlic can be found at some specialty chef and food stores. Many different flavors and colors exist. The bulbs have fewer cloves than soft neck and may not have any skin around them. They're less hardy and have a shorter shelf life than soft neck varieties. They're called hardneck garlic because the stalk is not flexible and remains rigid. The three main types of hardneck garlic are "purple stripe", "rocambole", and "porcelain".

Generally, for most home gardeners I recommend growing softneck varieties. This is the garlic you're familiar with, will store best after harvest, and the soft stalks are fun to braid and look cool hanging on the kitchen wall. Hard neck garlic can be finicky when it comes to weather and may not survive extreme conditions. The lack of an outer paper skin means you need to handle them with more care, though they are easier to peel when it comes time to cook.

You can grow purple, red, blue, and pink garlic. There are mild ones and spicy ones. You'll find little ones and big ones. But not all types will do well in your garden. Some varieties do better in cold regions while some do better in warm. Some garlic is ready for harvest in early summer while some isn't ready until late. With a little research you can find a garlic that meets your specific taste and growing requirements. Or you can go with common varieties that do well in many gardens.

When you seek garlic in a nursery or online site, you'll probably find names like Early Italian, Spanish Roja, and Inchelium Red. Those are among the three most popular varieties. I've ordered Inchelium Red for planting in my garden in about a month; it is a national taste-test winner. Spanish Roja is the most popular hardneck variety with a taste many consider truly garlicky. Popular Italian Late, Oregon Blue, and Susanville are softneck varieties that range from pungent to mild in taste.
 
"Elephant Garlic" is quite popular because it produces bulbs as big as a softball, but it is not true garlic. It is related more to leeks than to garlic. Though it looks like a big garlic clove and the assumption is that it will have a strong garlic flavor, it is actually more subtle. Just as a leek is milder tasting than an onion, elephant garlic is milder than  regular garlic.

Ordering online is an easy way to get your bulbs but you can also find them in nurseries and garden centers. When selecting bulbs for planting, they should be dry, plump, and firm. Soft and spongy or dry and crumbly bulbs should be avoided. Choose ones that don't have a green shoot appearing from the top; those are older and may not do as well when planted.

You can take cloves from standard bulbs you buy in the supermarket, plant them, and they may grow. However, unless they're labeled as organic they were probably sprayed with a chemical to keep them from sprouting while in transit and storage. That same chemical can keep them from sprouting in your garden. Also, they were probably grown in California or China in weather and climate different from yours.

Ask your fellow gardeners, your Extension office, or the folks at the nursery for which garlic does best in your area. Many sources can give background information about varieties you may be interested in. Inchelium Red was discovered on the Colville Indian reservation in northern Washington, an area near my father and his wife's home. I chose it because of that connection, because of its taste, and because it can handle cold winters.

Take a little time and look into the garlic varieties available to you locally and online. Find one or two that interest you and make a purchase. A single bulb will probably have between six and 16 cloves that you can plant. Think about how much garlic you typically use and plan accordingly. You may only need two or three bulbs to provide enough garlic at harvest to last you for many months.

In a few weeks I'll write again about how to plant garlic, how to protect it from weather, how it grows, and how to harvest. For now choose what you'll plant.

3 Comments

Selecting Herbs for the Garden

4/14/2011

1 Comment

 
Herbs are among the easiest plants to grow and can produce a wonderful harvest in a small garden space. While tomatoes can be finicky and zucchini can be too zealous, herbs quietly produce fragrance, texture, color, and, of course, taste.
Picture
My herbs
Some gardeners think selecting appropriate herbs for the garden can be a challenge given the large selection available, but I think it can be quite easy if you take a few moments to identify your desires. Herbs are used in just a few basic ways: the culinary use in the kitchen; as fragrances for items like sachets or soaps; to add variety and interest to the garden; or for the medicinal benefits some plants can offer. Within each of these categories it's easy to choose the best plants.

A primary benefit for me personally is the culinary aspect that herbs offer. I love to cook and like to use natural ingredients. When I make a nice homemade spaghetti sauce, it's a simple chore to step to my herb garden, snip off some thyme, oregano, rosemary, and sage, and add them to the simmering sauce. For a special flavor when roasting chicken, I'll pull off some tarragon leaves and slide them under the skin before placing it in the oven. The basil is great in salads and pesto. I make tea from the mint and lemon balm (see my article "Tea in the Garden II"). When I make pickles I use my own dill.

Picture
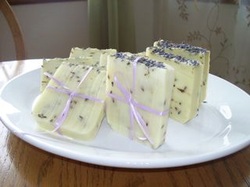
Lavender soap with real lavender

My wife has discovered the special quality that herbs add to handmade soap and bath products (see her products at www.sudsnbuds.com). She'll make a luxurious batch of lavender soap and sprinkle lavender flowers on the top before it hardens. She has made silky soap with mint fragrance and added some of my crushed mint leaves for extra aroma and texture. Lemon balm, rosemary, and sage have found their way into her bath products. I added a new bed to the garden devoted to new herb plants specifically for her use.


We've identified how we like to use garden herbs and that's the first step in deciding what to plant. Rather than select plants at random and then try to find a use for them, determine how you currently use herbs and plant accordingly. 

Are you a cook? If you cook Italian food, plant parsley, sage, rosemary, thyme, and oregano. If you like Mexican food, go with basil, cumin, cilantro and parsley to match with the tomatoes, peppers and tomatillos in your vegetable garden. For French cooking try tarragon, chives, parsley and chervil. For Greek food grow mint, marjoram, fennel, and dill. Look in your spice cabinet and see which herb bottles are empty and grow those.
Picture
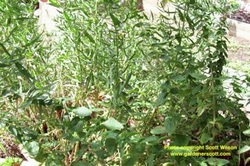
Tarragon and oregano

If you want to focus on making tea, start with mint, lemon balm, and chamomile. Lemon verbana, sage, anise hyssop, and lemon thyme make fragrant teas. Lavender, fennel, and rose hips can be brewed too.

Do you want to make sachets or fragrant pillows? Lavender, mint, rosemary, lemon balm and thyme will hold their aromas for a long time.

I won't spend much time on the aesthetic or medicinal values of herbs. To me, every herb can add visual interest to a garden. The colors, textures, and shapes of herb plants will benefit your landscape even if you never use the leaves, flowers, or seeds for any other purpose. As to the medicinal aspect of herbs, the uses are quite subjective with some people strong advocates of their qualities and others doubtful. If you use herbs medicinally, then growing them in your garden makes perfect sense.

By beginning the selection process with your intended use, choosing the types of plants to grow is easy. The next step is to figure out which herbs are appropriate for your garden. While most herbs can be grown in a typical garden, some do better than others. Identify the space you have to grow in and how much time you want to invest. Few of the plants take up a lot of space, so a small area can be home to many different types.

Basil grows easily from seed and is available in almost every garden center and nursery as starter plants. It will produce throughout the summer, may wilt in a the hot sun, and will die in the cold of winter. You have to plant new basil every year. Chives grow well from seeds or starter plants, but can handle the cold and will return every year in a bigger clump. You'll only need to plant once.

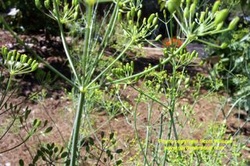
Cilantro, or coriander, offers two uses. The leaves are great in salsa, salads, and a number of ethnic dishes, and the seeds can be ground or used whole. The plants will die in the cold, but they produce seed graciously and grow quickly. Dill is similar, with leaves and seeds producing vibrant flavors in food. I plant my dill in a wine barrel half and new plants pop up every year from the previous season's seeds.
Picture
Dill setting seed
Mint returns with gusto every year even after a cold winter. It grows so well that it can easily overtake a garden and become a weed. I strongly recommend planting it in pots or containers that will limit its growth. You can find pineapple mint, chocolate mint, spearmint, peppermint, and many other types, each with a slightly different minty fragrance.

Thyme, tarragon, oregano, and sage will faithfully return every spring. In most Zone 5 gardens, and above, they should be considered perennial plants. Rosemary and lemon balm will return if the winter wasn't too harsh.

If you have a particular herb in mind, look at a seed packet, ask about it at a nursery, or do an online search. You might be surprised to find that it will be perennial. Even if it is considered an annual, you should be able to plant seeds or potted plants and be able to harvest during and at the end of the season.

If you don't grow herbs, consider starting. If you do grow herbs, think about adding more. Fresh, dried, or frozen, they're easy to grow and easy to use.
1 Comment

    RSS Feed

    GardenerScott

    Join me as I discuss gardening subjects and take a look at gardens past, present, and future.

    Blog Categories

    All
    Animals
    Biochar
    Birds
    Chickens
    Compost
    Crafts
    Deer
    Environment
    Flowers
    Fruit
    Gardens
    Gifts
    Growing
    Harvest
    Herbs
    Inspiration
    Irrigation
    Lawn
    Mulch
    Pests
    Planning
    Planting
    Plant Selection
    Preserving
    Propagation
    Pruning
    Recycling
    Reviews
    Seeds
    Sites To See
    Soil
    Tomatoes
    Trees
    Vegetables
    Watering
    Weather
    Weeds

    Archives

    April 2018
    December 2015
    March 2014
    November 2013
    October 2013
    August 2013
    July 2013
    June 2013
    April 2013
    March 2013
    February 2013
    January 2013
    December 2012
    November 2012
    October 2012
    September 2012
    August 2012
    July 2012
    June 2012
    May 2012
    April 2012
    March 2012
    February 2012
    January 2012
    December 2011
    November 2011
    October 2011
    September 2011
    August 2011
    July 2011
    June 2011
    May 2011
    April 2011
    March 2011


Web Hosting by iPage