GardenerScott.com
  • Home
  • How-to Videos
  • GardenerScott Blog
  • Photos
  • Tips & Tricks
  • Contact Me

Sow Cool Season Plants in Summer for a Fall Crop

7/30/2013

68 Comments

 
Two harvests in the same growing season are easy to accomplish. Many gardeners sow and plant in spring, spend summer tending to their crops, harvest in early fall, and then wrap it all up and wait until spring to repeat the same process. With little effort you can double your garden's output with sow, tend, sow, harvest, tend, and then harvest again. Then you can spend winter satisfied that your garden played double duty to produce all it could.
Picture
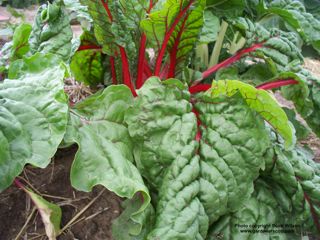
Grow chard for a fall harvest
In late summer you sow seeds for cool season plants that will grow as temperatures begin to decline. They'll be ready to harvest after the first frosts have appeared and long after the last tomatoes were pulled from the vines. There is no need to create new gardens; you use the same beds you do now.

Cool season crops are primarily the ones that provide leaves, stems, and roots for harvest. These crops include:
 
Arugula, beets, broccoli, Brussels sprouts, cabbage, carrots, cauliflower, celery, chard, collards, endive, fennel, kale, kohrabi, leeks, lettuce, mustard greens, onions, peas, parsnips, potatoes, radishes, spinach, turnips
Picture
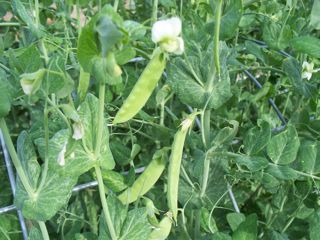
Peas, especially snow peas, do well in cold
Many gardeners grow these plants in spring and hope for a slow start to summer so the plants will mature and be ready for harvest before high heat causes them to bolt and their taste turns bitter. We take advantage of their natural ability to tolerate low temperatures by planting early.

We can also use that ability to plant late. The mature plant tolerates the low temperatures of fall, there is no risk of bolting, and many people believe many of these crops taste superior after exposure to frost.

Those of us who sow in early spring and hope the soil has warmed enough to initiate germination are ready for a percentage of our seeds to never grow. Those of us who sow in late summer are pleased that the warm soil provides speedy germination with little seed loss.

Early seed and plant care is different when you plant late. In spring there is less need for extra watering; lower temperatures mean less evaporation and there is always a chance of rain or late snow. In summer, the heat requires more gardener attention to maintaining moist soil conditions for seeds and young plants; you may need to mist or water the plants two or three times a day in harsh sun.
 
Temperatures above 80F (27C) will cause broccoli and spinach to bolt quickly. Sowing in a shady spot or setting up a row cover can reduce this concern.

Once the plants have a few sets of leaves the need for watering becomes less than in late summer. While early plants need more water to combat the increasing summer heat, later plants require less water as the decreasing temperatures bring comfort. The plants are less stressed in fall. They grow in the conditions they like best; they're called cool season plants for a reason.

As long as the day temperatures remain about 10 to 15 degrees above freezing (40F - 50F, 4C - 10C) you can expect the crops to continue growing and producing. When the day temps remain below 40F (4C) the plants may begin to suffer. Careful harvesting will still produce results. The center of the plant may still have new, tasty leaves while the exterior leaves look frazzled.

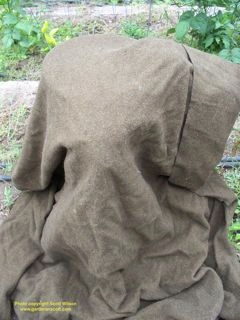
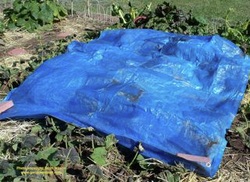
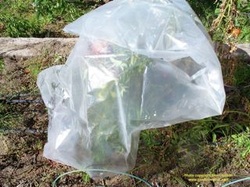
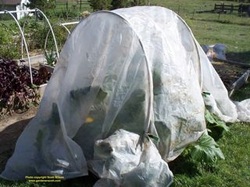
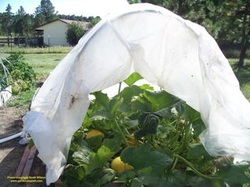
Hard freezes, cold days, and icy conditions will adversely affect most cool season crops and will spell the end for your second harvest, but you can delay winter by mulching heavily with straw and using a season extender like cold frames, cloches, or plastic tunnels. I use my hoophouse system to harvest well into November and even December.
Picture
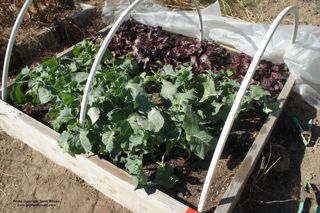
Broccoli and beets ready for overnight protection
Some crops like cabbage, kale, and spinach can do well, even in snow. With heavy mulching, beets, leeks, and parsnips can often be overwintered and harvested in spring (I've done this). 

Use your entire vegetable garden for fall planting. If you have a cool-season spring bed for broccoli, spinach, or lettuce and then let that bed remain filled with bolty, straggly, dried plants throughout the summer, rip those plants out and sow again for a fall crop.

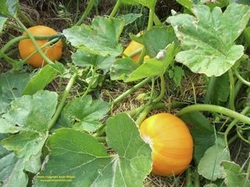
Your tomatoes, peppers, and melons will decline in cooling weather. Anticipate their decline and sow seeds among those plants, in the same beds. When the first frost zaps your tomato plant, cut it out and let the cabbage and broccoli growing nearby overtake that space.

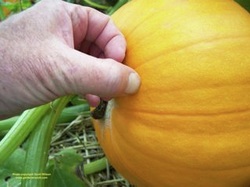
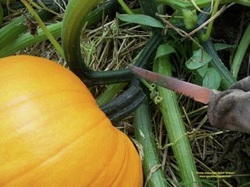
Root crops won't be as big as spring plantings, but may be tastier. Try growing small, thumb-sized carrot varieties or harvest them young before the ground freezes. Beet roots will be harvested when they're just a few inches big, but the beet leaves can be harvested continually.
Picture
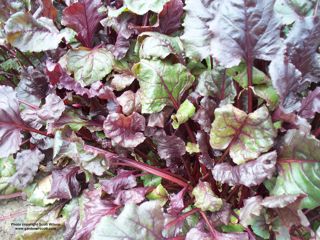
Beet leaves are edible and tasty
Garden pests can be less of a concern for a fall garden. Many insect pests are less active, if not gone, in fall. The weeds will spend all summer attacking aren't active in fall. Even deer seem to be scarce as they make their way to find a winter bed.

While growing a second crop in the same season sounds like extra work, it doesn't need to be. Summer garden beds should be cleaned up before winter so insects don't have a place to overwinter. That clean up works well to prepare the beds for fall crops.

You'll spend a few more days in the garden watering and harvesting, but is that really a bad thing? Fall gardening allows you to do more of what you like and for me that's a good thing.

68 Comments

How to Extend Your Growing Season in Fall

10/17/2011

18 Comments

 
Freezing temperatures are coming, if they haven't hit you already. While my high-altitude garden had its first frost about two weeks ago, the vast region that surrounds me is expecting the first fall temperatures below freezing tonight. The first frost of fall can spell doom to many of the warm season plants in the garden, but for gardeners who want to extend the growing season a few weeks it's relatively easy to buy more time.

The basic concept behind growing season extension is to cover plants. You want to put a blanket on your plants to keep them warm. It sounds simple and easy and it is.
Picture
An old blanket on a tomato cage
After months of hot spring and summer days, the soil is warm and still capable of supporting most plant root, leaf, and fruit growth. When air temperatures begin to drop in fall many soils are still able to retain the heat that has accumulated deep in the earth until long after the first frost. The key to extending the growing season is to harness that soil warmth. A blanket on the plants does that.
 
At night in our cozy beds a blanket keeps us warm. Wool, cotton, or polyester, the blanket doesn't actually create higher temperatures. The blanket traps our body heat and radiates it back to our chilled skin. Our own body is what keeps us warm when we cover it with a blanket. In the garden a blanket keeps the plants warm in the same manner by trapping and returning the heat of the soil.

Plants aren't picky about the blanket material. It can be plastic, canvas, wood, or cloth. Of primary importance is that you cover plants before the temperatures approach or drop below freezing.

When you suspect or expect cold temperatures overnight, apply the blanket while the outside air temperature is still above freezing. This usually means during the day when the sun is shining. The waning daytime heat will couple with the radiating soil heat and create a warm air pocket that protects the plant during the cold temperatures.

Like a blanket on our own beds, the garden blanket should fully cover the garden bed that you want to keep warm. It should be large enough to ensure no leaves or plant parts are sticking out from the edges. Any part of the plant that is exposed to freezing temperatures may experience freeze damage. Your foot gets cold when you dangle it outside the covers; the same happens with dangling stems and leaves.
Picture
The blanket doesn't need to physically touch the plant and in many cases it should be supported above it. It all depends on the blanket material. I've thrown old wool blankets directly on top of squash plants to protect them from cold. I've leaned a plywood sheet on a fence to cover plants with a lean-to. I've draped both canvas and poly tarps over bushes. But when I use plastic sheeting I use wooden stakes and metal or plastic tubing to support it above the plant; the plastic is thin and any leaves that touch the plastic can experience frost damage as though they were unprotected.
Picture
A plastic sheet on a tomato cage
In this respect, think of the plastic blanket as an umbrella that envelops the garden bed. We're trying to trap the soil warmth and it's that heat that keeps the plant warm not the actual blanket. Cloth and wood blankets can touch the plant with little damage but plastic isn't thick enough or dense enough to prevent it. I use a lot of plastic to protect my plants and my system is essentially a series of plastic umbrellas or tunnels. The same plastic hoops that allow me to begin planting in early spring are reused to extend the growing season in fall.
Picture
Protecting pumpkins
Also important in covering the plants is to ensure all edges of the blanket or umbrella are flush with the soil. It's difficult to keep your bedroom warm if you leave the window open. It's equally difficult to maintain a pocket of warmth around your plant if you have one side of the blanket open to the cold air. Use bricks or rocks to weigh the edges down. Bury edges in soil. Clamp or staple plastic to the support system. Drape plastic over the edges of a tarp or a plywood board. You may need to use multiple pieces of material to achieve a complete blanketing.

The last critical component of plant protection is to remove the blanket when temperatures warm up again. Once the sun comes up and temperatures rise above freezing, take the cover off. If you leave the blanket on, you run the risk of potential plant damage through excessive heating. You also want to give the soil more opportunity to warm up again.

You can continue the cycle of covering plants at night and removing the cover during the day for weeks. Until daytime temperatures drop to a point where the soil no longer absorbs heat, you can continue gardening.

Colorado State University conducted studies for extending the growing season in the spring, but the same systems can be used in the fall. They found that a simple cloth covering (a row cover) provided 2F to 4F degrees (1-2C) of protection. That means that the outside air temperature can fall to about 28F degrees (-2C) while the air around the plants stays above freezing. Plastic supported by a metal mesh frame provided 3-6F degrees (3C) of protection. It's important to note that the plastic completely covered the frame, allowing no exchange of air. This is enough protection to keep your plants alive for the first frost of the season and for a few weeks after.

For even more protection, a space blanket, or thermal blanket, is highly effective. The light-weight, metallic blankets reflect up to 99 percent of heat. Adding a space blanket on top of a plastic cover adds protection when the night temperatures drop below the 28F degree (-2C) threshold. In CSU trials, a space blanket added to a plastic-covered frame kept plants from freezing when the night temperature dropped to 0F degrees (-18C), following a sunny, spring day. It is critical to remove it during the day because you've also created an oven that can bake plants in the sun.

If you are really serious about extending the growing season you can take extra efforts to continue gardening when temperatures drop below the point where daytime temperatures can sustain this cycle. You can add a heat source to the plastic umbrella over your plants. Christmas tree lights are one solution, but they need to be the old-style lights, the big ones that heat your fingers when you touch them; new LED lights won't have the same result. The CSU trial showed that a string of C-9 lights draped from the metal frame, under the plastic sheet, added up to 18F degrees (10C) of frost protection. With a space blanket on top, that protection extended up to 30F degrees (16C). That means the outside temperatures can be bone-chilling cold and the plants are still enjoying temperatures above freezing.

Here are a few more thoughts about covering your plants to extend the growing season. Cloth covers work well, but will lose much of their heat retention ability when they get wet; avoid a cloth blanket or sheet if you expect rain or snow.  Heavy tarps or wood sheets retain heat well but can crush plants underneath. Moist soil will retain more heat than dry; plants also prefer moist soil over dry so there's no reason to withhold normal water. Plastic covers can stay in place if you open the edges to avoid over-heating during the day; set up a plastic or wooden frame, drape plastic over it, and just open and close an end during the day-night cycle.
Picture
Letting air in during the day
Also, the season-extending technique of covering plants works best with plants that grow close to the ground and for warm season crops. It's not worth the effort and expense to try and blanket a fruit tree. Covering cool season plants like kale, chard, and spinach isn't necessary; they'll keep producing even after there's snow on the ground.

Cover your plants to get past the first frost in fall. Often you only need a few extra days to harvest the crop being threatened by cold. Keep it as simple as you need. One year I didn't see the frost forecast until the nightly news. I ran out as the sun was setting, threw a large tarp over the pumpkin plants, weighed down the edges with rocks, and went back in the house. That was the only crop that needed a little more time to grow. The next morning I pulled off the tarp to see the plant was alive and happy; a few of the leaves that stuck out from the edges were damaged by frost, but I gained enough time for the pumpkins to turn orange in the next week.

At some point in cold-winter regions, the growing season has to end. When you've picked the last zucchini or tomato, there's no reason to protect the plant any longer. Pull off the blankets and plastic and store them away until you need to repeat this process in spring with young plants. By blanketing your plants you can gain time and extend your growing season on both ends.
18 Comments

Harvesting Pumpkins

9/18/2011

39 Comments

 
Few garden crops represent the joys and colors of autumn more than pumpkins. Their color is synonymous with the season's holidays, changing leaves, and spiced desserts. Easy to grow in most gardens, they're easy to harvest too.
Picture
Close to harvest
I had my first frost this morning and the pumpkins were the first in my vegetable garden to show damage. While my 7,500' garden gets cold temperatures earlier than most, fall's unpredictable weather portends the end for all warm season crops like pumpkins. Whether for nutmeg-spiced pies or sneering Jack-O-Lanterns, pumpkins should be harvested before freezing weather settles in.

You should leave pumpkins on the vine as long as you can. They'll only ripen and change color while still growing. Unlike tomatoes and bananas, pumpkins won't improve after picking.

There are a few ways to determine that pumpkins are ready to harvest. First is the color. If you're growing pumpkins for autumn decorations or Halloween carving, color is probably an important factor. Once the pumpkin on the vine reaches an appropriate color, it can be harvested. The color may deepen if left on the vine, but if you're happy with the hue go ahead and pick it.
Picture

The skin of the pumpkin hardens as it matures. Stick your thumbnail into the outer skin of a pumpkin. If the skin is hard and your thumbnail doesn't easily penetrate it, it's ready to cut free. If it feels soft and you leave a deep incision, leave it on the vine a little longer.

The stem that attaches a pumpkin to the plant should normally be green and sturdy. As the fruit reaches its natural maturity, the stem will begin to crack. That's a good time to harvest too. The vine will begin to shrivel and the pumpkin may separate itself at this point saving you some effort.

Thumping a finger against a ripe pumpkin should produce a hollow sound. It's hard to describe what a hollow sound is to someone who hasn't heard it. Kind of like a drum but not as loud or vibrant. To me this is the hardest way to determine harvest time.

If a heavy frost or freeze hits, the leaves will be killed, the plant can no longer support the pumpkins, and the vine dies back. Some gardeners wait until this point to harvest. I've discovered small fruit that I didn't know I had after a freeze clears away the big leaves. The pumpkins can handle light frost temperatures but they should be harvested and protected before a hard freeze. Freezing temperatures can damage the flesh.
Picture

When harvesting, wear gloves. The vines and stems are prickly. When you've decided that's it time, use shears or a knife to cut through the stem. Particularly for Jack-O-Lanterns leave enough stem to act as a handle for the lid. Three or four inches is enough. If the vine has died back the pumpkin should be easy to separate from it manually, but I usually cut it to leave a clean stem.

Don't carry the pumpkin by the stem; use two hands. If you carry a heavy pumpkin by the stem it could separate, breaking the pumpkin when it impacts the ground or at the very least removing the handle of the lid and affecting its aesthetic appeal. Also a lost stem can expose the pumpkin to early rot.

The vines, dead or alive, are ready for the compost pile. They can add a lot of green component while still fresh and are a good balance to dried leaves that usually appear about the same time as harvest.

After cutting the pumpkin from the vine, it should cure for at least 10 days if you plan to store it. Curing further hardens the skin and keeps in moisture so the flesh stays fresh for long periods. If you don't plan to store it, you don't need to go through the curing process and it can be used right away. Properly cured pumpkins can be stored at 50F degrees (10C) for two or three months and even as long as six months in a dark, well-ventilated room.
 
Picture
Curing pumpkins
Expose the pumpkins to the sun to cure. Ideally, high temperatures and high humidity are needed for the best curing (at least 80F degrees and 80% humidity), but the reality is that few gardeners have those conditions at harvest time. I don't even have those conditions during the prime growing season. Place the pumpkins in a sunny, dry area so they won't rot from wet ground contact. As long as the days are sunny and warm the pumpkins will cure. If more than a light frost threatens, cover them at night with straw, plastic or a tarp, or bring them inside.

After curing, or to help facilitate curing, bring the pumpkins indoors. This should definitely be done before freezing temperatures damage them. Don't stack the pumpkins or allow them to touch each other; this can cause soft spots and potential rot. Avoid placing them near apples and other ripe fruit. The ethylene gas they emit can shorten the pumpkin storage  life.

That's all there is to selecting pumpkins for harvest and curing. Collecting the seeds for eating or future planting is always a good idea too. If you have pumpkins in your garden and you haven't harvested, take a close look at them because it may be time.

39 Comments

    RSS Feed

    GardenerScott

    Join me as I discuss gardening subjects and take a look at gardens past, present, and future.

    Blog Categories

    All
    Animals
    Biochar
    Birds
    Chickens
    Compost
    Crafts
    Deer
    Environment
    Flowers
    Fruit
    Gardens
    Gifts
    Growing
    Harvest
    Herbs
    Inspiration
    Irrigation
    Lawn
    Mulch
    Pests
    Planning
    Planting
    Plant Selection
    Preserving
    Propagation
    Pruning
    Recycling
    Reviews
    Seeds
    Sites To See
    Soil
    Tomatoes
    Trees
    Vegetables
    Watering
    Weather
    Weeds

    Archives

    April 2018
    December 2015
    March 2014
    November 2013
    October 2013
    August 2013
    July 2013
    June 2013
    April 2013
    March 2013
    February 2013
    January 2013
    December 2012
    November 2012
    October 2012
    September 2012
    August 2012
    July 2012
    June 2012
    May 2012
    April 2012
    March 2012
    February 2012
    January 2012
    December 2011
    November 2011
    October 2011
    September 2011
    August 2011
    July 2011
    June 2011
    May 2011
    April 2011
    March 2011


Web Hosting by iPage