As landscape armaments go, seed bombs are my weapon of choice. A popular tool in guerrilla gardening, they allow seeds to be sown in difficult-to-reach locations like vacant city lots and other barren, urban locations. While popularized on the internet as a method of adding life to blighted areas, seed bombs can also be a fun and interesting way to add plants to home gardens.
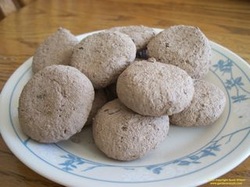
My homemade seed bombs
Seed bombs are nothing more than clay and another growing medium like compost or worm castings mixed together with seeds and water. Formed into a ball and dried, they can be tossed anywhere the thrower's arm can reach. Rain or irrigation cause the clay-based ball to dissolve into a blob where the seeds can germinate amid the compost and grow into vibrant plants.
Recipes vary but the most common one found on the web is:
Five parts clay
Three parts compost
One part seed
One to two parts water
My garden already has too much clay and my region is quite arid so I prefer a recipe that has more compost and less clay, closer to a 50-50 mix. Dry clay powder is combined with the compost and seed and water is added. Clay is the binder and as long as you use enough of it to hold the ball together just about any combination will work.
The choice of seed is completely personal. Wildflower mixes are popular but check the specific seed mix to make sure you're not introducing noxious weeds or invasive plants. Lettuce and salad seed mixes are a nice option, as are bombs concentrating on sunflowers or peas and beans.
The biggest problem I encountered in making seed bombs was finding the clay. Dry, powder, ceramic clay is preferred. You'll see "dry, red clay" mentioned often in recipes, but the color really doesn't matter. The problem comes in that few hobby stores and retail stores sell dry clay. Surprisingly, few ceramic supply stores sell it as well. My city of half a million people only has one ceramic outlet that offers it and a 50-pound bag is the smallest size available. For about twenty dollars I thought it was worth the price.
Moist clay can be purchased from nearly all hobby and ceramic stores. You can use this pre-mixed wet clay to make seed bombs but incorporating the compost and seeds thoroughly is more difficult. You also have to be careful because some of the hobby blends are designed to harden permanently when dry and they may not dissolve in the rain as desired. Use the powder if you can find it.
If you're making seed bombs for your own garden and your soil has a propensity for clay, you can use your own soil in the mix. No need to buy clay if you have your own already. I wouldn't recommend using your soil if you plan to share your seed bombs because you may inadvertently transfer your soil problems to another gardener.

Begin by measuring out the ingredients per your recipe. For these photos I used the 5-3-1 ratio mentioned above: 1 1/4 cups clay, 3/4 cup sifted compost, and 1/4 cup wildflower seeds.

Mix the dry ingredients completely to get the best and most even distribution of seed. Then add the water. I used two parts or 1/2 cup. Combine well with a spoon or your fingers.

The easiest thing to do at this point is to roll the mixture into small balls between your hands. This can get messy. The size doesn't matter, though bigger balls will concentrate more seeds in a small area and the plants will have to compete with each other upon germination. This recipe made a baker's dozen of 1 1/2-inch wildflower seed bombs.

I like to flatten the balls to make little disks. The flatter shape helps keep the seed bombs from rolling away down my hilly landscape and I think a flat piece will dissolve easier and more evenly than a ball when placed on open soil; with our limited rain every drop needs to count and a disk will catch more drops than a sphere. You can press the mixture into a mold if you want a certain shape.

Place the newly-formed, wet seed bombs in a safe place to dry. You can put them on a sheet of newspaper and it will absorb some of the moisture but I don't find that this accelerates drying much. After two days the seed bombs will be dry and ready to use. There's no need to use an oven. Just let them air dry.
If you want to practice a little guerrilla gardening, take the seed bombs and toss them where you want new plants. Be aware that trespassing or littering laws may apply if you throw them on public land or property that isn't yours.
I suggest you take the seed bombs and toss them in areas of your own landscape where you want a random growth of new plants. For children, it's a fun game to toss the little marbles around. Left where they land they'll sprout when the water falls, either rain or from your sprinkler.
For a more controlled process the seed bombs become seed balls that can be placed in pots or specific garden rows. Planted just below the soil surface they'll germinate with normal garden watering. Like seed tape the seed balls help you control where your seeds go.
The entire process of making seed bombs is a good one for schools and gardening clubs. Make it a group activity. If you use a light-colored clay, add food coloring to color the balls. Package them and give as gifts. Have a bomb party and let your friends and family help plant a new garden bed.
Have fun with the whole thing. In gardening, bomb doesn't have to mean a dangerous weapon.
 RSS Feed